


This is my little Sony NEX-C3 which I am enjoying so much. It is simply fun to use it but it is also useful in learning about my lens collection.
You may remember that I bought a Sony NEX-C3 to play with. (I wrote about it here) The idea was to have a camera which would allow me to use my pre EOS Canon lens collection. I did not want to spend a lot of money and I was not ready to switch to Sony so this seemed like a perfect choice. The main two features that appealed to me were the resolution, 16 megapixels, and the “focus peaking” to compensate for my old eyes (and of course the price). The major downside was the lack of a view finder which gave rise to all sorts of problems.
As I have used this camera I have found solutions to most of its shortcomings. And I have learned a great deal in the process.
I have always liked a monopod. I use one often not only to steady a camera but simply as a walking stick. And this little camera is light enough that it can be attached to it all the while.
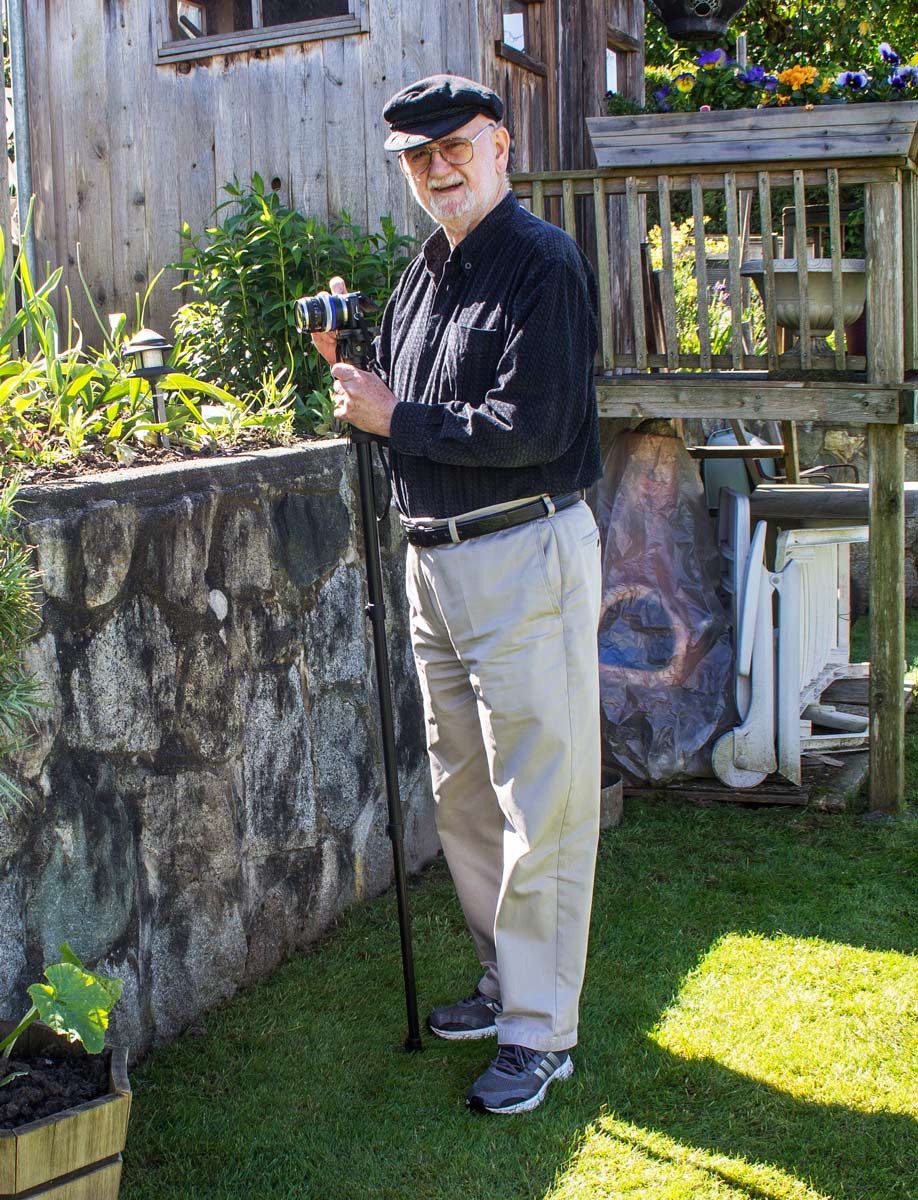

This solved the stability issue and allowed working with the manual lens easily.
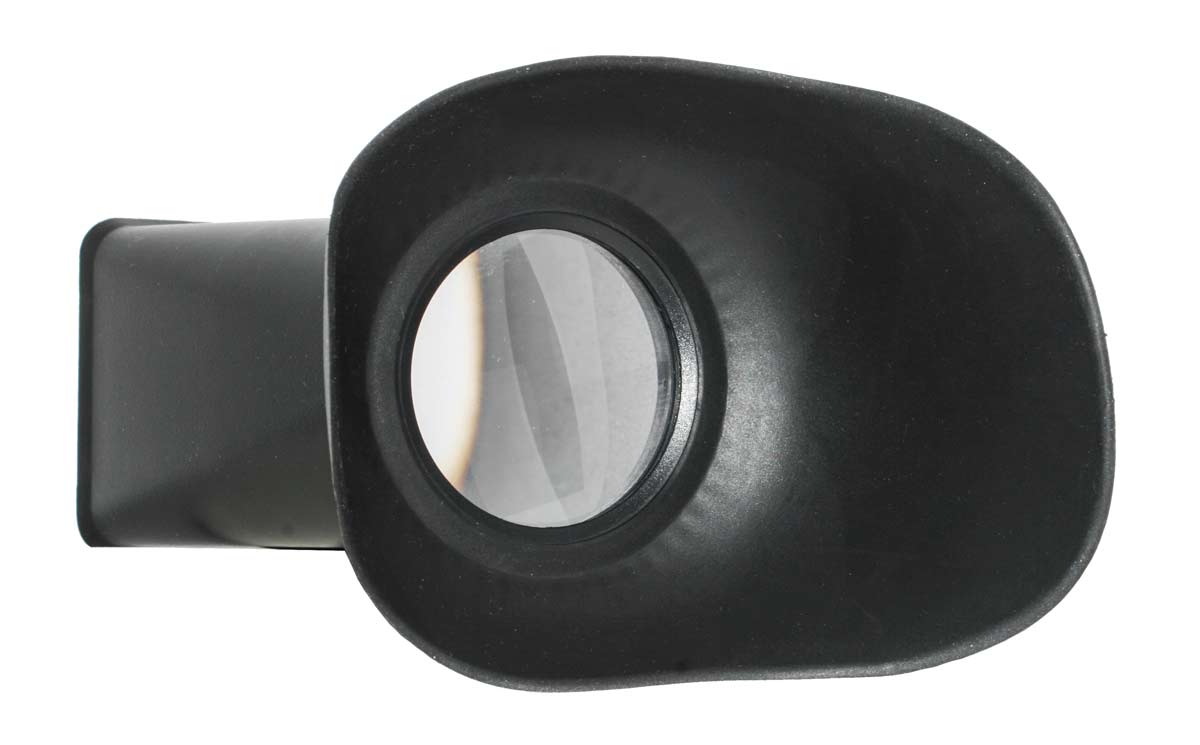
The answer to this problem turned out to be a magnetic LCD Viewfinder hood: $8.00 USD with postage included on E-bay. And it worked pretty well. This allowed a two hand hold with the camera up against the face. Just like any other camera.
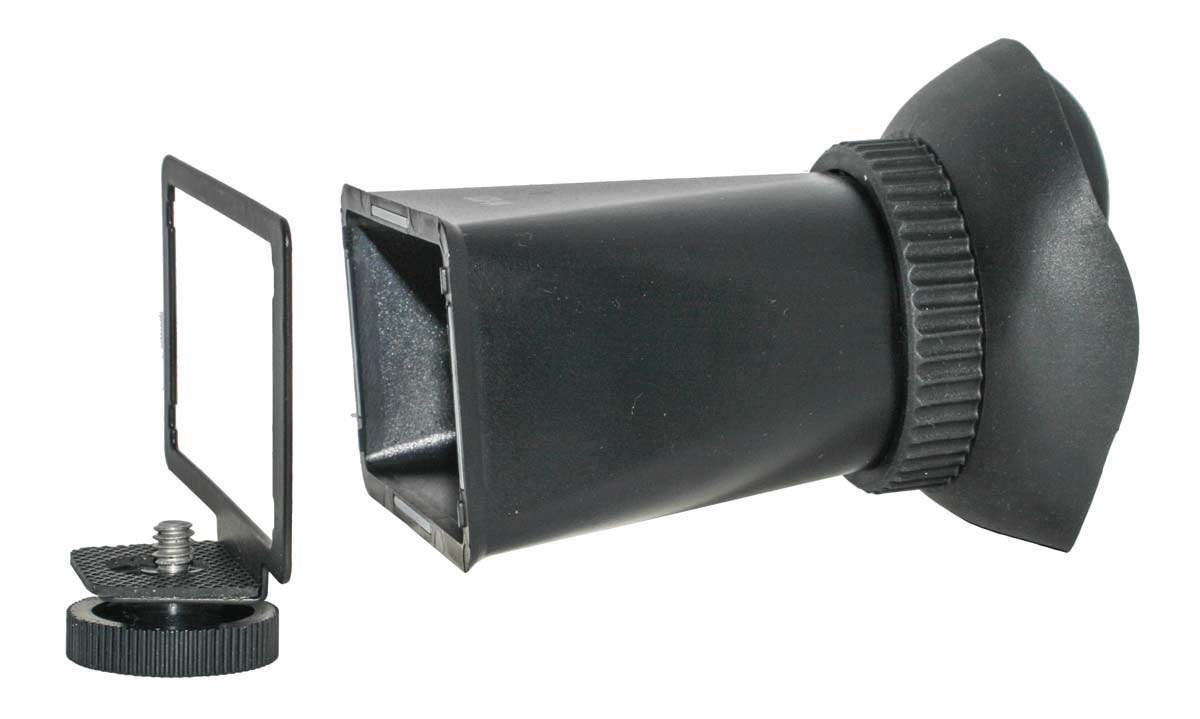
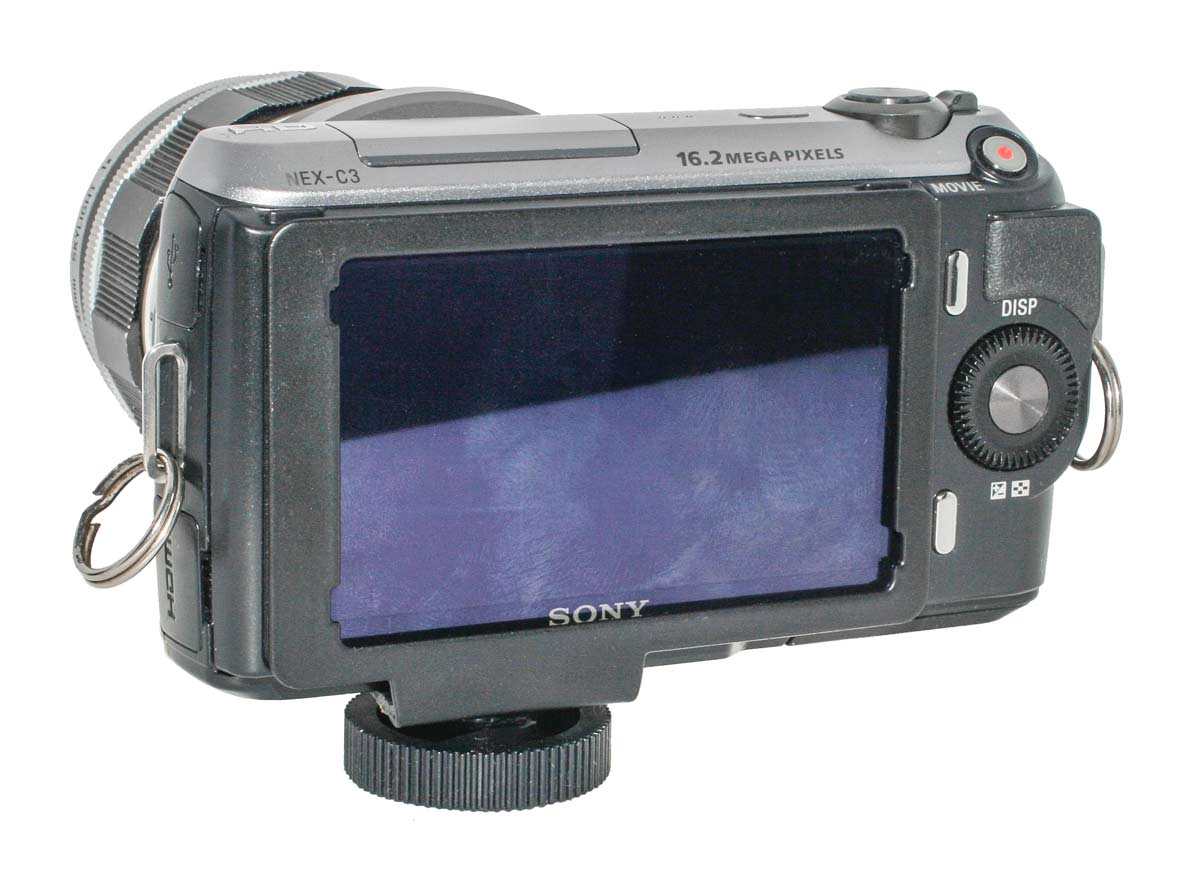
The LCD Hood Unit is composed of a metal frame for the LCD held in place via the tripod socket.
The LCD Frame attached to the camera gives the LCD a metal rim for the magnetic hold on the hood..
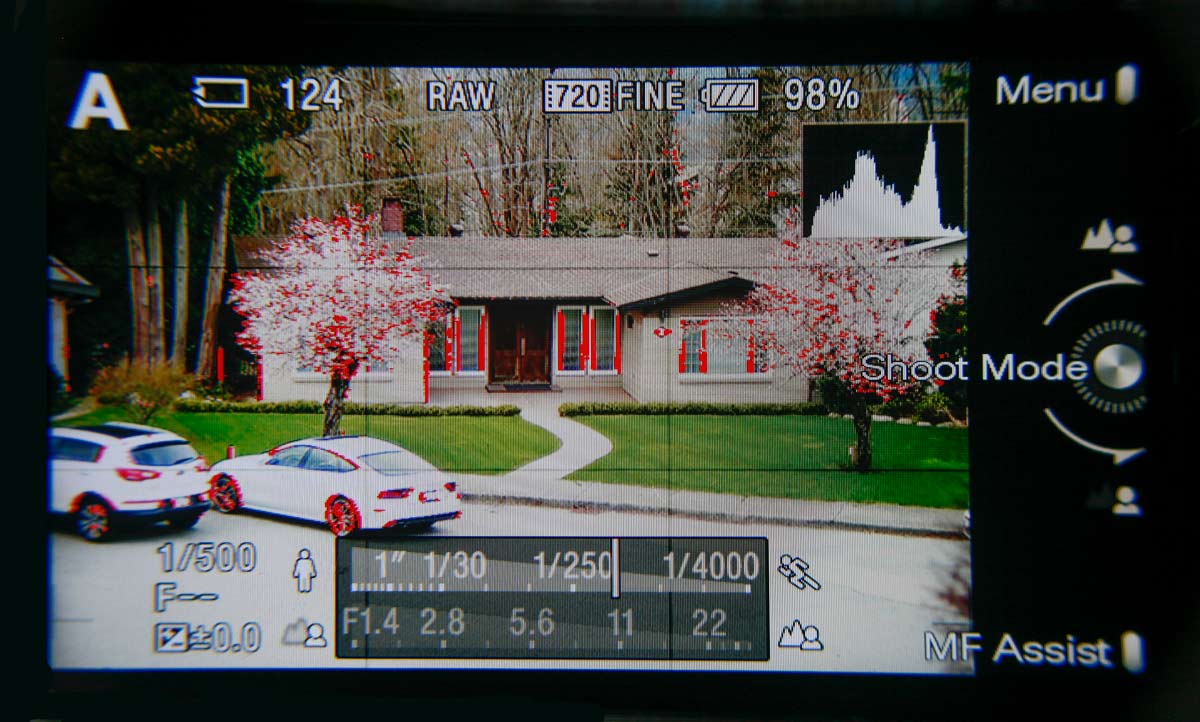
The hood has a large magnifying lens to allow a close up view of the whole LCD screen much enlarged.
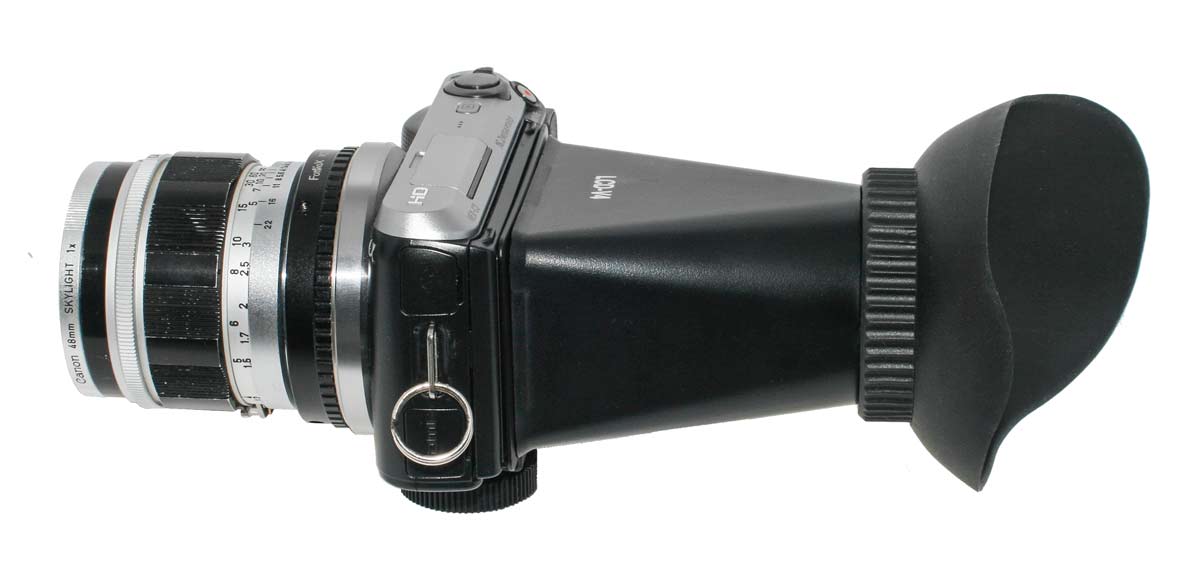
This is the NEX-C3 ready for action. Going from the Left to Right, there is a Canon 50mm f/1.8 lens, the M39 to Sony E mount, the Camera, and then the LCD Viewer Hood. It looks awkward but it actually works very well. It is possible to set the f stop with one hand and still hold the camera in place.
When I was thinking about buying this camera I had comments to the effect of “Why bother?” Well, I love to tinker and this was perfect for that. I could play with all of my early lenses. But more importantly, I could actually investigate a lens, assess its abilities and limitations, and even try to make “art” with it.
So, for example, about two weeks ago I purchased a very nice Nicca III-S camera with a Canon 50mm f/1.8 lens mounted on it. The lens was, externally, in really nice condition but internally, not so much. It was easily apparent that there was a problem with one of the inner surfaces. It appeared that it was fogged by fungus.
I removed the rear lens group to get a closer look and the inner lens surface, facing the aperture blades, which had been afflicted with fungus but someone had tried to remove it and in the process scratched the surface badly. A perfect eample of why people should leave well enough alone unless they know what they are doing!
I tried to remove the fog with ammonia and hydrogen peroxide to no avail. It cleaned up a little but it was still not good. The fog was reasonably transparent but it would obviously affect the contrast of the lens’ image. The picture below shows the lens surface and its problems. By shining the light from below the marks show up clearly but in reality the blemishes were more transparent. It was strange that all other surfaces in the lens were crystal clear.

This is the Canon lens that came on my new Nicca III-S. Cosmetically, it is a really nice collector piece. But on closer inspection, it is not so good inside. One lens surface is in bad shape.

If we look through the lens at the right angle and illumination it is possible to see that one surface in the lens was badly hazed and further damaged when someone tried to remove the haze very aggressively.
There is no question that the image was originally a little soft. The blemished lens surface was diffusing the light. However, there’s a fix for that: Photoshop Camera Raw.
This is the full 16 megapixel frame from my Sony NEX-C3. It has been quickly treated in Adobe Camera Raw to increase contrast, sharpness and color.

From the frame on the left we zoom into the three flowers in the very center of the frame. This lens performs really well, all things considered.

Zooming in again on the flower to the upper left of the last image we begin to approach the resolution of the camera sensor. But look at the sharpness!
After some basic adjustments, to my surprise, the image was really quite excellent. The basic geometry of the lens was still there and it still cast a sharp image. I am surprised at how good the image is considering the condition of the lens. I would actually use this lens in a pinch. Of course I would have to avoid shooting into a light source as that would probably produce unacceptible fog.
Through this exercise I learned how good this lens design is. Another thing I learned is how tolerant a lens is of surface defects. In spite of serious injury, it was able to perform well.
And so I have learned a great deal about this lens type and the effect of surface blemishes. I’ll keep this one as part of my collection. Maybe one day I will come across a beat up copy with clear optics and switch the rear elements out. But until I do, I am happy with this damaged lens.
And I learned all of this with my little Sony NEX-C3.
