
You may recall that I had a problem when I went out to shoot some film in one of my Pellix cameras. The light seals had deteriorated and turned to goo or had crumbled away and the film became fogged in the camera. This was a problem with the foam used by Canon in the 60’s and 70’s and it is not uncommon. In fact, it is pretty standard in these old cameras. But replacing light seals is not a difficult thing.
To replace the foam the first thing I had to do was find a replacement material. In a local arts and crafts store I found 2 mm foam with a sticky backing. It was a little dense but it looked like it would serve. For a square foot of this material I paid $2.00. That was enough to do a dozen or more cameras.
Now a word of caution: if you have never done this before you do risk your camera’s health. It is hard on a camera to have someone learning to do these procedures. Don’t start out with a valuable camera! I have been dissecting a Canon TX and describing the process in a post here. This is a good way to learn. Start out doing something like that. I had already taken the bottom off the TX and removed the back so I knew what to expect here. That said, here we go.
1.

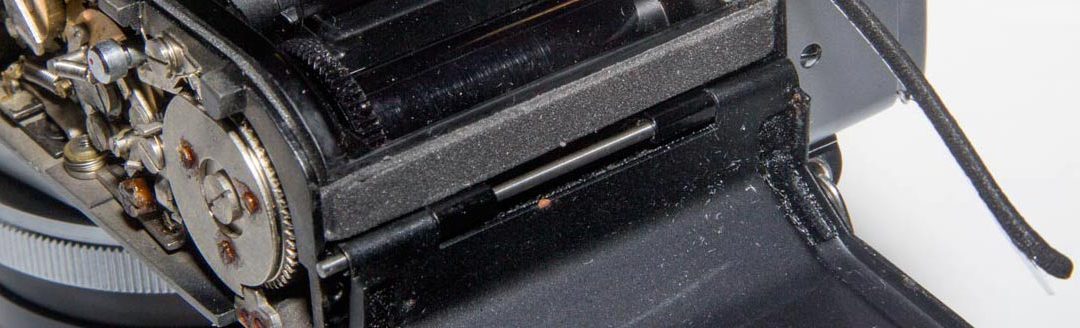
The end seal in this Pellix is completely gone leaving only the residue of the glue used and crumbs in the camera.
2.

To get the hinge out to remove the back we need to remove the bottom plate. Take out the two screws on the bottom and one on the end under the hinge.
3.

If you look you can see that the bottom plate prevents the hinge pin from moving. That is why the bottom has to be taken off.
4.

Once the bottom is removed the hinge pin can be removed by pushing from the top end and then pulling gently with pliers.
5.

Once we have the back off we can begin the cleaning process. All of the old gunk has to be removed and the camera cleaned.
The bottom comes off easily to allow the hinge pin for the back to be removed. Once the back is off we can begin to clean the camera. Be careful. The shutter curtains are now exposed and can be easily damaged. And make sure you don’t get crumbs from your cleaning into the shutter mechanism.
I used a degreasing solvent that softened the old residue and allowed me to remove it. It took a bit of effort. Be careful with solvents. Test them first and use the mildest you can. Try water. If that does not work, try Windex. Then maybe isopropyl alcohol. I ended up using a non-residue degreaser like lighter fluid.
There is a channel at the top and bottom of the back that has to be cleaned out. Be very careful doing this that any solvent you use does not leak down into the camera.
6.

A small screw driver is ideal to clean the narrow channel at the top and bottom of the back.
8.

Use a steel straight edge and a very sharp knife to cut the foam pieces you will need.
7.

A fairly firm bristle brush, like a tooth brush, is essential to clean out corners and channels.
We need three pieces of foam. Two narrow narrow strips to go in the top and bottom channels. At the hinge end of the camera we need a larger pad to seal the area of the hinge. As the back closes it must come into contact with this foam to form the seal.
The foam I bought has a sticky back and I used no additional glue. Because the surfaces were very clean it seemed to stick just fine. In any event, it is held in place by the back which is normally closed. The foam may deteriorate again, but it isn’t going anywhere, at least for a long time.
9.

The foam pad at the end is in place and looks good. The long piece on top is one of the two strips to be used in the top and bottom channels on the back. Once they are installed, the hinge can be reassembled and the bottom replaced.
And that is all there is to it (I think …. I have never done this before!). Clean the camera thoroughly blowing it out and wiping with solvent, sparingly.
A word of caution: be careful that the foam you use is thick enough to make contact with the camera back when it is closed, but, it cannot be too thick. When you close the back and it comes into contact with the foam a strain will be put on the hinge. If the foam is too thick this pressure could damage the hinge. You want a gentle pressure when closing the back and nothing more.
So the next step to to take this camera out and try it. That will include exposing it to the sun and holding it at different angles to the sun so we can be sure that we have solved our problem. Of course we won’t know that until we have developed the film. But that will not be today.
