
Thoughts on the efficient Digitizing of your Film Negatives
The options for moving your images from film to computer include more than scanning at home or professional digitizing. But what other options exist and how well do they work?
I have described before my way of working with images on film: I convert them to digital. This is because I don’t have the room or inclination to create a wet darkroom. But the process of digitizing has been tedious or expensive.
I Have a flat bed scanner, a Canon 9000F Mk II which will scan images for me, one or two strips at a time for 35mm and one strip for 120 film. This has been adequate for posting my pictures on line but it is really not very good for large prints. The scanner is touted as scanning at up to 9600 dpi but don’t believe it. I scan at 2400 and there does not seem to be much improvement if you go beyond that and, anyway, you get really large file sizes.
The routine I have followed is to scan at 2400 dpi and load the images into Lightroom which lets me work easily with them.
However, when I wish to create a really large print I then take the negative to a professional lab for a high resolution scan. This can be expensive, about $50.00 a scan, but the images are amazing. You can see the grain in the film clearly.
About four months ago I bought a mirrorless camera to play with. I wanted to be able to test my old lenses quickly and easily without involving film so I acquired a second hand Sony NEX C3 which is a super
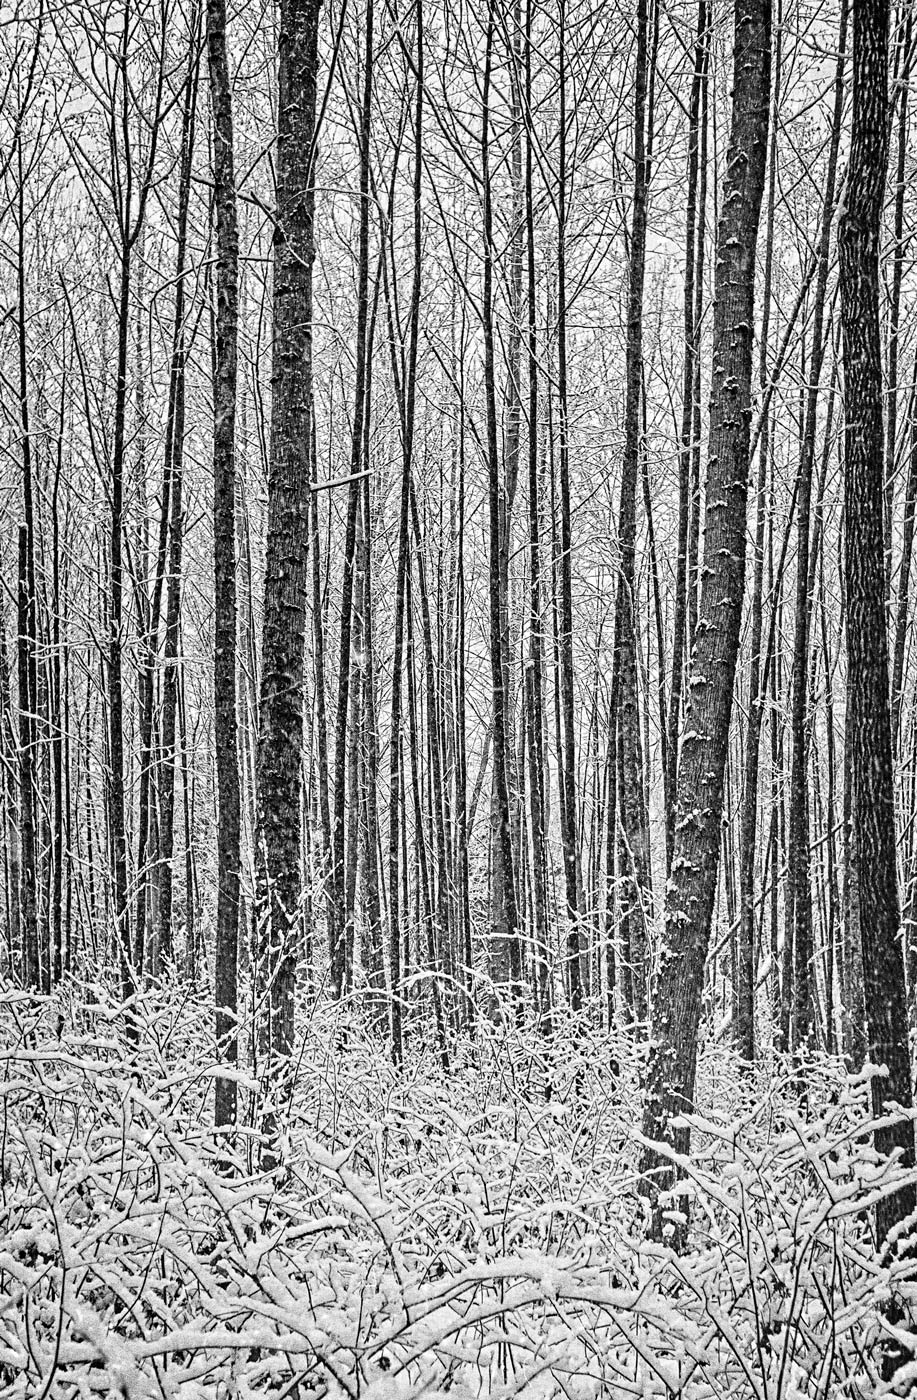
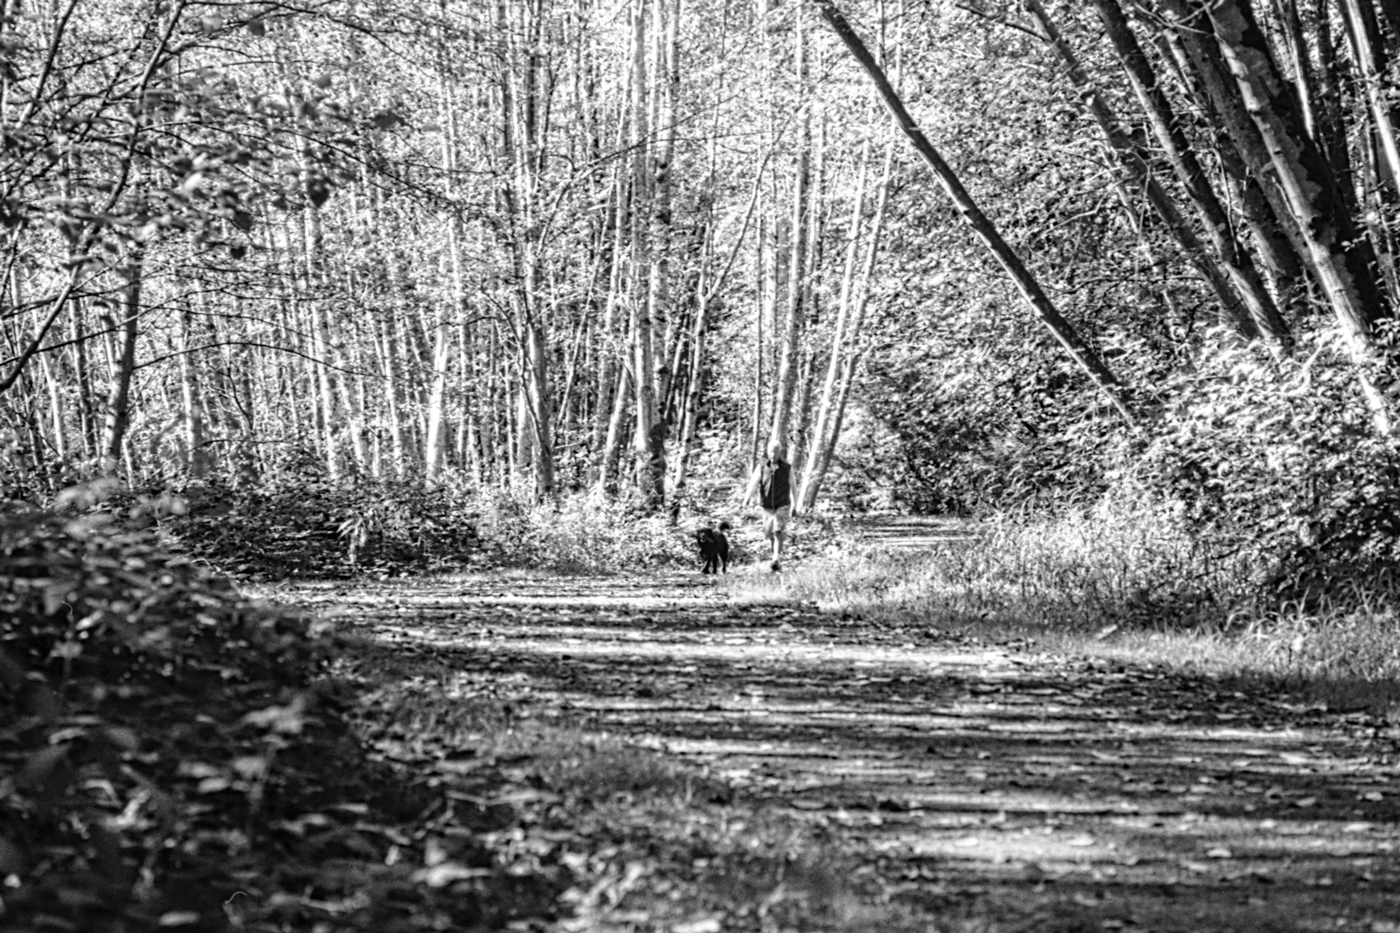
This is an image taken with my Canon L1 with an F 3.2 35mm Serenar Lens. The film image was digitized with the equipment shown here using the NEX-3C camera. It is not cropped so this is the full frame.
compact 16 mp camera. I have since bought adapters to use M39 and FD lenses on it. It has been great fun! But it is amazing how one thing leads to another.
I came across an article on the internet about converting film images to digital files using a camera. It was not a very complete piece but it did get me thinking. With a high quality lens why could you not photograph your negatives and thereby capture all of the detail and brightness information. My little Sony NEX 3C seemed the perfect testbed.
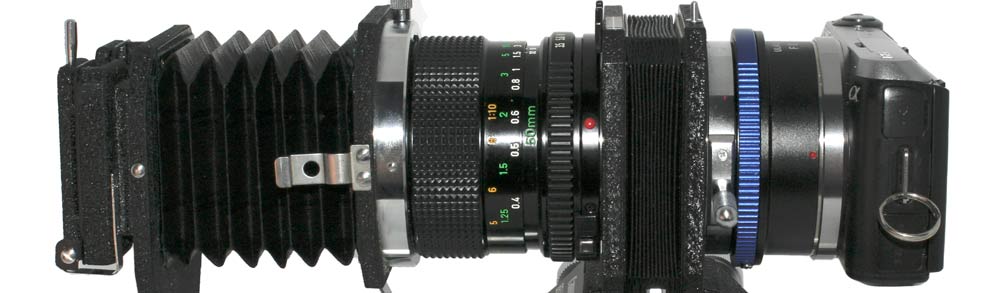
Canon made a slide duplicator for FD cameras back in the 70’s and that seemed the place to start. I went onto E-bay and bought the Canon FL bellows and the slide duplicator attachment that went on the front. For a lens I chose an FDn 50mm Macro lens which was made for this sort of closeup work. The Sony camera attached using an FD to E Mount adapter. And when it was all together it was an impressive looking setup!

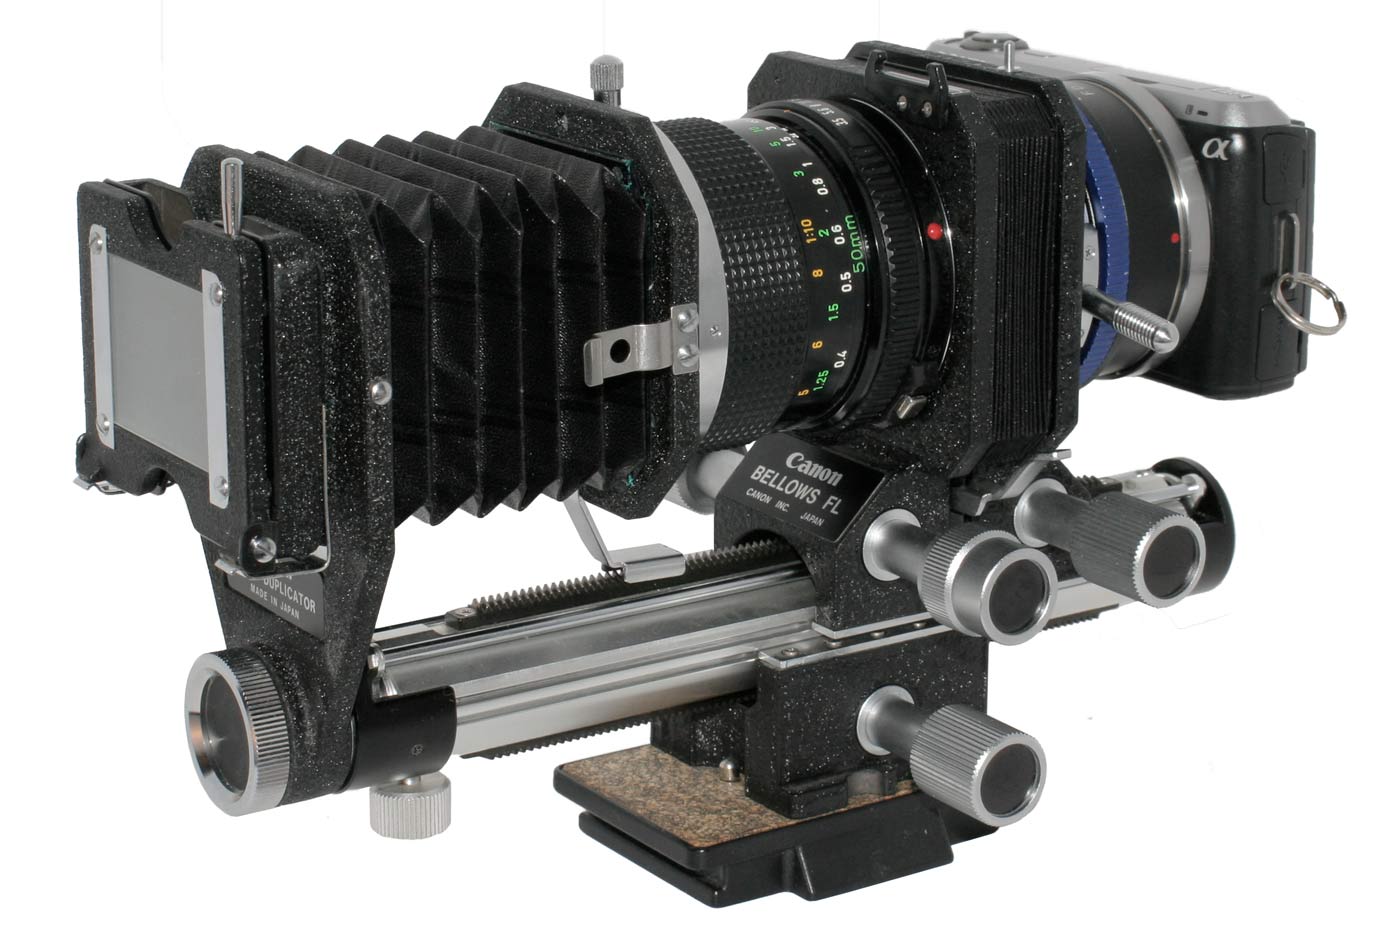
This is the assembled slide duplicator. On the left is the slide duplicator itself which attaches to the front of the bellows unit. Then there is the bellows that comes with the slide duplicator and a fitting to attach to the front of the lens. Then we have the 50mm FDn Macro Lens which is attached to the FL Bellows. Then there is the bellows assembly that is part of the FL Bellows unit. Finally, on the right, is my Sony NEX-3C attached using an FD converter mount.
The film is placed in front of the opal glass diffuser. You can clearly see how the Slide Duplicator bellows fits over the front of the Macro Lens.
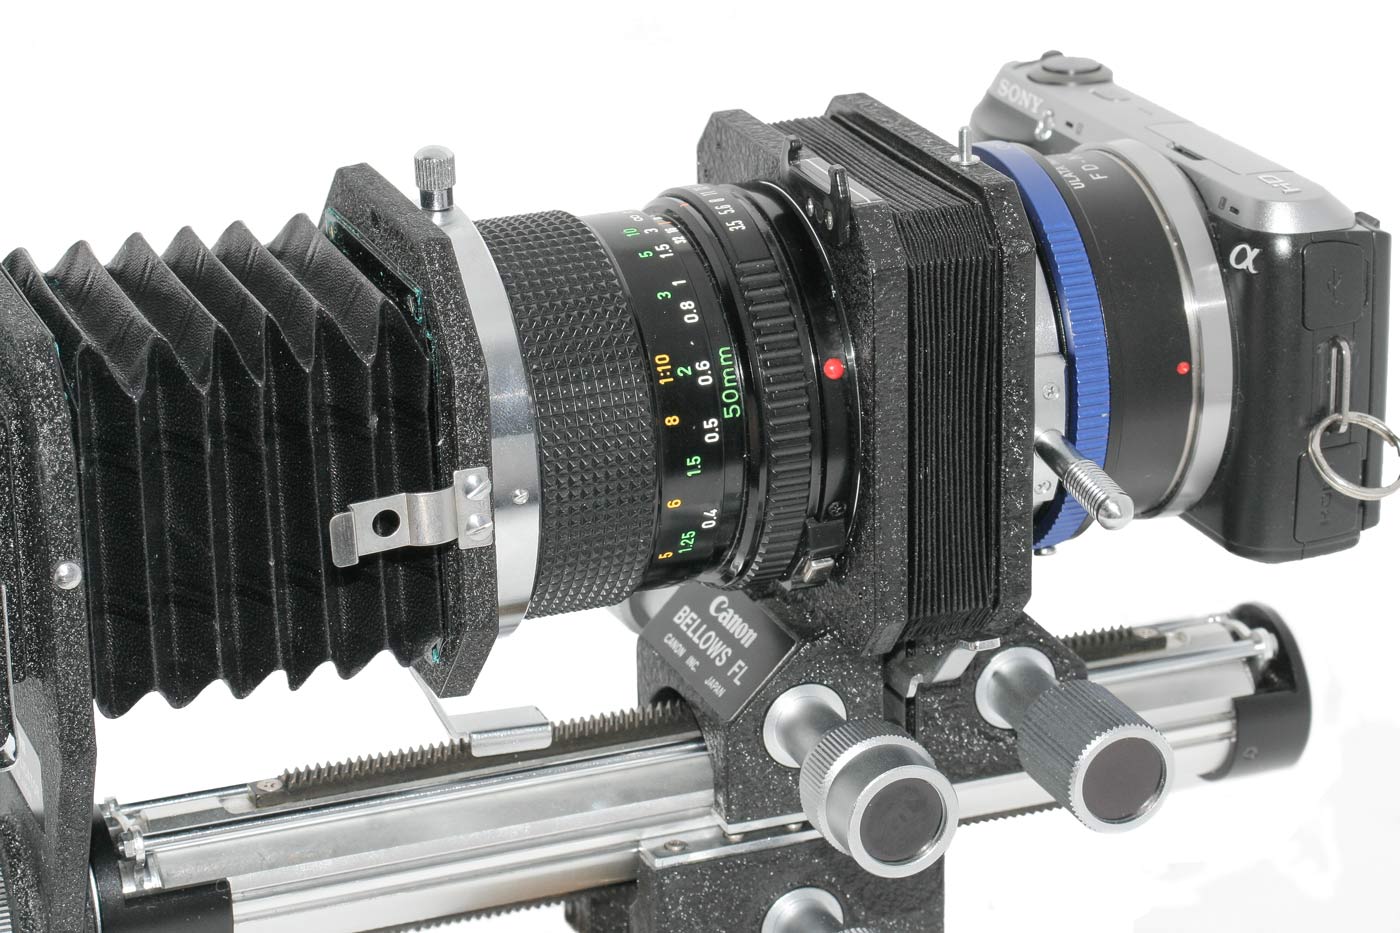
The Sony is shown here on the FD mount of the Bellows using an inexpensive adapter. The camera is not full frame but the bellows adjusts for that.
Once set up the process is amazingly simple. The camera is set to fire without a lens and I put it into AV mode. I then set the f-stop on the lens to f11 to get lots of sharpness. There is no communication between lens and camera so the camera has no idea what the lens is set to. It simply takes whatever light is given to it and tries to adjust the shutter speed for a proper exposure.
The FL Bellows actually has a lever that lets you flip from full open (for focusing) to stopped down to your present aperture (to take the picture). You put a light source at the film end, make sure you histogram is centered, focus, stop down and take the picture. But, for the rest of the images you simply move the film and snap the picture. Focus and f-stop are set and not changed. And that is all there is to that.
By the Numbers
Lets consider the arithmetic of what we are doing. The Canon software for the 9000F MkII lets us select several resolutions for film scanning. Although it goes to 9600 dpi I found that beyond 2400 dpi there is little or no improvement. The 2400 dpi scan yields a file with 3360 pixels by 2256 pixels and at 4800 dpi this increases to 6720 pixels by 4512.
The Sony NEX-3C is advertised at 16.2 effective megapixels. These images come out at 4912 pixels by 3264: roughly in the middle between the two scan settings above. Based on this, you would expect the image quality to fall somewhere between the two scanner settings.
This setup is extremely easy to use. I used f/11 on the lens and adjusted the light level to give me about 1/25th shutter speed although shutter speed is not critical. Once set up, running the film through was simple. No further adustments were rquired and the camera adjusted shutter speed to accommodate negatives of differing density.
So now all we have to do is examine the results.
This is a scan at 2400 dpi from the Canon scanner. The image is reasonably sharp and very adequate for the internet. But compared the the camera scan ……
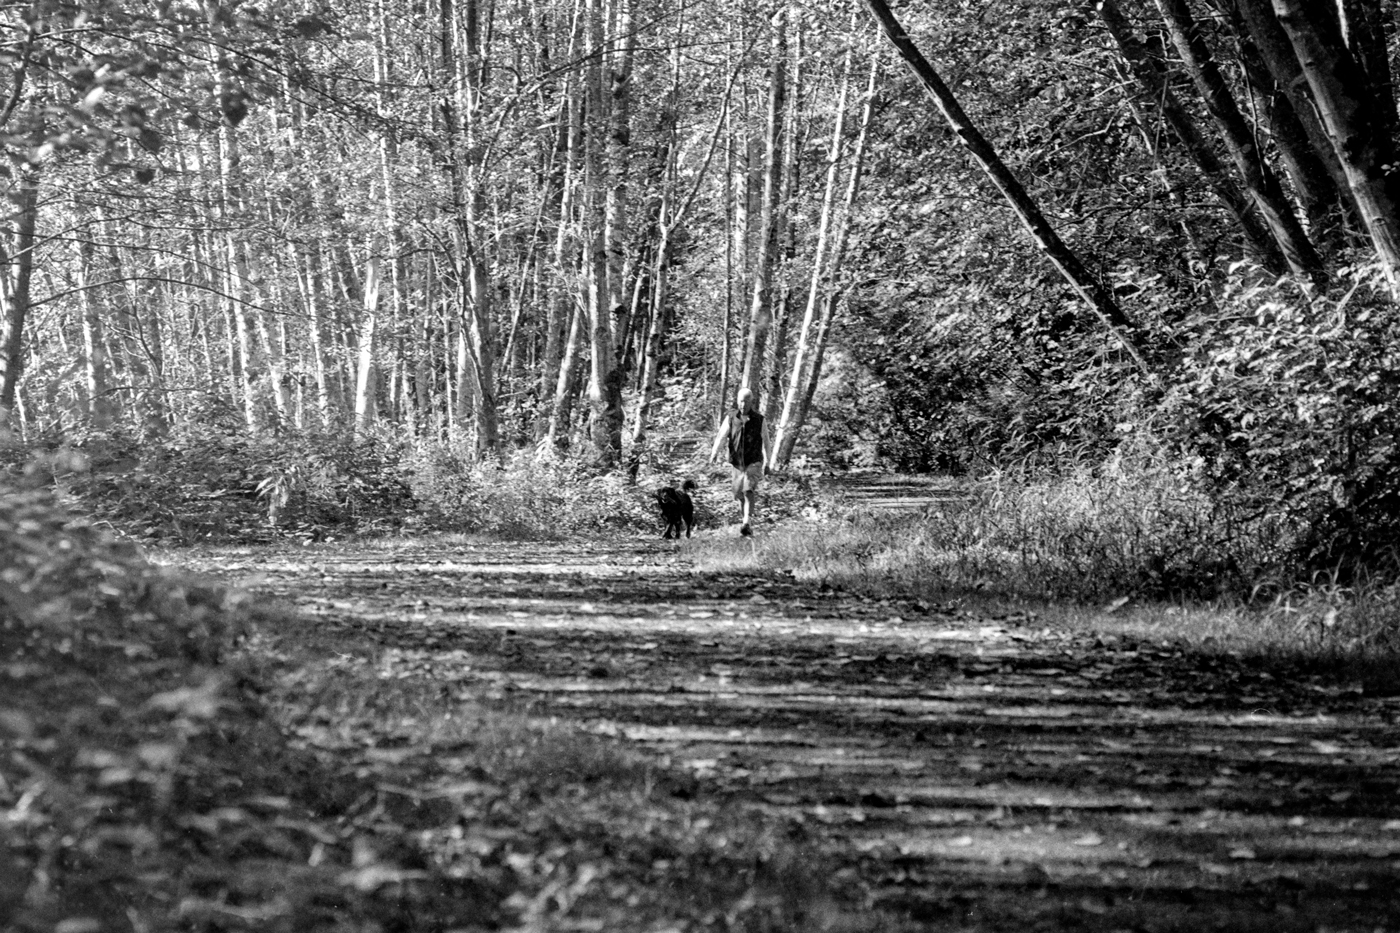
This is the same image from the Sony camera. It is substantially sharper with finer detail and has a much better dynamic range. The camera sensor is superior.
Comparing these two images there is no doubt the scanner image comes out second best. But we need to get in closer and compare the details in the images to see just how much better the camera is.
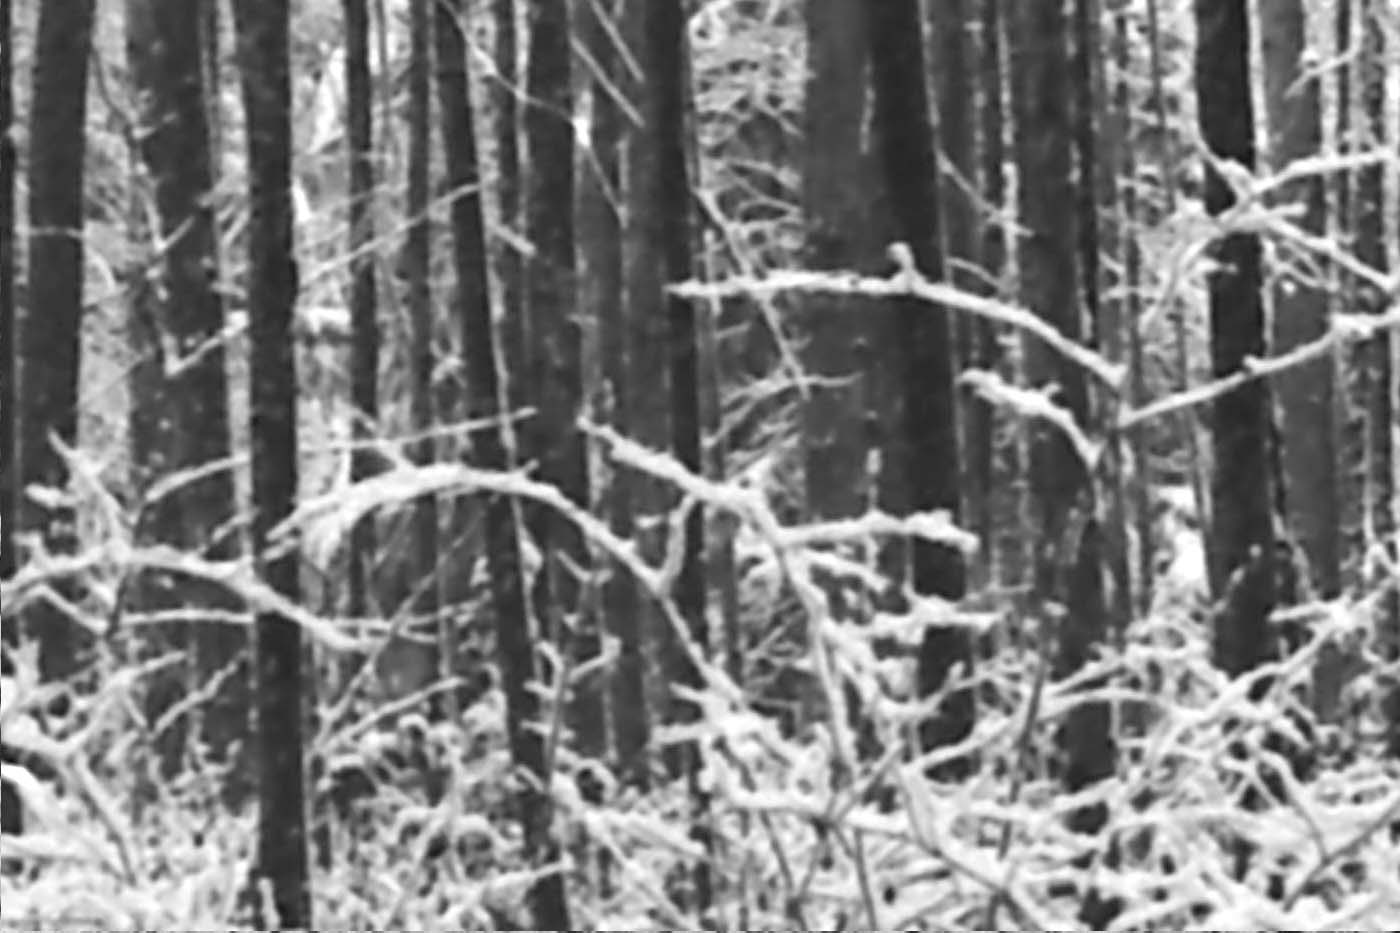


Here we have a section of the forest taken from the scene at the top of this post. A print at this scale would be at least 24 x 36 inches. This section is taken from the same negative so there are no differences in camera and lens or exposure.
On the left is a Canon scan at 2400 dpi. You can see the level of detail in the foreground trees and in the bush in the distance. The center image is also a Canon scan but at 4800 dpi. I think I can see a very slight improvement but not much. That’s what I said about the higher settings on the scanner; not much improvement over 2400 dpi.
The image section on the right is from the Sony NEX-3C. The improvement is substantial. The image is sharper and the tonal range is much superior. Look at the branches in the distance. They have detail in this sample that is lacking in the others. The Sony camera is by far the better option for digitizing images.
Conclusions
Well, the obvious conclusion is that I will scan my images with my camera. It is not only easy but the results are superior. Because the camera has a higher pixel count you expect a better outcome which we get. The improvement in tone was unexpected but very noticable. And the ability of the camera to adjust for differing negative density is a bonus.
So how can we make it even better? Well, if my light source was monochromatic, for instance from a sodium vapour lamp, chromatic aberration would be eliminated. But I don’t know if that would make a noticeable difference.
However I do know that more pixels would increase resolution. My little Sony is serving wonderfully for the purposes I had in mind: experimenting and testing. But really, I need more pixels. That is easily solved with the Canon 5D Mk IV which I have been lusting after ever since it was announced.. Here is one more reason to go out and make the purchase.
