I have written before about my love of the Kodak Brownie Hawkeye camera. It is a beautiful thing from a simple design point of view and it was a perfect snapshot camera considering the technology of the times, the 1950’s. The lens is a simple one piece meniscus. In the original cameras it was glass but in later models it became molded plastic. And since most pictures you got from the drug store or camera shop in those days were contact prints, this was enough.
In my post “Consider the Pencil” I looked at images I had taken on 120 film with the camera and showed how it was a useful photographic instrument. I returned to this subject in “How to be a Better Photographer” and again used examples taken with the Hawkeye. But all this time I have never stopped thinking about the meniscus lens and wondering just how good it really is. Is there a practical use for it in a photographer’s kit today?
Several months ago I found a Hawkeye at an antique market in a really good original Kodak box. The camera was in rough shape but the box was excellent and I wanted it. I bought them and put a really nice camera in the box and I was left with the shabby one. As the camera was in bad condition I felt this was the opportunity I had been waiting for. I took the lens out of it and found it was in great shape because it is protected on the outside by a flat glass plate and on the inside by the shutter. And this was the beginning of my simple investigation of the Brownie Hawkeye lens.
Mounting the Brownie Hawkeye Lens
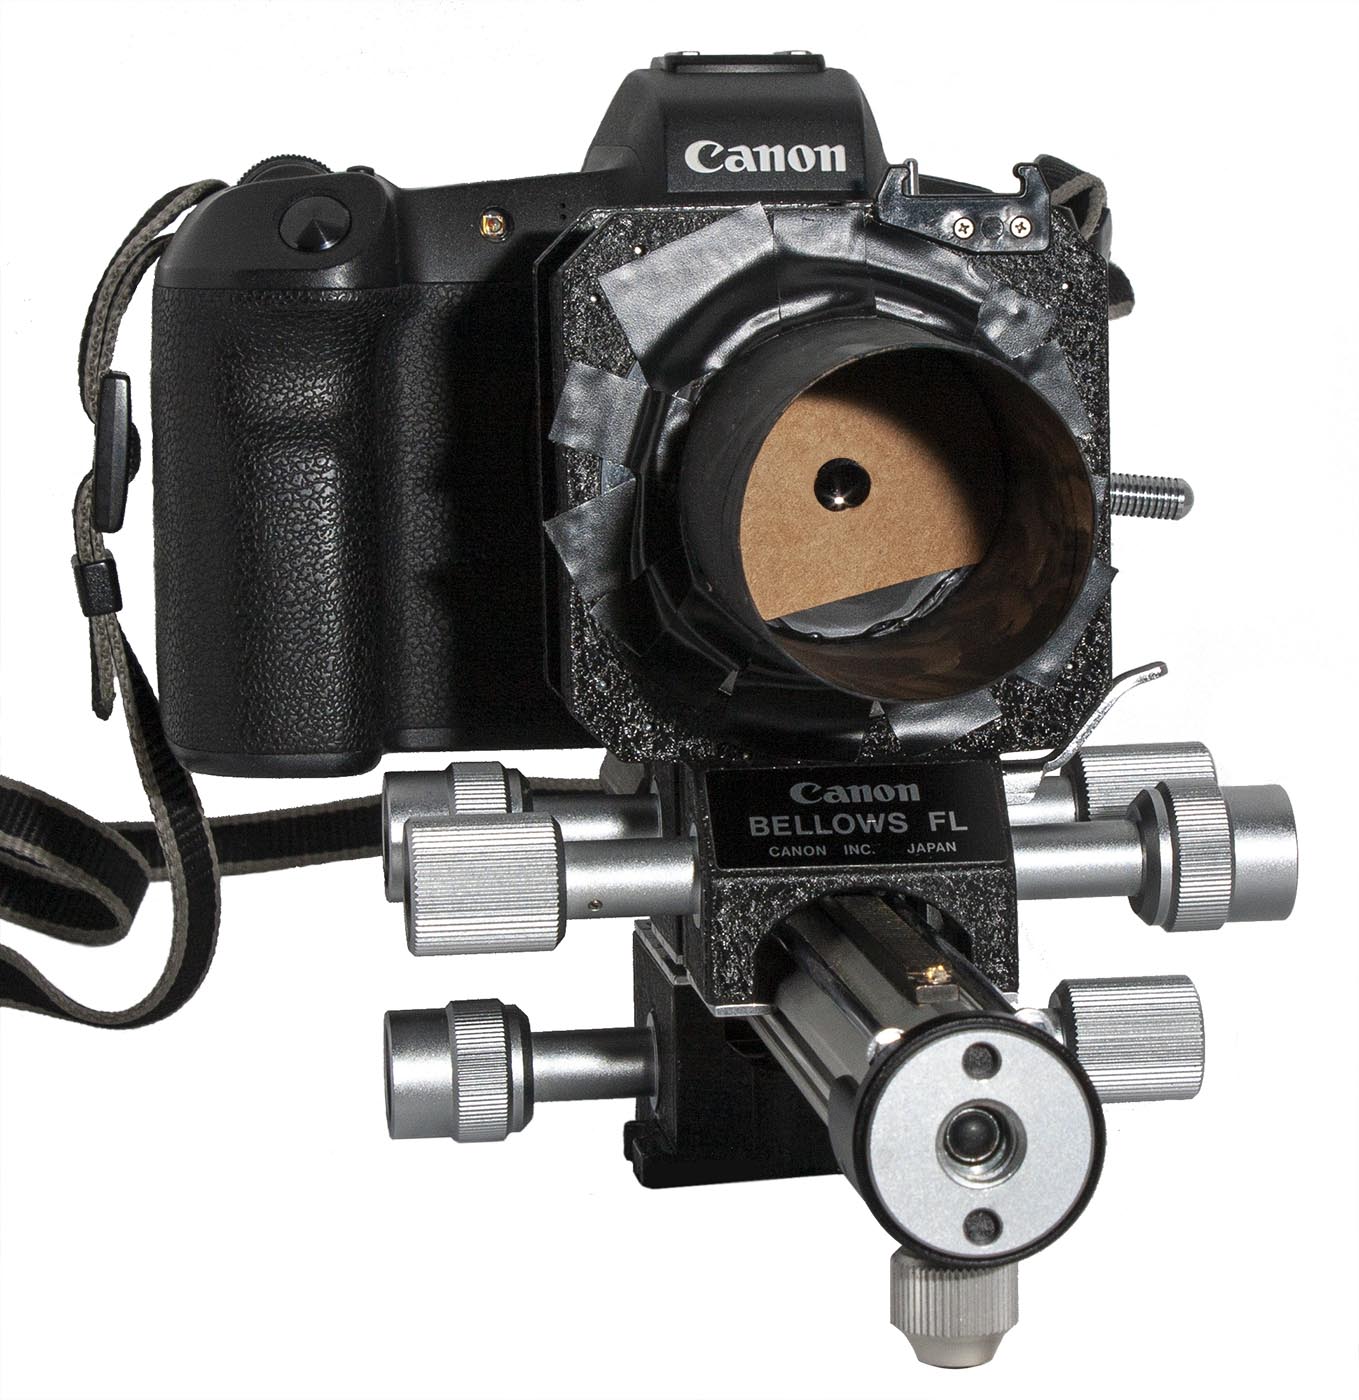
The first thing to do was mount the lens on my Canon R. This is a wonderful camera for me because all of Canon’s equipment, from any age, can be adapted to it. Using my FD to EOS R adapter I was able to mount the R on the Canon Bellows FL. The bellows unit would give me the ability to focus the meniscus lens.

I began by mounting the lens in its plastic holder onto a piece of cardboard cut to fit on the front of the bellows unit, making sure to orient the lens the same as in the camera, concave side towards the film (or sensor, as the case may be).

A simple uncoated piece of glass will be prone to serious flare so I cut a long sun shade from a cardboard tube (core of a paper towl roll) . It worked becuse of the long focal length of the lens. This I glued on the cardboard lens mount.

The whole assembly was then painted with flat black paint. It is easier if you do the painting before the sun shade is attached to the lens cardboard. Because of the potential for lens flare this step is very important. Any black flat paint will serve.


Once the cardboard lens assembly was painted and dry, I taped it to the front of the FL Bellows using the plastic black electricians tape. Not very pretty but it served very well for our little test. The bellows gave me the ability to focus the lens, something that could not be done on the Brownie Hawkeye.
First Tests

At full aperture this single element lens creates an image too soft and difuse to be of any use.
I created an iris to stop the lens down considerably. A crude affair to test the concept.

This is the same subject with the lens stopped down. All of the remaining pictures below use this method.
Using this setup is very easy. I knew the lens was around f/16 and so to have reasonable shutter speed I set the ISO to 400. The camera was set to aperture priority and it was left to pick the shutter speed. Focus peaking made focusing pretty straight forward. Out to the garden we went for our first tests.
That was a shock. The images were all so soft as to be useless. This was puzzling as I knew this lens could take a decent picture. I double checked my setup and it was all good.
I got one of my Hawkeyes off the shelf and examined it. The lens in the camera was stopped down to a diameter of 7/32nds of an inch which is considerably less than the diameter of the lens. So I then cut a piece of cardboard to cover the lens and punched a hole in it with a common paper punch: exactly 7/32nds!
Then, back out to the garden. The difference in the second round of images was quite striking: suddenly I had a usable lens.
Looking at the improved image you can see that the center is very decent and it degrades to the edges.
My test apparatus is pretty simple and somewhat fragile. But it held together for our tests here although, if I wanted to use it in the long term there would have to be improvements made.
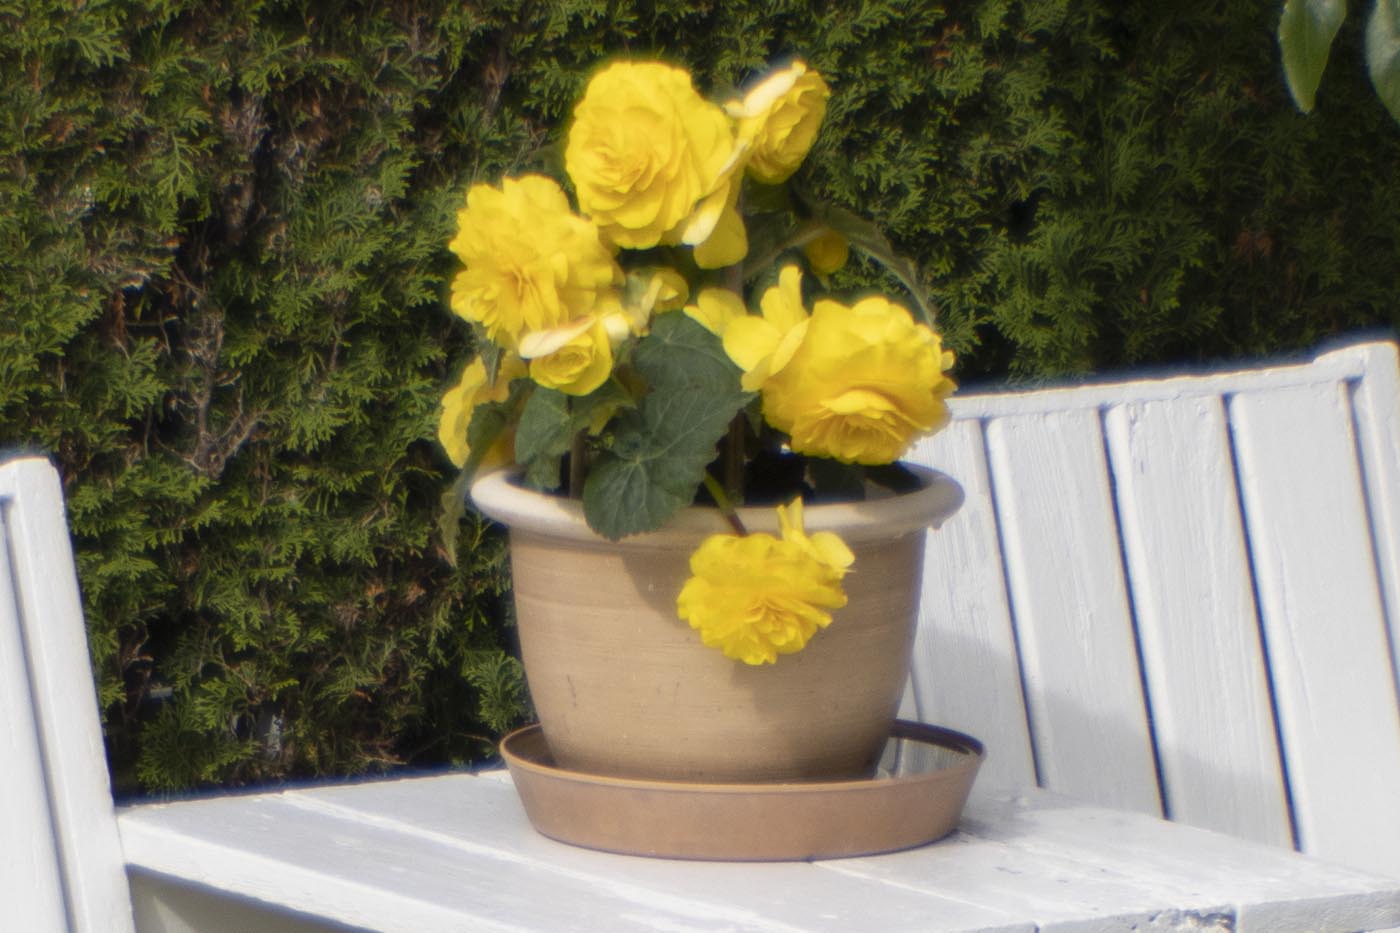
The center portion of the image shows good detail with a pleasant degree of softness.
Real Pictures
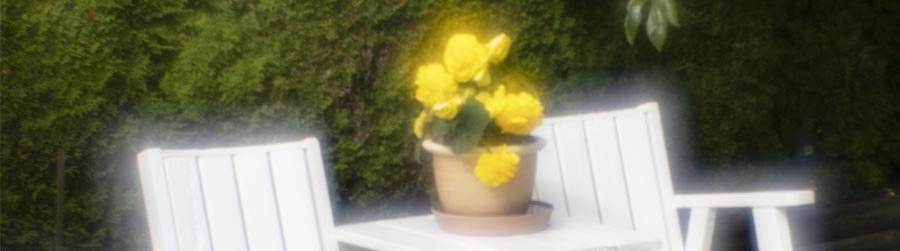
Once I had the test rig working the question became: Could this lens take real pictures? So, back to Susan’s garden again to see what I could find that would challenge me and my camera. Now, what is good photography is a subjective matter of taste but I found, for my taste, that this lens was excellent in certain things. If you were looking for soft dreamy pictures, it was pretty fine.

This image of daisies in the garden shows the strengths of this lens: good central focus, shallow depth of field, and excellent boket. What else do you want?

Looking at the center up close you can see there is good detail yet you can see the gentle softness in the tips of the white flower petals.
I have post processed the daisy image above in Photoshop but the color balance is as shot. You can see that only the center portion of the image has any real sharpness and even that is dreamy with a softness bordering on blurry. This is not a lens for every day use or for most situations. But it gives a pleasant effect to the flower above and I think it would be interesting for portraits. And these lenses are essentially free. There are old broken Brownie Hawkeye cameras at every swap meet and garage sale across the country that can be had for a few dollars.
I have an old FD 135mm lens that was submerged in water and then left to dry out without disassembly (I am not the guilty one!) and it is ruined. However, it has an FD mount on it that is in good shape. I am going to remount this lens using that FD mounting ring. I will use the tubes from the lens, some PVC pipe and lots of epoxy and create a proper FD lens out of this Hawkeye lens. It will become part of my kit.
One last picture. I know I go on about our Madonna dei Fiori. Forgive me but here is one more image of her in a veil of spider web. I really like this Brownie Hawkeye lens!

