Fixing the Problem of
Filter Ring Dents
I was on the FD Lenses Facebook page the other day and a question was posted about what to do with lens filter ring dents. The front edge of the lens into which you can screw a filter gets dented when the lens is dropped or the camera swings against a hard surface. Brass, which expensive lens barrels are usually made of, is not a hard metal and it deforms easily.

It is a sad thing to see a good lens with a dent on the front edge. That usually means that you cannot screw a filter into the ring and often you cannot mount the correct lens hood. And it does not look good. A modern lens can be sent back for a replacement barrel but with older lenses that is not always possible. So what do you do? Thinking about the question I got to thinking about how I had solved this problem in the past.
When I bought my Canonflex RM from a collector who was selling off much of his collection he sent me a Super-Canomatic 50mm f/1.8 lens with a bad dent on the
filter ring. The ring was actually crushed and deformed and there was no way a filter could be threaded into it. But the glass was clear and bright with no visible marks on it so the lens seemed worth saving.

But I am getting ahead of my story. Seeing this question on-line I read the comments and then went to the internet to see what I could find. There were several suggestions floating around, some good and some not and some totally crazy. The worst suggestion was to use a pair of pliers! So I thought I should weigh in on this.
But first, a few comments. Why would anyone use a lens without a filter on it. That filter will absorb a lot of punishment and protect the rim of the lens from all but the most vigorous assaults. And why would you use a lens without a lens shade. They are usually plastic and pretty fragile but they keep your fingers off the lens AND they will cushion a blow. Together with a filter the lens is pretty well protected. Always use them!
Secondly, we are talking of metal lens barrels. I have never had a plastic lens barrel with a dent. Marks and gouges, yes, but dents in the filter ring, no. So I cannot comment on damage to plastic lens rings.
And finally, lenses are pretty sturdy but they can be knocked out of alignment or internal components can be displaced. If a lens gets banged enough to bend the filter ring you will be wise to thoroughly test the lens before using it on any mission critical projects, such as weddings. However, if we are dealing with a dent in the filter ring and no other physical damage, the lens itself is probably OK. But check it!
If the finish on the barrel of the lens has been marked or the metal has been scratched or gouged none of what follows will repair that. Those cosmetic repairs are for another day.
Filter Ring Vice Tool
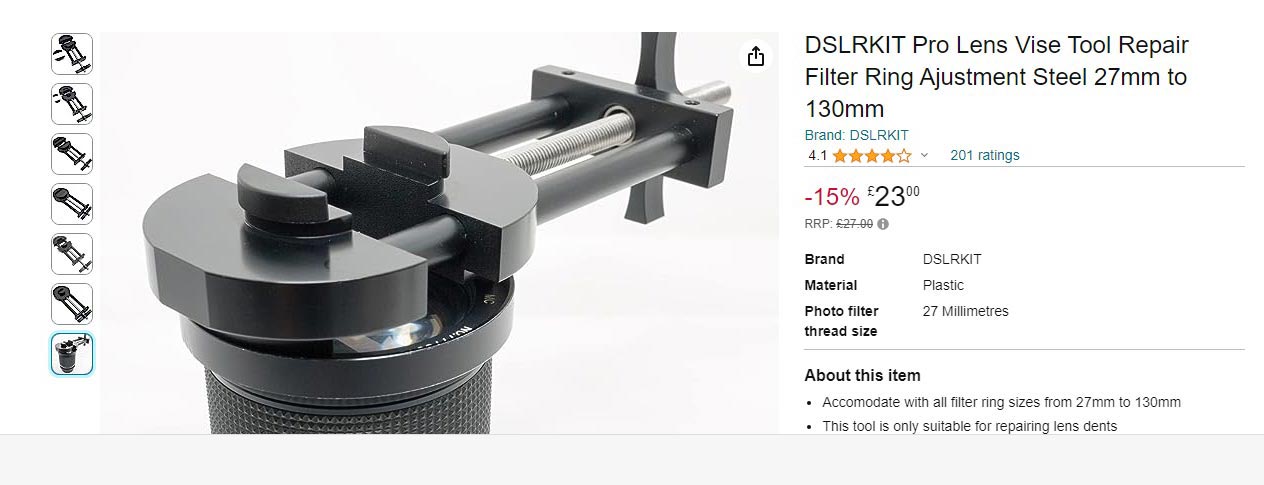
Before this question came up I did not know about this tool. But it is apparently available on Amazon which is where I got this ad. There is information and instruction how to use it on the internet but it seems to get mixed reviews. Personnaly I am supicious of it.
The Vice works by putting pressure on the dent from inside the filter ring. But to do this it puts outward pressure on the opposite side of the filter ring and this stretches the filter ring into an oval shape and the
pressure is enough to bend the metal of the ring. I question whether the ring will ever return to a circular shape. To me this appears to be a brute force method and I think it is asking for trouble.
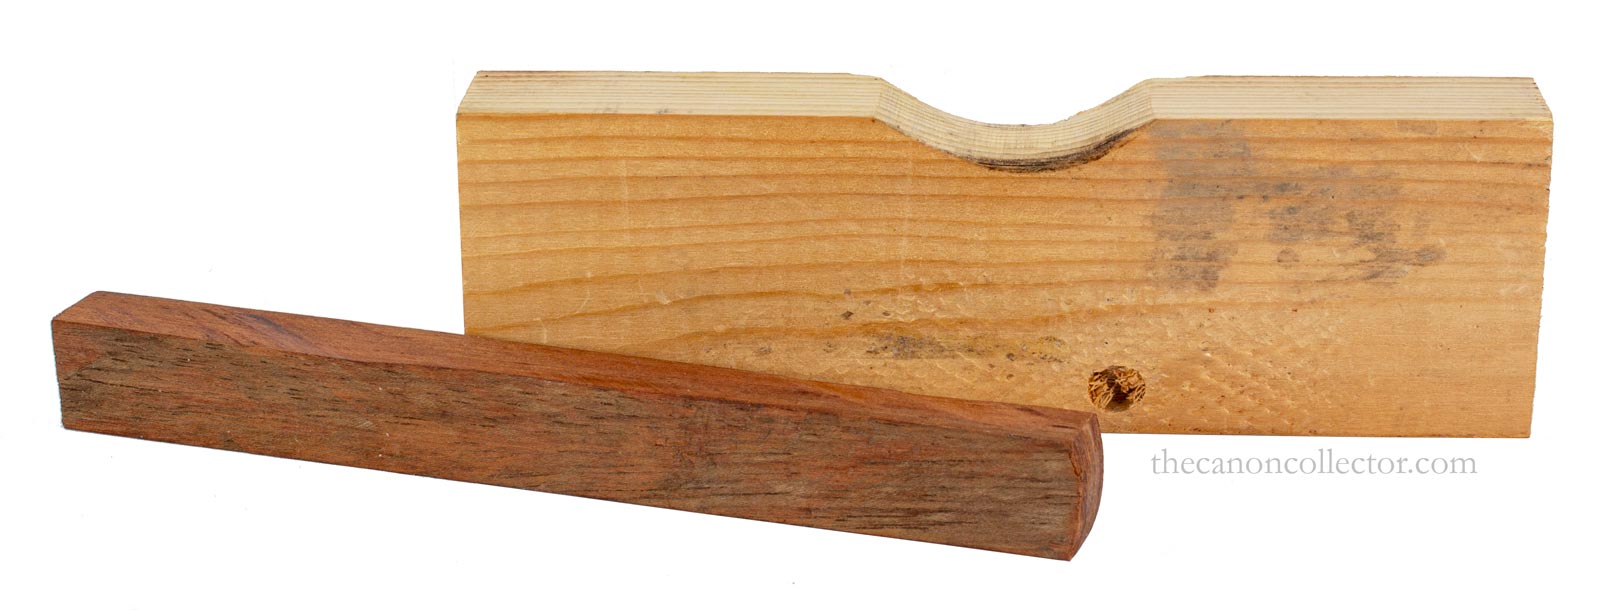
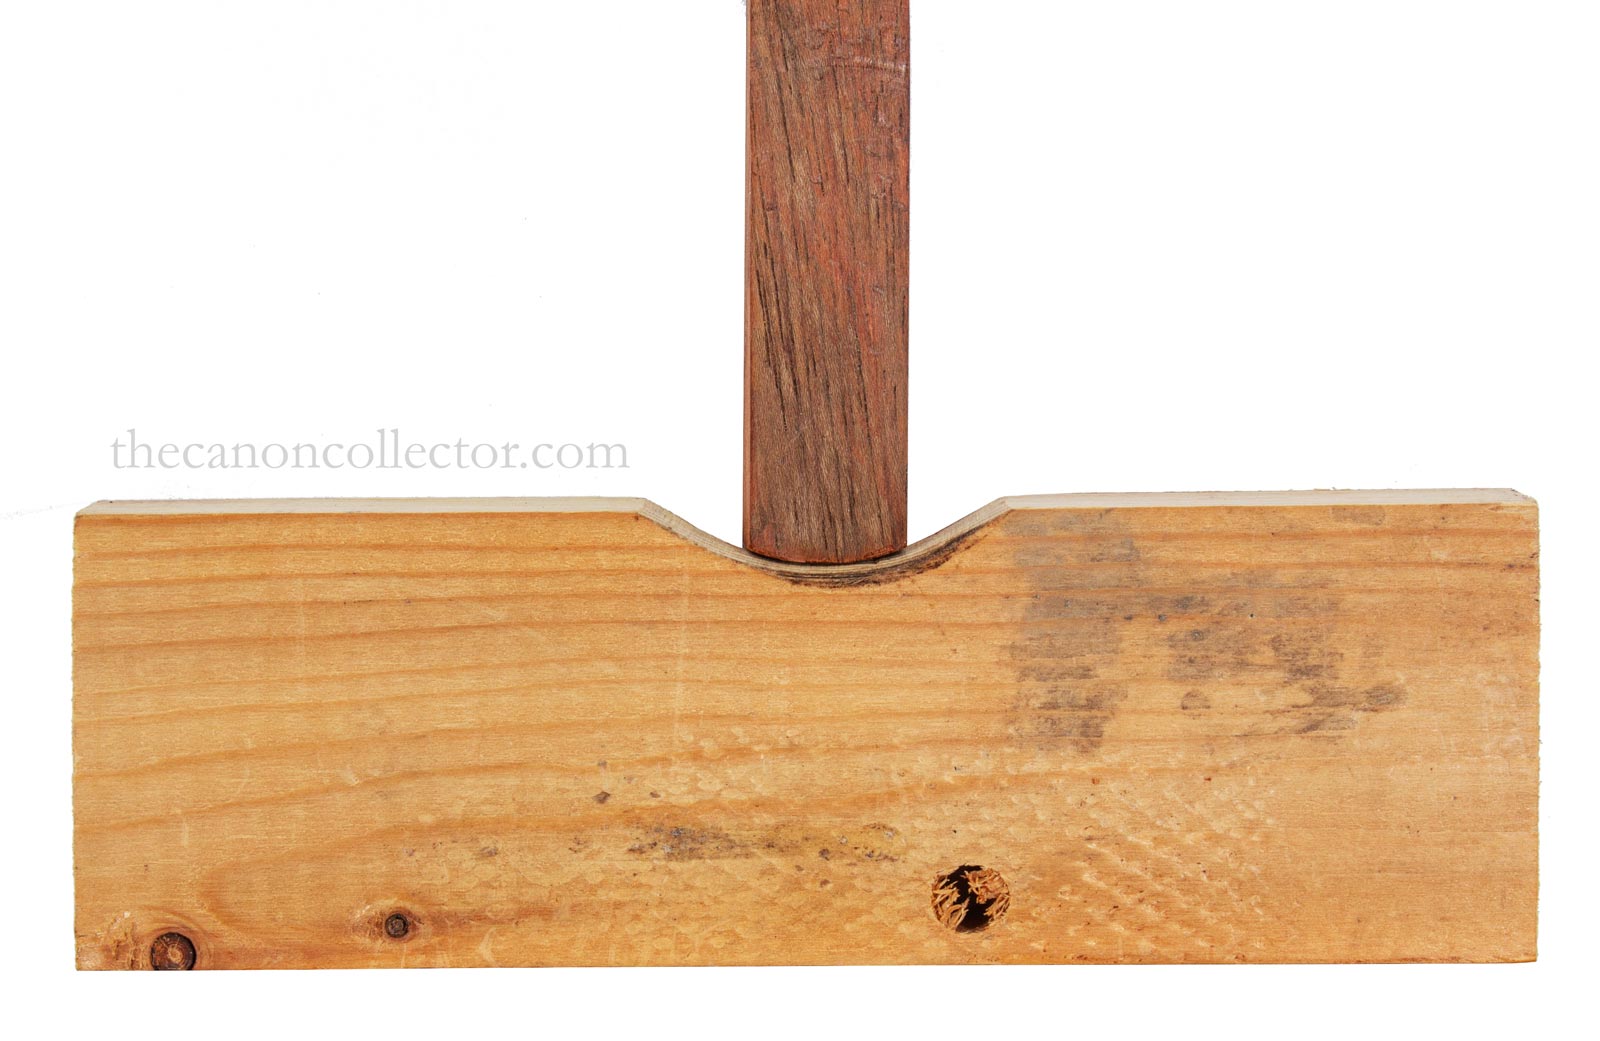
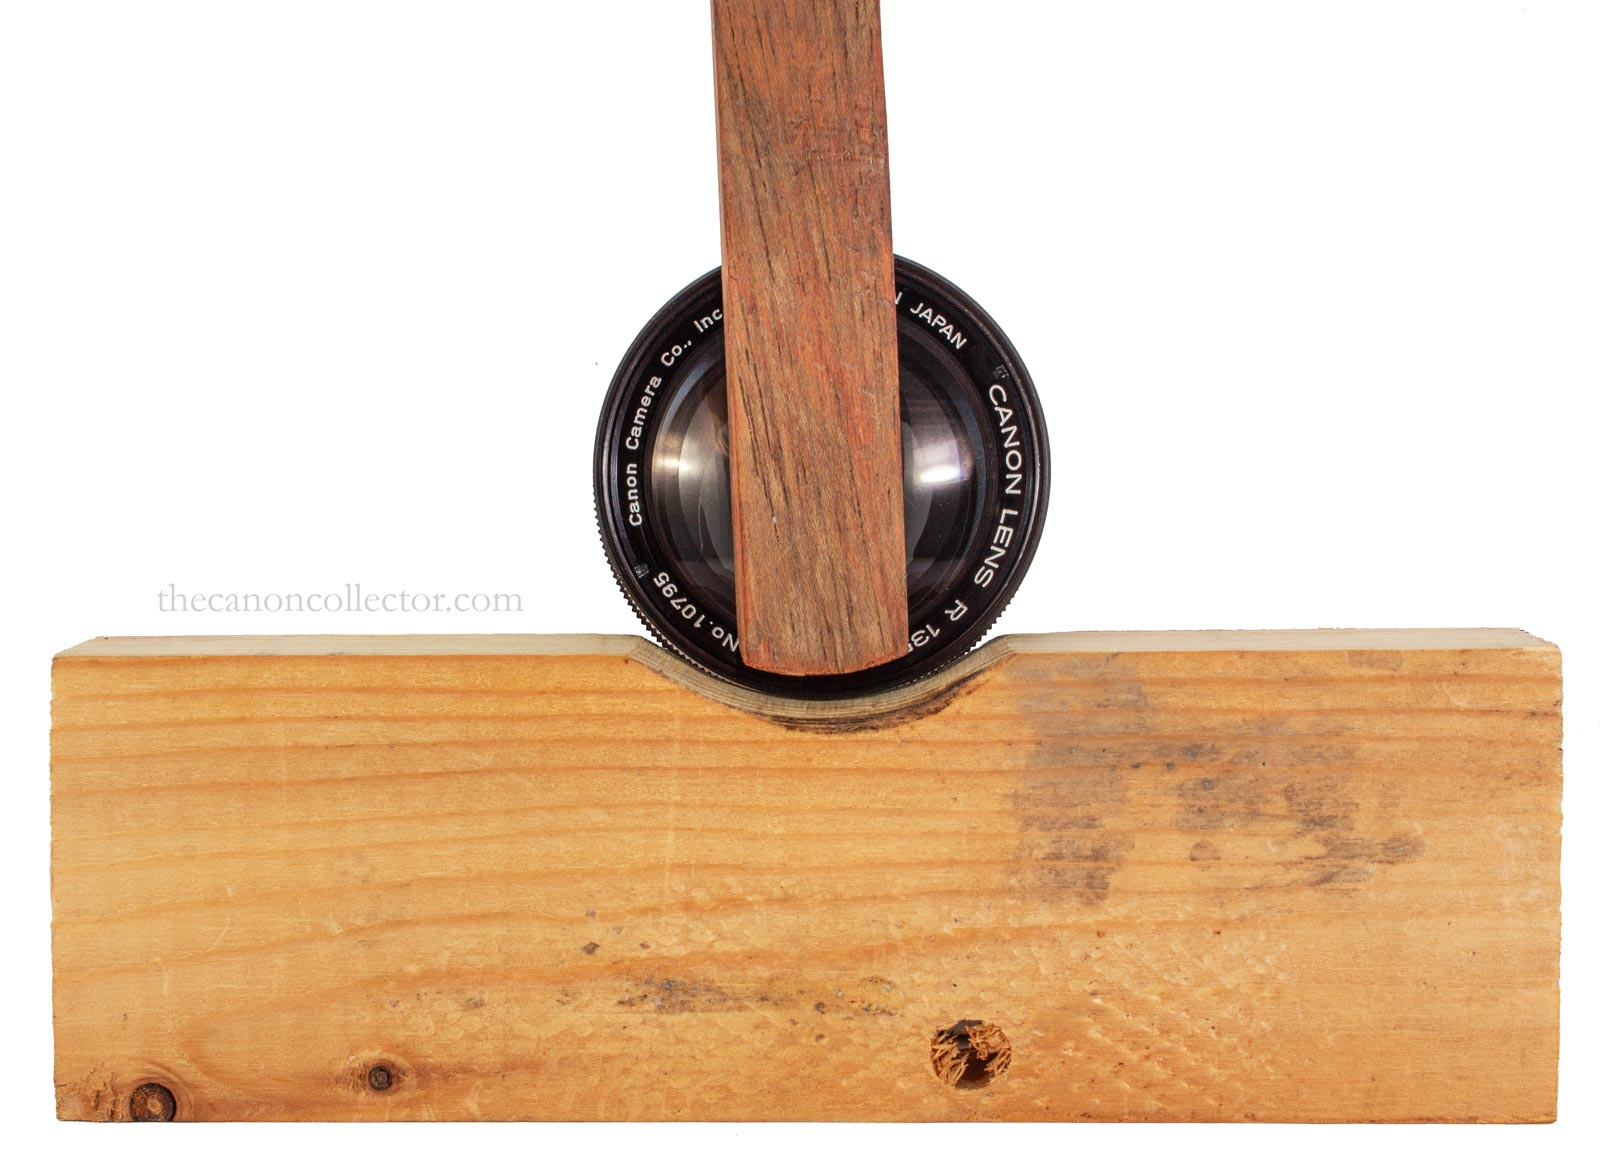
This is my Hammer and Anvil that I created out of scrap wood. The large piece of wood, the Anvil, is a soft pine or fir wood that will not mark the finish on the lens. The long thin piece, the Hammer, is hard wood like oak or mahogany, which transmits a small hammer blow directly to the dent from the inside.
The Hammer and Anvile have matching curvatures that are patterned on the radius of the filter ring.
Hammer and Anvil
Now, getting back to my Super-Canomatic, I built a tool that worked very well on this and several other lenses with similar problems. It consisted of a large piece of softwood, the Anvil, which is mounted in a vice on a workbench. The other piece is a hardwood Hammer that applies force directly to the inside of the dent forcing it out.
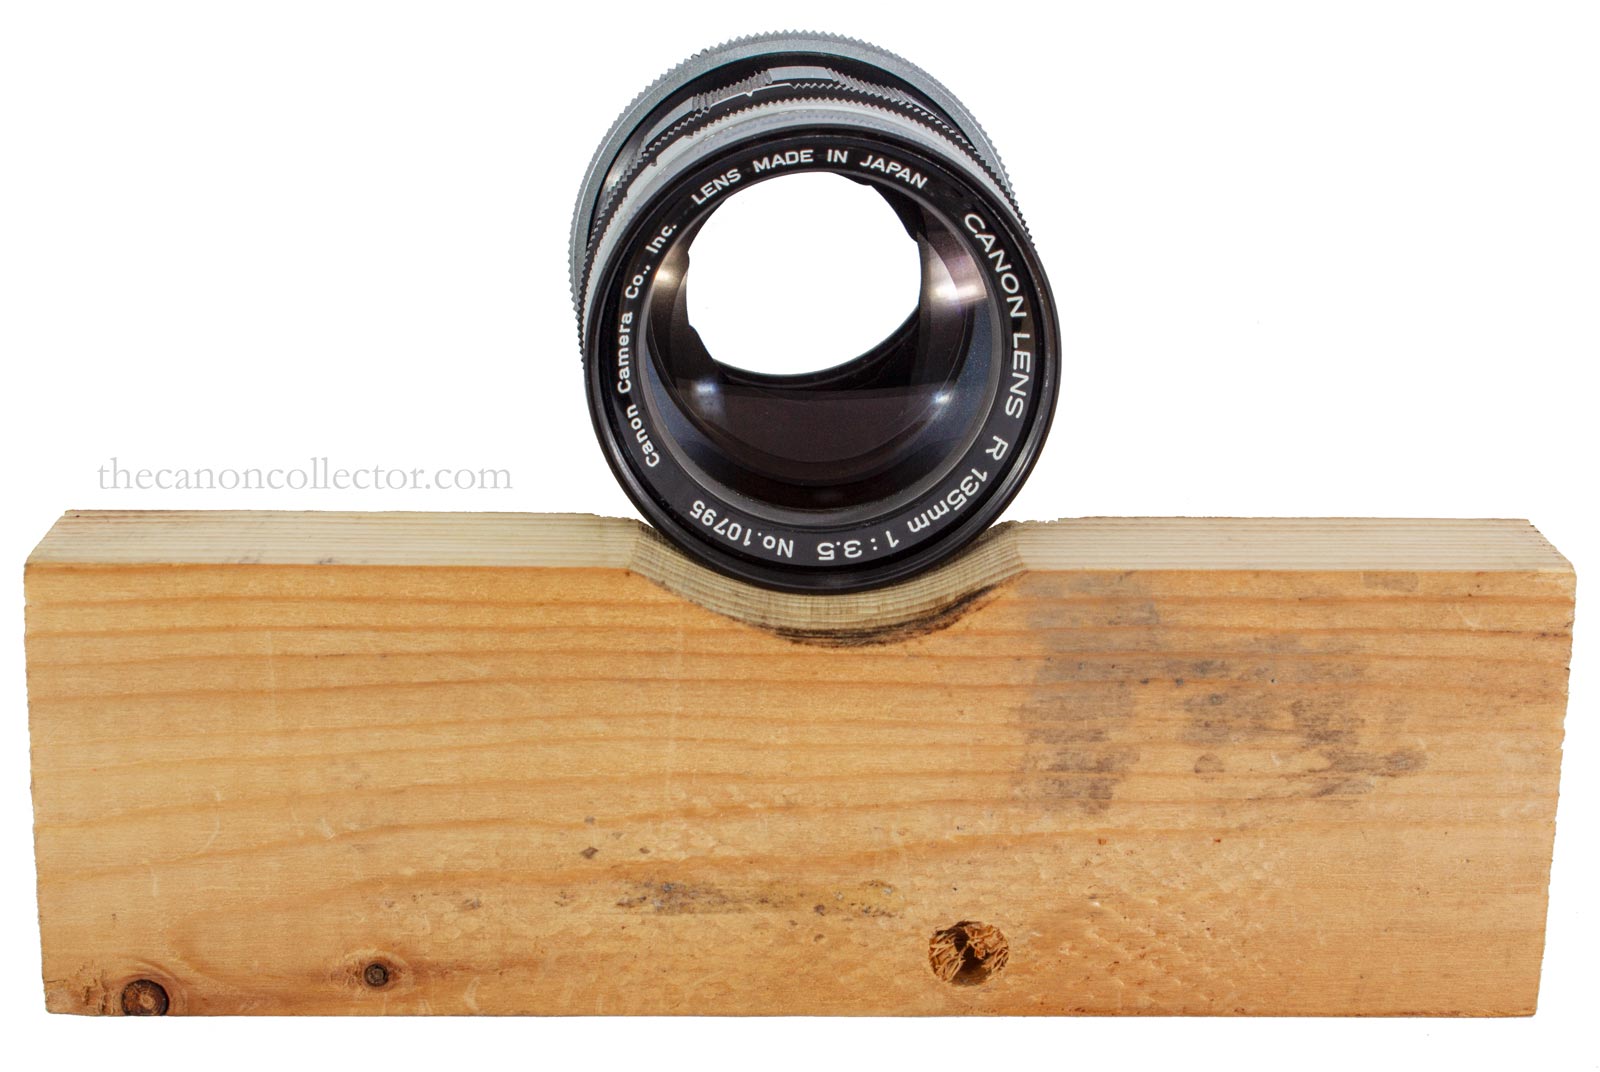
It is important that the cutout in the Anvil match exactly the outside of the filter ring. I used the circular portion of the lens as a template for the cutout. The end of the Hammer is also the same shape but just a slightly smaller radius to fit the inside of the filter ring.
The Anvil is made of a soft wood such as pine or fir to protect the finish on the lens. The Hammer is made of a hard wood to better transmit force to the inside of the filter ring.
Once I made the tools I placed the Anvil in a strong vice and while holding the lens in the Anvil with the dent in the bottom of the cutout I placed the Hammer on the inside of the dent. Then I began tapping the Hammer with a real hammer. Many very light taps varying the angle of the Hammer will slowly push the dent out to the original radius of the lens. It is a slow process. Small taps because we do not want to damage the threads on the inside of the filter ring.
The lens is held in the Anvil like so. It is important that the curvature of the Anvil matches that of the lens very closely because it will determine the shape of the filter ring when we are finished.
NOTE: When tapping out the dent the glass in the lenses is very vulnerable to damage. Be sure the rear lens cap is on securely and prepare a couple of pieces of lens tissue to cover the front element.
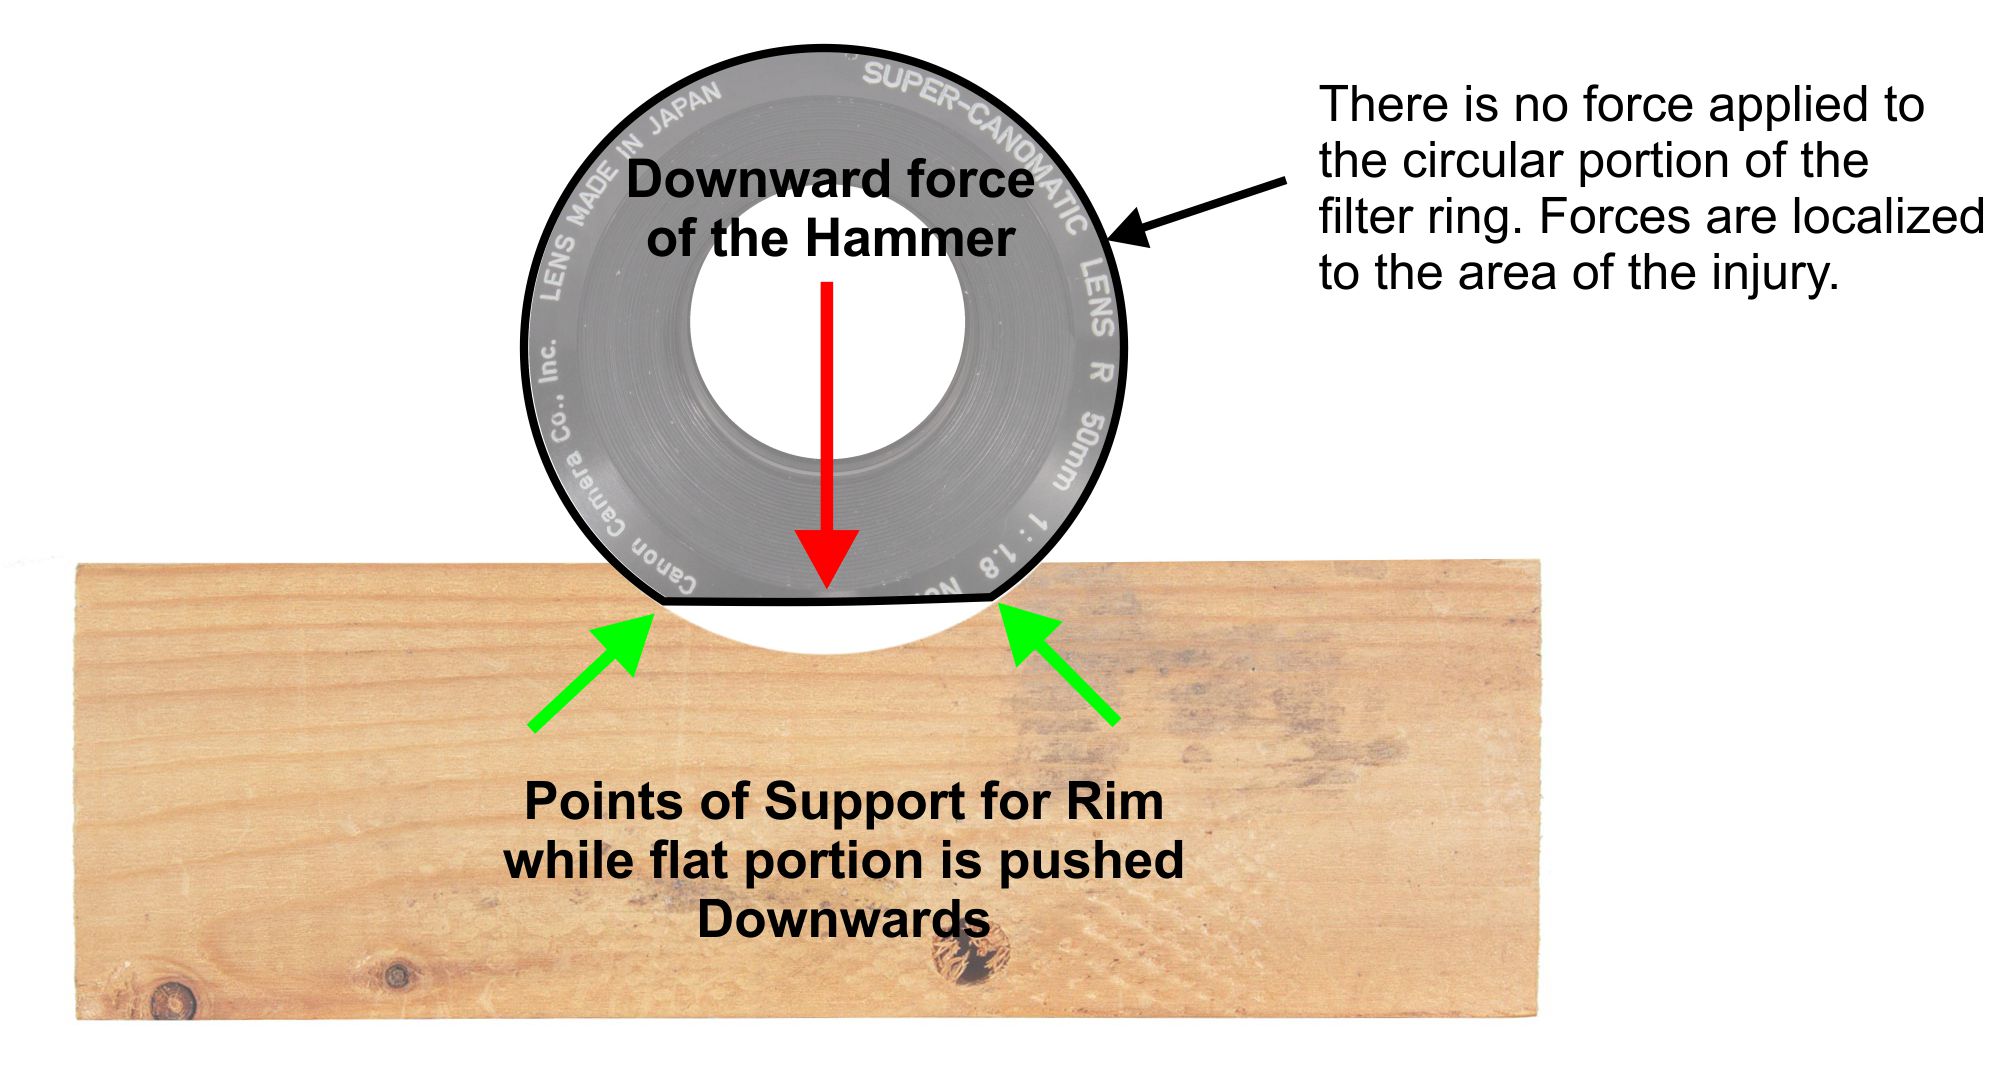
The diagram on the left demonstrates
why I think this is a superior method.
The majority of the filter ring is still
round and only the dented portion
needs to be moved. So it is important
not to apply force to the round portion of
the ring. This method supports the ring on both
sides of the dent and no force is applied anywhere
except in the immediate vicinity of the injury.
When the Hammer exerts a downward force the corresponding upward force is applied to the edges of the dent but this area cannot be deformed because the shape of the Anvil is the final shape we want. You cannot hammer the filter ring too far because it is stopped by the shape of the Anvil.
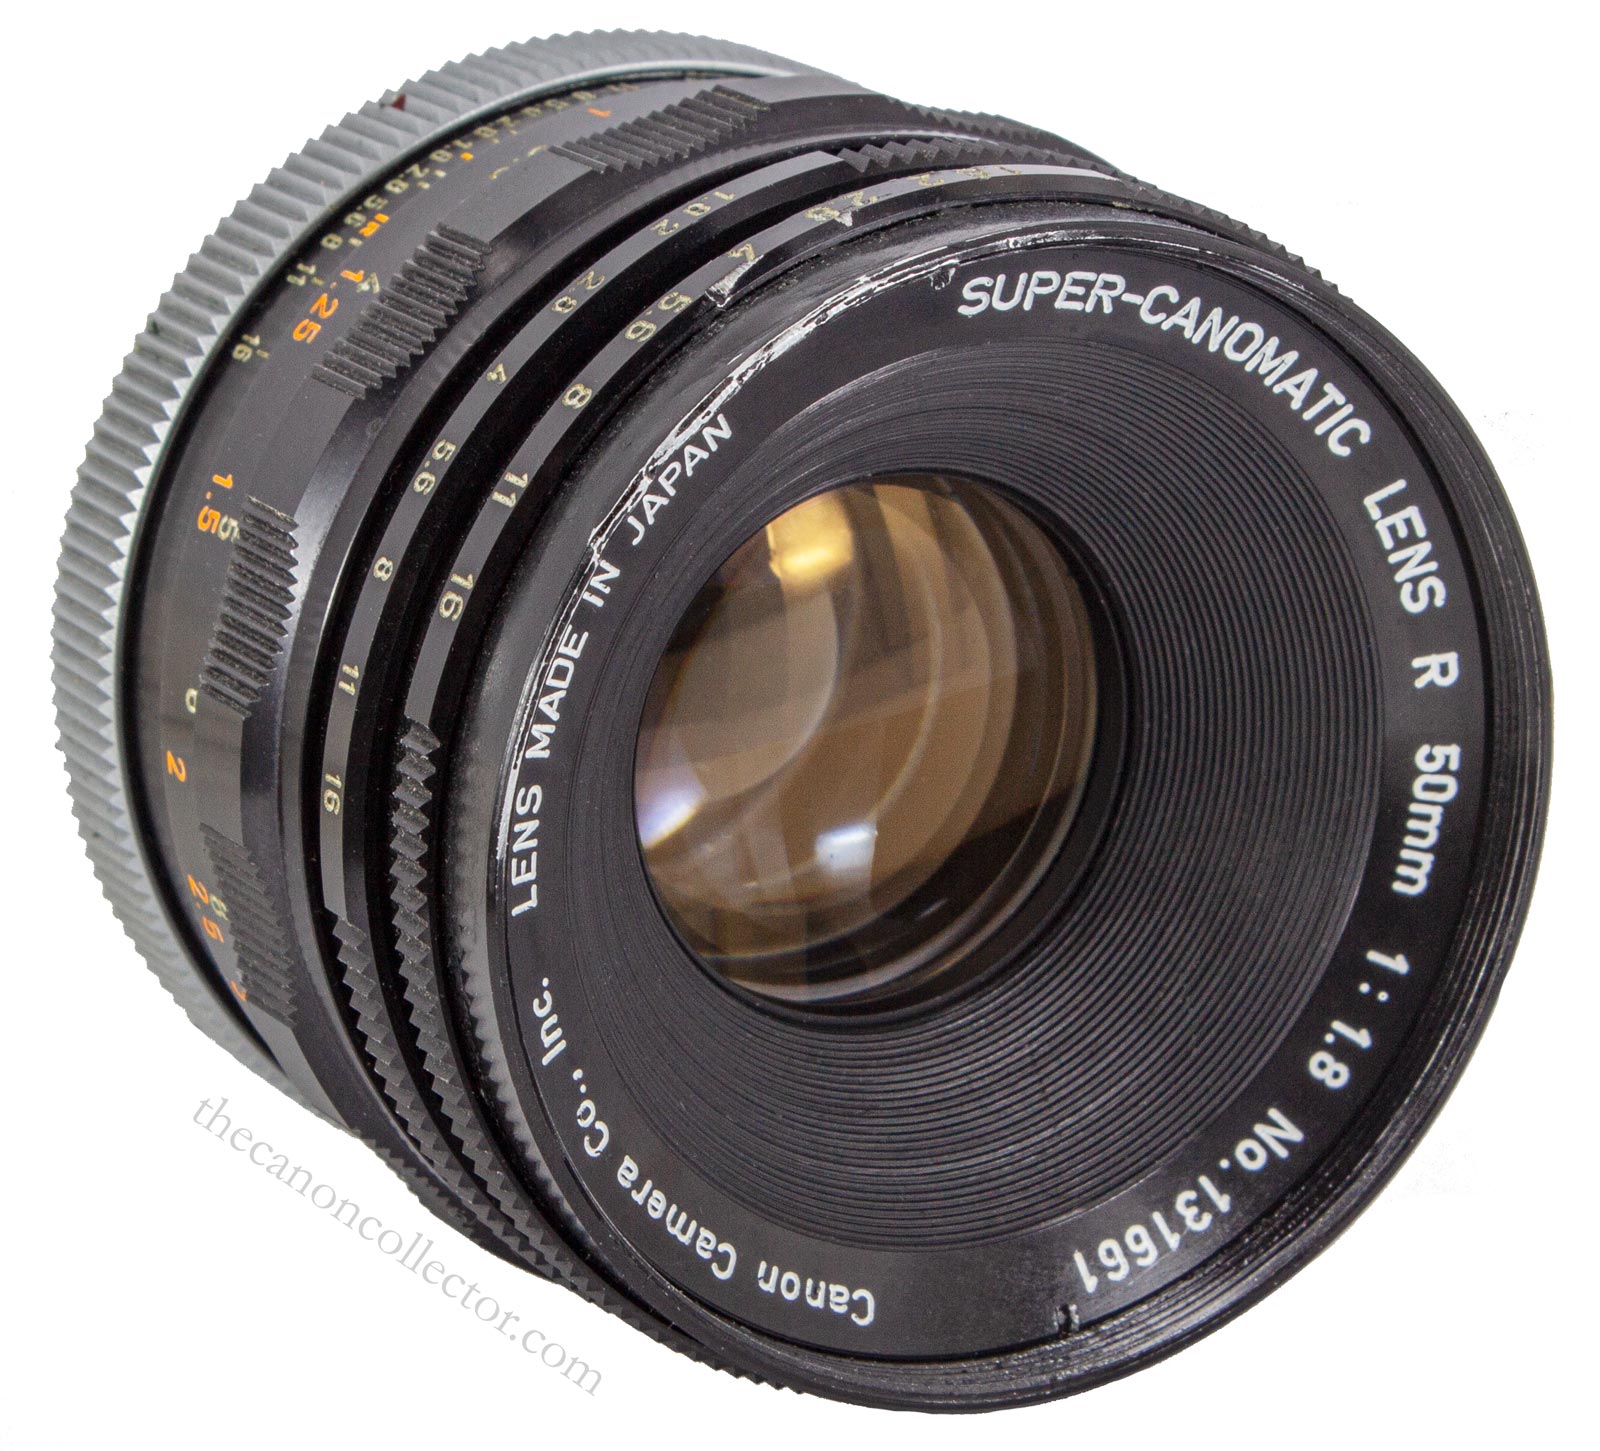
On the left is the Super-Canomatic we started out discussing after my repair. The original dent was serious. It had removed a lot of paint and gouged the metal of the lens barrel. However, the lens appeared bright and subsequent testing showed that it was still sharp and everythng worked smoothly.
By following the method here I was able to push the dent out. Now the filters screw in easily and the name ring can be backed out without a problem. The lens is back to being fully functional.
To fix the cosmetic problems will involve paint and that is a subject for another time. However, by screwing a UV filter onto the lens most of the remaining damage becomes hidden and the lens looks fine.
One day I will find a really nice lens externally with glass that is broken, scratched or covered in fungus and I will simply replace the damaged filter ring. Another item for my ever expanding “Want List”.
This website is the work of R. Flynn Marr who is solely responsible for its contents which are subject to his claim of copyright. User Manuals, Brochures and Advertising Materials of Canon and other manufacturers available on this site are subject to the copyright claims and are the property of Canon and other manufacturers and they are offered here for personal use only.


