If you go out in the woods today you’re sure of a big surprise ……. well, if you’re my age you know that song. It has to do with picnics and teddy bears. But I’m thinking that if you go out in the woods today with your camera you’re in for a big problem. How do you photograph a forest? Let’s think about that for a moment. I love the forest. The air under a stand of trees is cool and the ground is usually soft with the leaves of other seasons. The colors are vibrant and the scent of the forest is sweet. It is an altogether wonderful experience. There is something in us that pulls us into the woods. But here is the problem: how do you take a photograph that conveys this feeling? Try it. Lift the camera to your eye and look. You are too close. The image surrounds you on all sides. The look in the view finder is small and jumbled. That wonderful dappled light does not come through. The grandeur of the trees does not appear. You are left explaining to everyone how you felt. The image alone does not convey what you saw. It is thoroughly frustrating. I know it is; I’ve tried it many times.
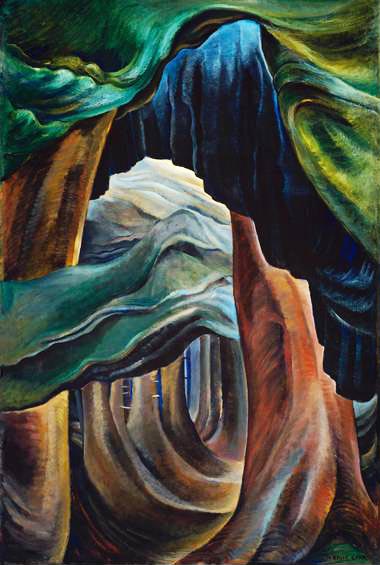
Now Emily Carr faced the same problem. She wanted to put a forest on canvas with oil paint: compress it into the four sides of a rectangle with a very limited color palette. That is our problem. Her solution was to resorted to abstraction. She attempted to paint not the picture but the essence of what she was looking at. And she did pretty well. She created images that are graceful on the eye and a pleasure to look at. The problem in the forest is that we are too close and the subject has too much detail. You can’t see the forest because of all the trees!
Just like Emily, we have to simplify our image without subtracting from it. We have to apply the techniques that we have available in our tool kit to compress all of that detail into our rectangular container without losing the essence of what we are looking at. Can we use abstraction?
Just like Emily, we have to simplify our image without subtracting from it. We have to apply the techniques that we have available in our tool kit to compress all of that detail into our rectangular container without losing the essence of what we are looking at. Can we use abstraction? Yes, of course we can. We have wide angle and fish eye lenses. Can we alter the color palette? Yes, we have the Vibrance slider, the Tint slider, and we have HDR. We have all kinds of controls over our color palette. Can we simplify the details? Yes, in Photoshop we can apply an amazing array of filters, we can mask out, use brushes, we can simplify. We have options. The trick is in applying them.
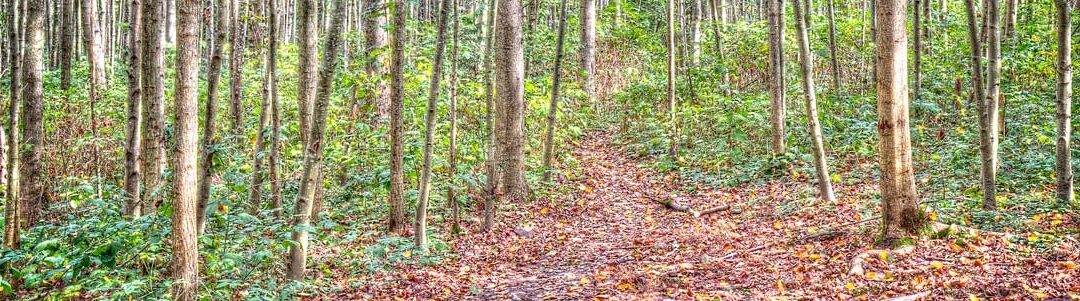
So, we have this park near our house. It is heavily forested and there are wonderful walking trails all through it. However, there is one place where you can walk out of the park on a small trail. It passes through a low swampy area that is thickly populated with young trees, maybe poplar or alder. It is fall just now and there are leaves on the ground and the whole effect is very pleasing to the eye. I decided this is a good place to try my hand at trees once again. So three days ago I dropped over to this little thicket of young trees with my camera. A nice day, mainly cloudy, but with patches of blue sky. The clouds were moving quickly and so there were occasional patches of sunlight. Overall excellent lighting because you simply had to wait for the lighting you liked.
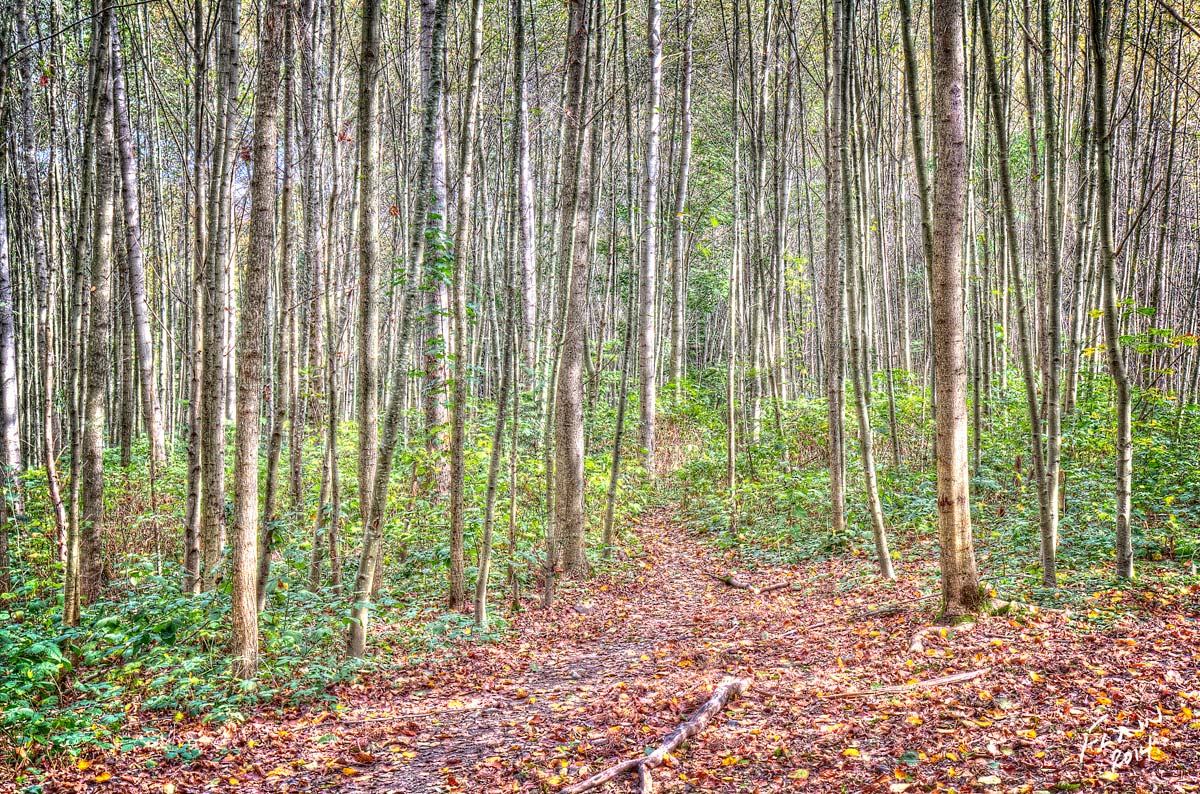

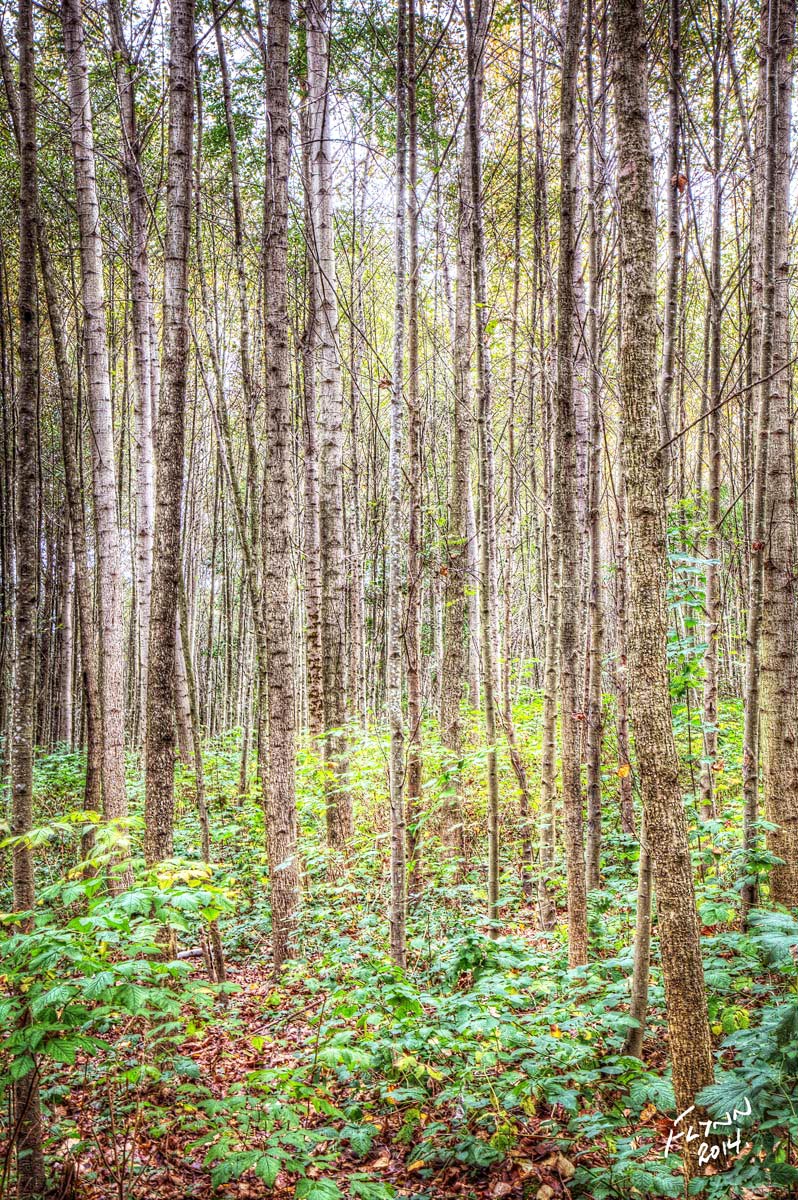
But what about a single image. What if there is no HDR set to develop? Well, there is still a lot you can do. This image to the left is a single exposure. But there is a feature in the HDR software, Photomatix, that you may not know about. You can load any number of images for HDR processing. You can even load a single image. And then you process it in the same way as multiple images. You are restricted in how far you can push things but you can get amazing results as you see here. Try it and prepare to be amazed!
I frequently resort to this feature when I have photos that have great contrast because it can protect highlights while it brings up detail in the shadows. It also has a range of other controls such as contrast, brightness, gamma, saturation arranged in a convenient grouping that you really don’t find anywhere else. And there are useful presets provided for inspiration. Very useful!
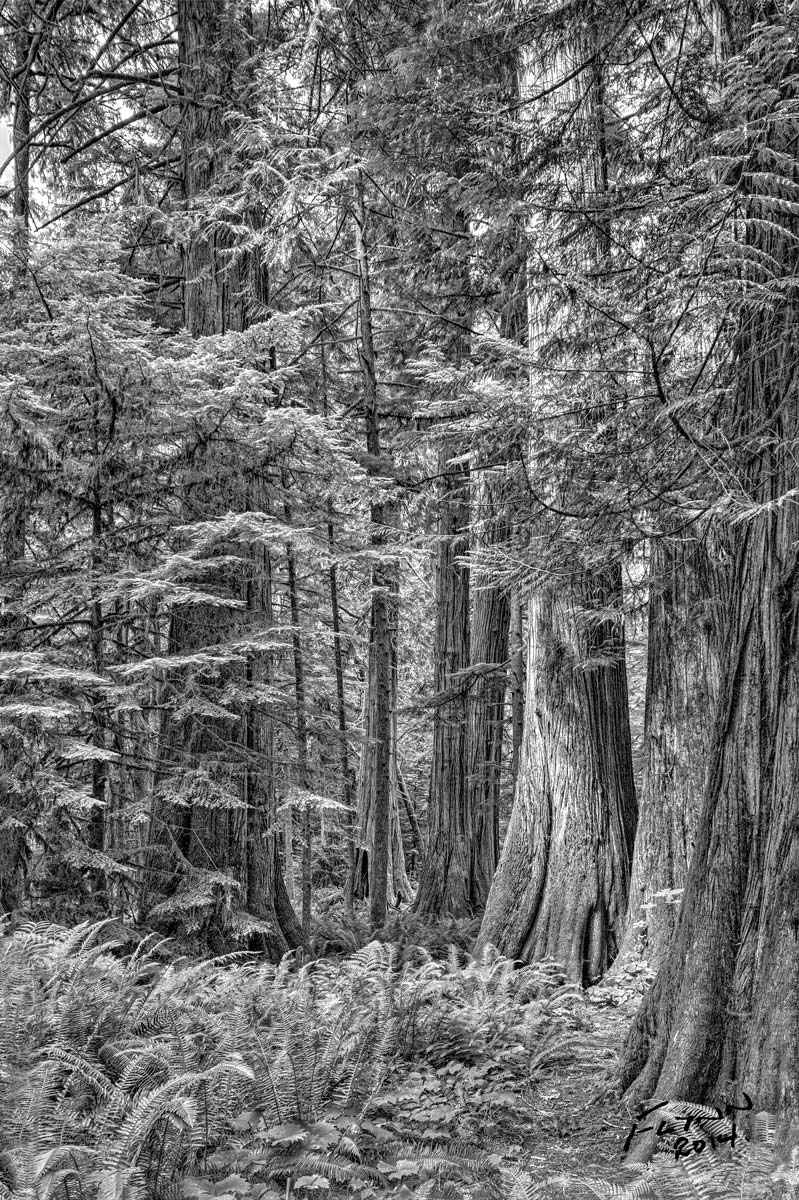
So there we have it for small trees. Not the definitive article to be sure but a beginning. But what about big trees? Well, the problem is like the trees: bigger! Getting the bottoms and the tops in the same picture is impossible unless you are using a really wide lens. So you try to isolate features. Well, sunlight falling in patches can be interesting. And texture is really useful. Just push the sharpness and contrast to make detail stand out of the jumble of detail. A few years ago, when I was still shooting with my Canon XTi Rebel, I took some pictures in Cathedral Grove on Vancouver Island. Now these are really beautiful “old growth” trees. Although I had only 10 megapixel images I went back to see what I could do. These are single images so I played with them in Photomatix and OnOne Perfect Effects. I think the results are interesting.
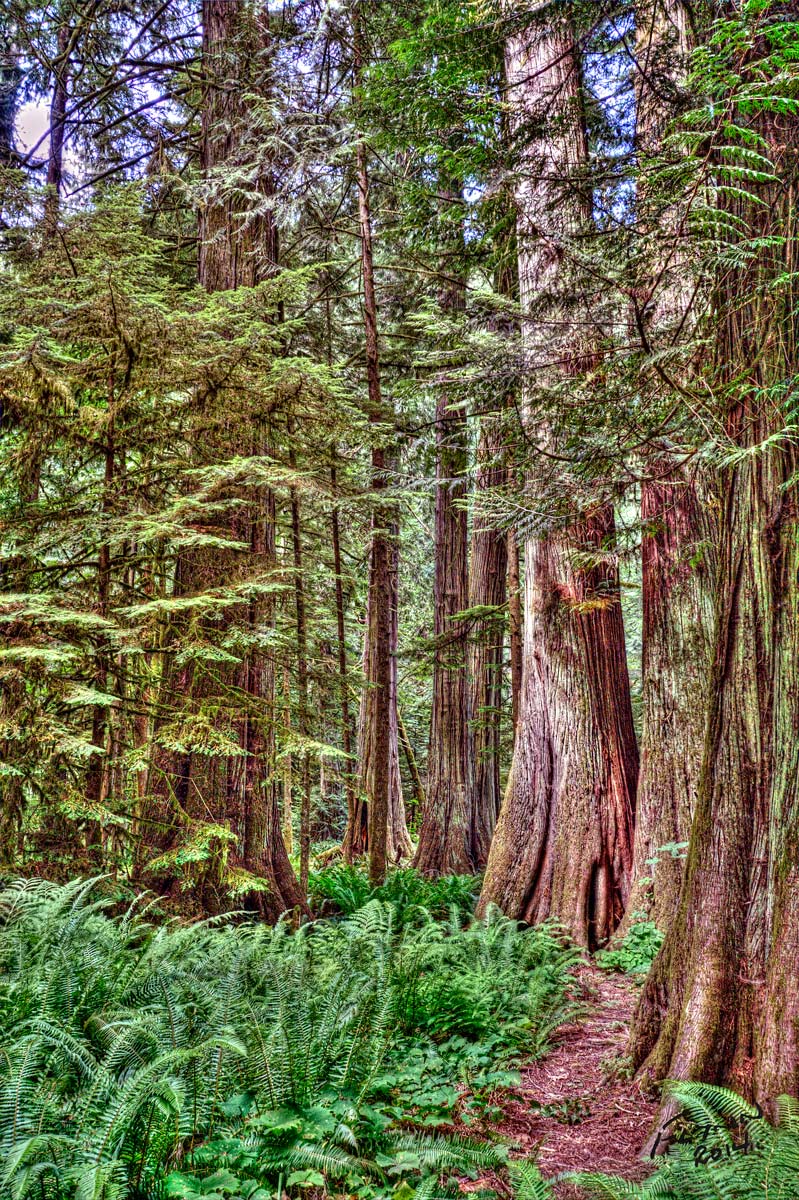
So what is going on here? Well, this was a strange image. I think because the sunlight was filtered down through a green canopy and then reflected off green foliage below the whole color cast was green. This was a problem. I could not get the color balance right in spite of trying.
The picture on the left, with color, was my first solution. I reduced the color overall and then restored it for the green ferns and other foliage on the forest floor. And by emphasizing the color of the ferns and other low foliage I think I was able to separate the floor from the trees. Of course, I pushed the contrast and the sharpness to add crispness to the detail. The color is a little false but overall this image does capture the impact of the scene I felt when I was standing knee deep in it.
Solution number two, the one on the right, came about as I played with the saturation slider. By pushing it all the way to the left I was presented with a black and white image. By really pushing contrast and sharpness the effect becomes much like a steel engraving. It is hard to see the detail in these small images but up close in a large print the surface dissolves into black lines on a white page. It is really very lovely and it looks nothing like a photograph. This is a real tribute to playing with the sliders.
And by the way, that Canon XTi, although an old camera, can take a fine image. I still use it even though I have much better cameras now with many more features. It is a real workhorse. I never feel embarrassed using old equipment like this. I have learned over the years that it is me and not the camera doing the work. And besides, I am not out to impress people with what I can buy. I drive a Porsche for that!
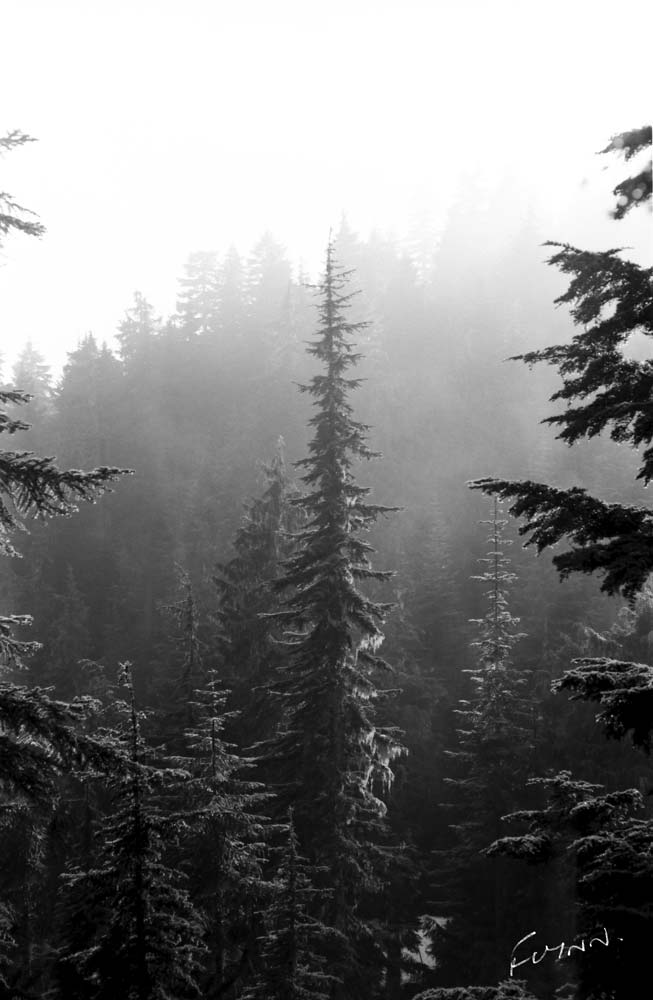
I am reaching back a bit for this picture on the left. It was taken with a Leica M-3 in 1970 and recently scanned to create this image. Here I have been able to find a vantage point where a single tree stood out. It was framed by other trees and the mist in the background provided a separation from similar trees on the hillside beyond. So silhouette works as does isolation and framing.
Before we leave the woods today I want to look at one more image. Actually I could look at pictures of trees all day but I know we all have other things to do.
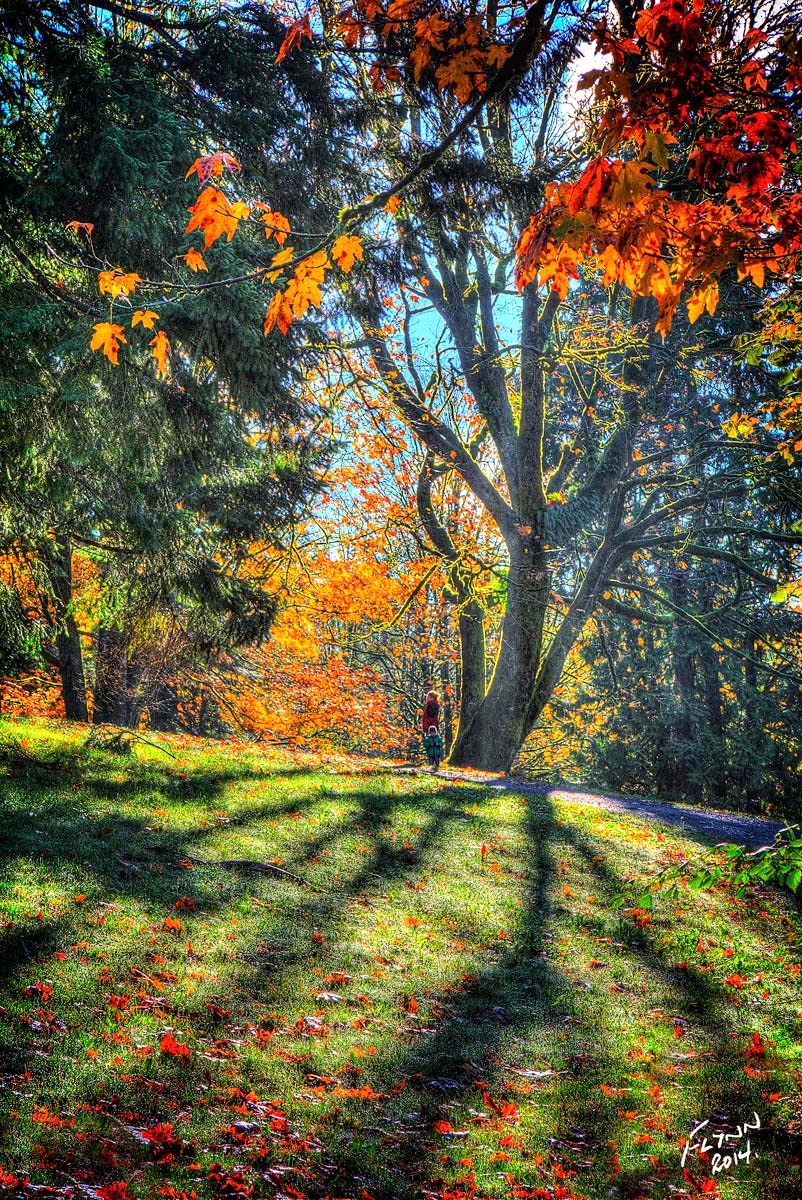
We have a park near my home, a different one from the one mentioned above, on the top of a local hill we affectionately call a ‘mountain’. In truth it is nothing so grand. I went up there one morning this fall on my way to work simply because it was such a wonderful morning and I thought I might find a few pictures. I did!
Trees are wonderful subjects for backlighting because they throw wonderful shadows and the semi transparent leaves glow like Christmas tree lights. And again, framing is never out of place. Put something around the edges that pushes attention to the main subject in the center. It not only focuses attention but it gives depth to the image.
So there you have Flynn’s easy steps to good tree photography. But, enough rambling on this topic. There is probably nothing instructive here but I do like to hear myself write!