Light Metering in DSLR Cameras
Flynn Marr 27 October 2025
Before we start, please understand that this subject involves advanced knowledge of optics and electronics which I don’t have so what follows here is a layman’s summary only.
Through the Lens (TTL) metering for Canon began with the Pellix camera in
Three developments made possible the more sophisticated light metering found in DSLR’s. The first was the introduction of the Silicon (Si) Photo Cell (SPC) which offered several advantages over the CdS Cell. They were small, very sensitive in low light, had a low “dark current” which meant a low drain on their battery, responded rapidly to changes in illumination, and were sensitive to a wide range of wavelengths. The SPC was basically a diode junction that allowed current to pass in proportion to the light falling on it. Canon’s first use of the SPC was in the EF camera of 1973.
The second development was the use of Integrated Circuits (IC’s) in cameras which began in 1976 with the introduction of the AE-1, the first camera in the world to make use an IC to control camera operation. Discrete transistors, resistor and capacitors were too bulky to allow for automation in the camera. However, once the miniturization possible with IC’s allowed true computing power to be built into the camera the way was open to more sophisticated light metering.
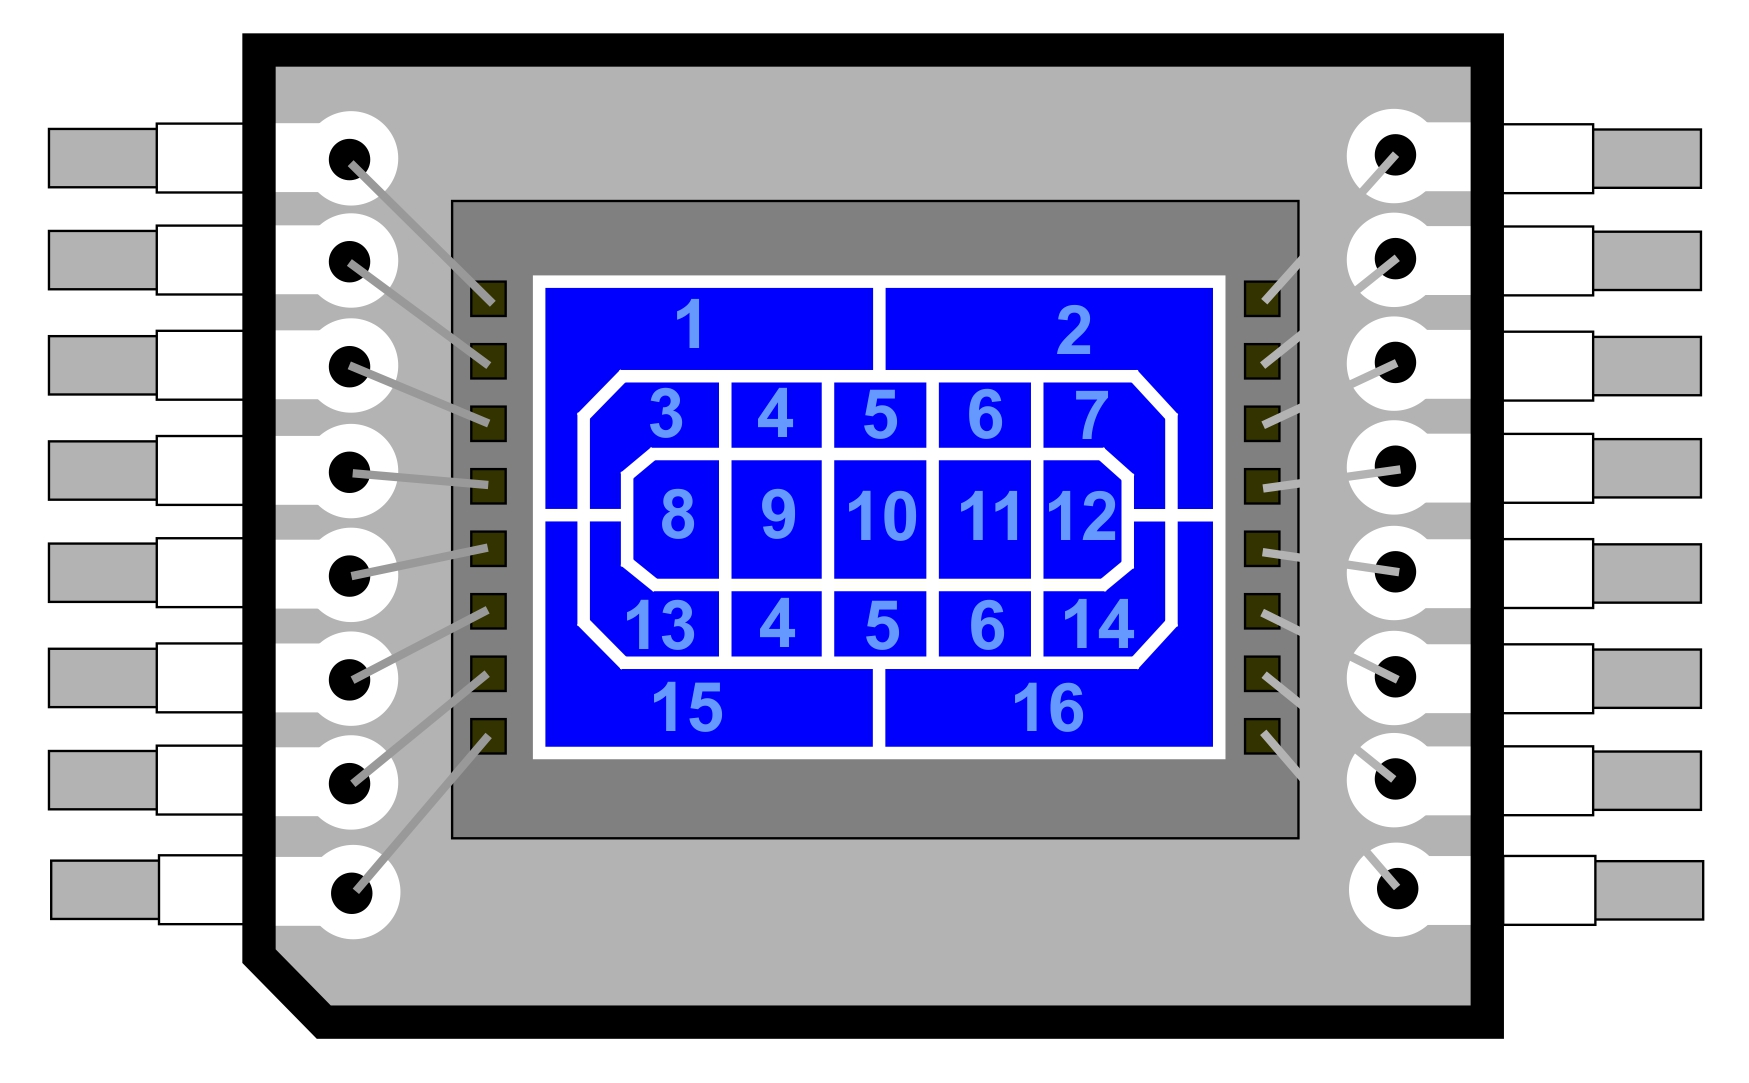
This is a representative diagram of a Silicon 16 Zone Metering sensor. The image falling on this sensor could be sampled by taking readings from individual sectors of the sensor. (The numbers are for reference here but they do not exist on the actual sensor chip.)
As different models were introduced
Metering Sensors have changed over the years to extend sensitivity to a wider range of colors and to increase the pixel count in each zone into the hundreds of thousands. The metering sensors have become very much like the image sensors except with fewer pixels. The resolution of the metering sensor has become sufficient for them to be used for face and other object recognition tasks.
Canon quickly settled on four metering patterns that have been consistently used across their DSLR models for two decades. Canon’s symbols for these Metering Modes have been consistent across almost all of the Digitals SLR’s appearing in the User Manuals and on the LCD Screens and Menus of the cameras themselves.

Evaluative Metering
For general purpose photography this is the recommended setting. All sectors are sampled and then based on the cameras analysis of brightness, contrast, distance, and Focus Points the camera choses the best exposure parameters.

Center Weighted Average Metering

Partial Metering
Note that the more Sectors there are the more accurate the selective amplification can be and the more finely adjustable that 6.2% is.

Spot Metering
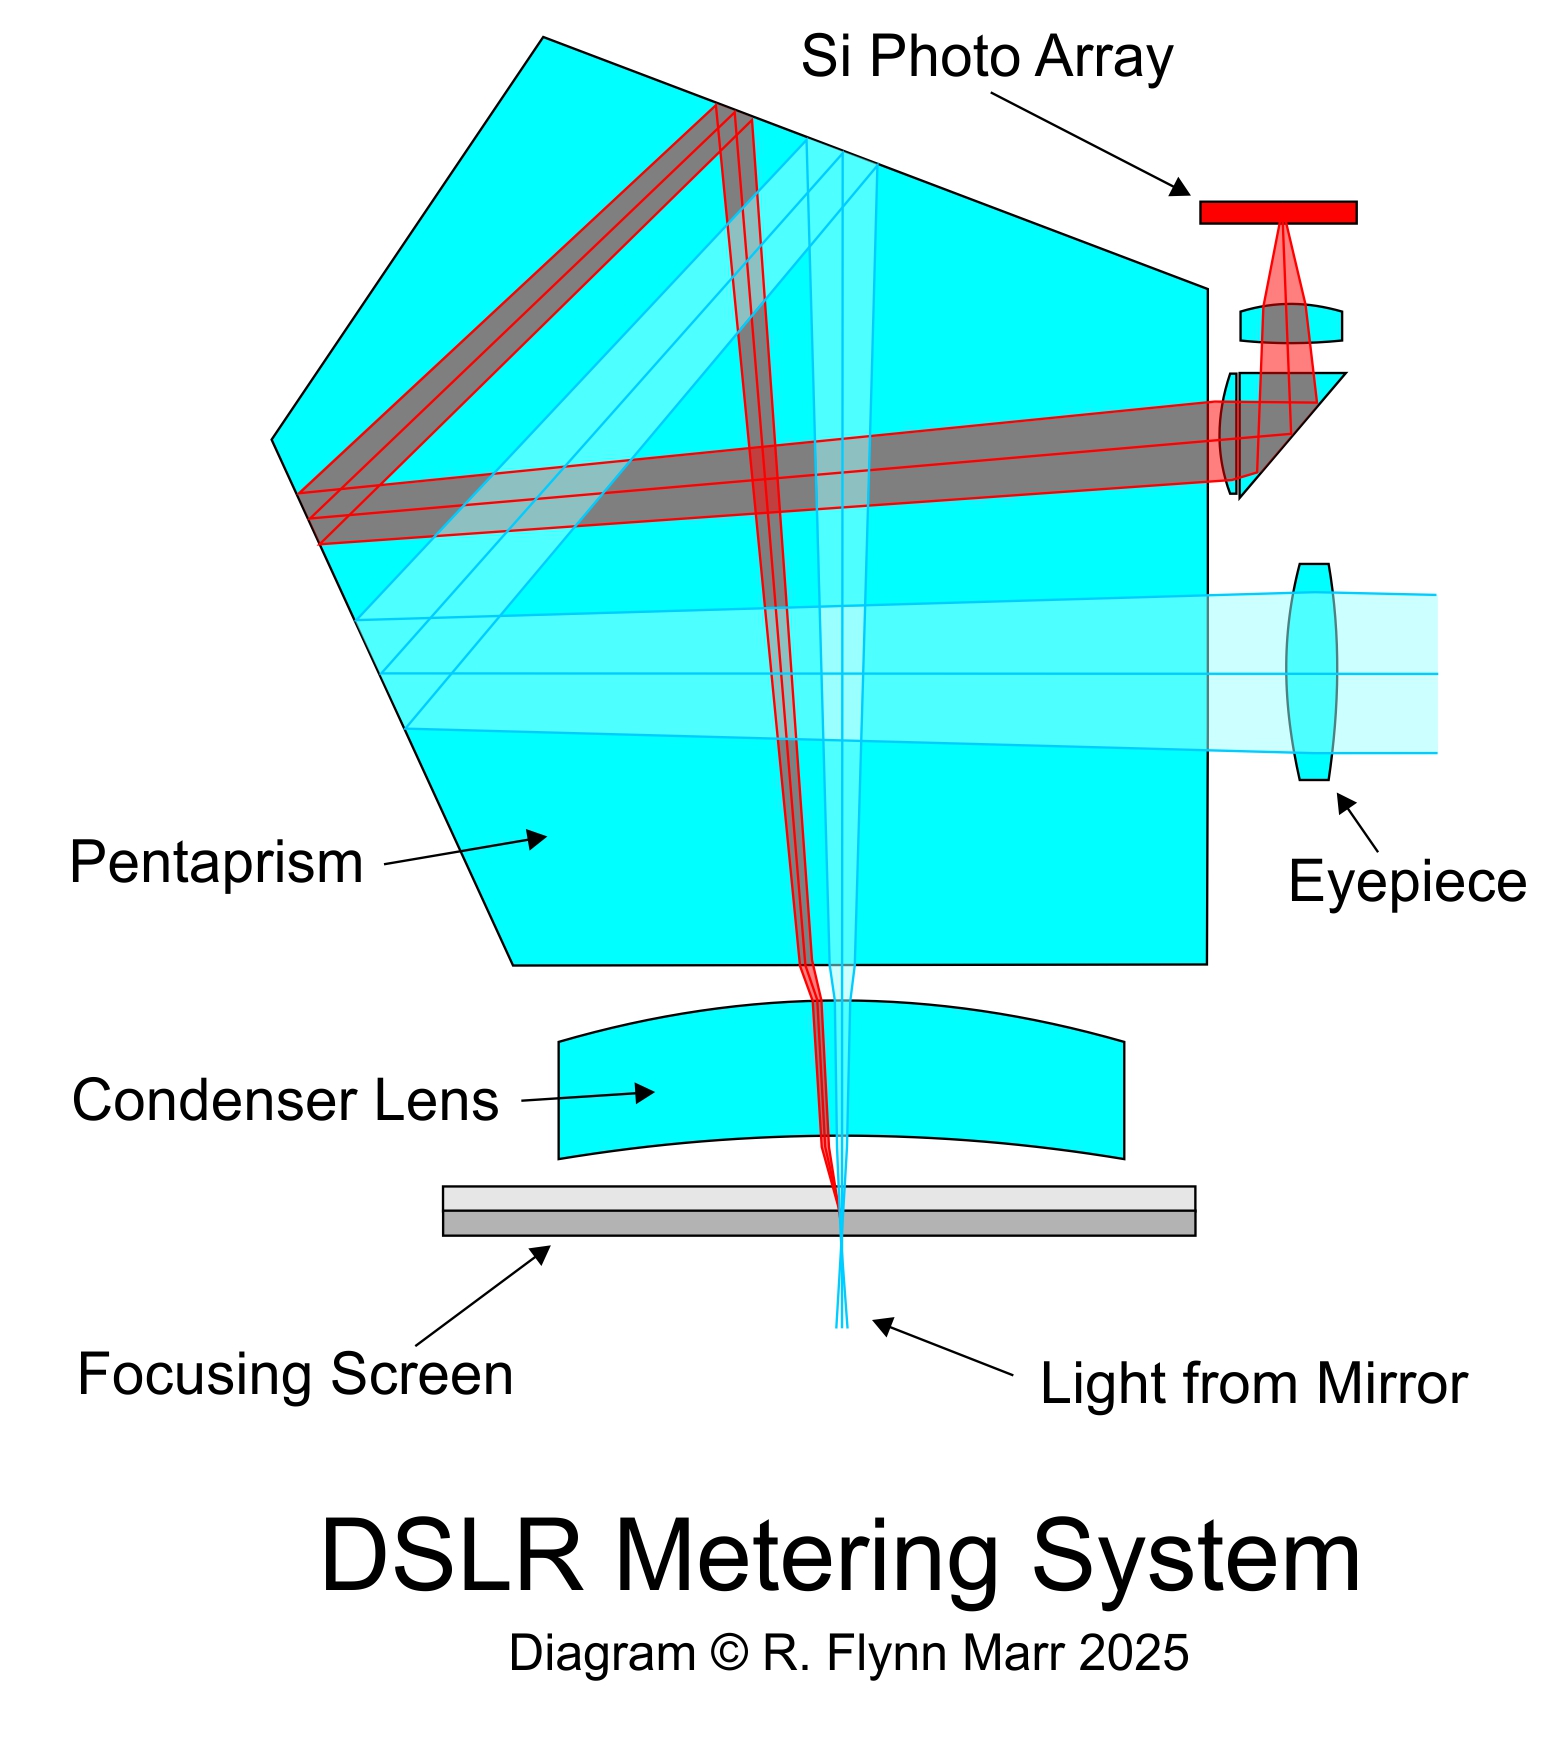
But physically, how was the Metering Sensor illuminated? That is an interesting piece of mechanical optical engineering as well. First, we need a diagram.
The Focusing Screen is actually a sandwich of optical layers which are glued together. One of these layers has a pattern of optical wedges impressed into it which manage to divert a small portion of the incident light into a slightly different path which is shown in red on our diagram. This sends a complete copy of the image to a separate prism and lens combination above the eyepiece where it falls on the Silicon Photo Cell.
The amount of light diverted is not large because the SPC is sensitive and the output signal is amplified when received.
Another system you will see used has a semi transparent main mirror with a secondary mirror behind it which diverts a copy of the image onto the SPC which is located in the bottom of the mirror box. During exposure the secondary mirror folds up against the main mirror as it lifts up and out of the way. The degree of transmission through the main mirror is controlled by the amount of silvering deposited on it.
Some photographers don’t like the “in camera” meters and insist on using their hand held meters instead. This is a perfectly workable choice but it does require a greater undersanding of the light and shadow encountered in a scene. And the extra piece of equipment is annoying.
I do recommend to any one intending to take the best pictures they can to study all aspects of their camera including the built in light meter and learn how to expose for maximum light and shadow detail. The only way to do this and understand it is to take pictures and then study what you get. Over time you build up a second sense about your camera and how to use it for best effect.
This website is the work of R. Flynn Marr who is solely responsible for its contents which are subject to his claim of copyright. User Manuals, Brochures and Advertising Materials of Canon and other manufacturers available on this site are subject to the copyright claims and are the property of Canon and other manufacturers and they are offered here for personal use only. Use of this website is governed by the Terms of Service set out on the page by that name.

The True North Strong and Free

