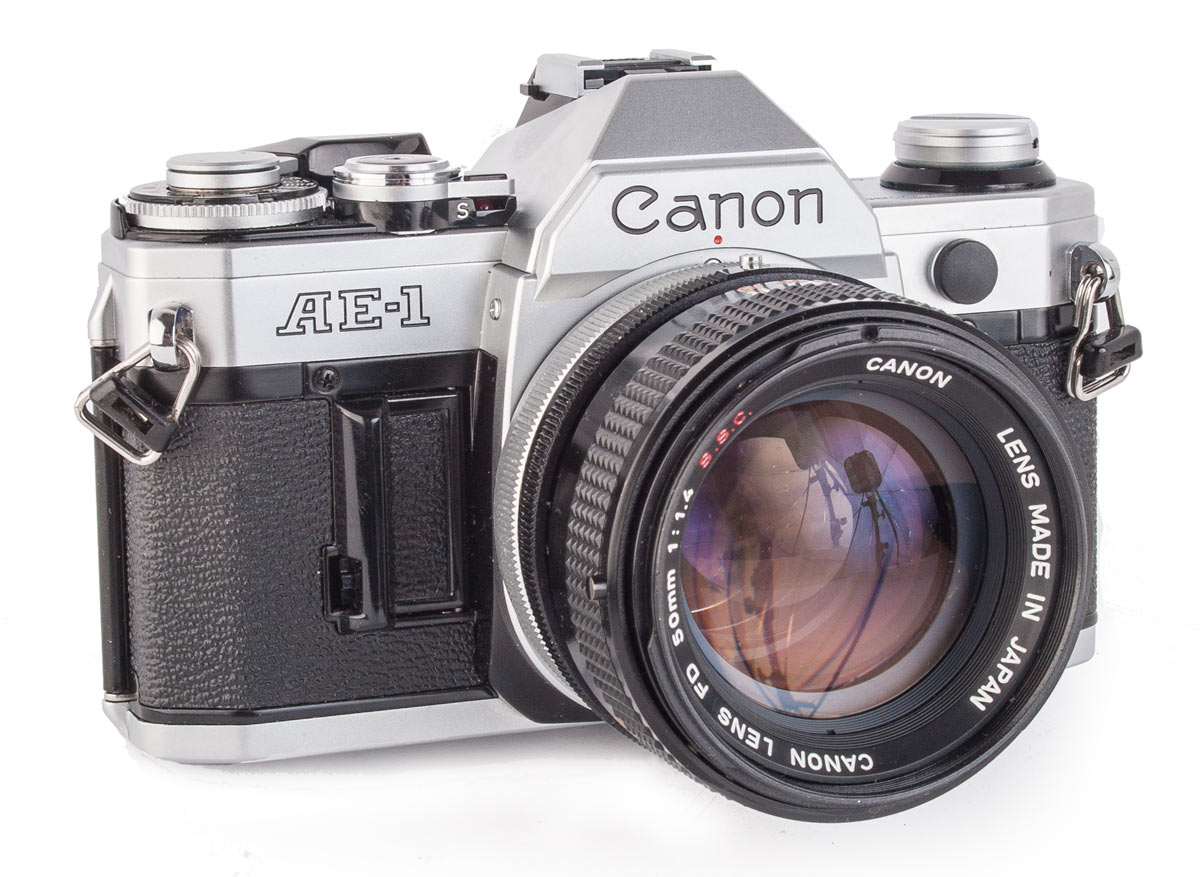
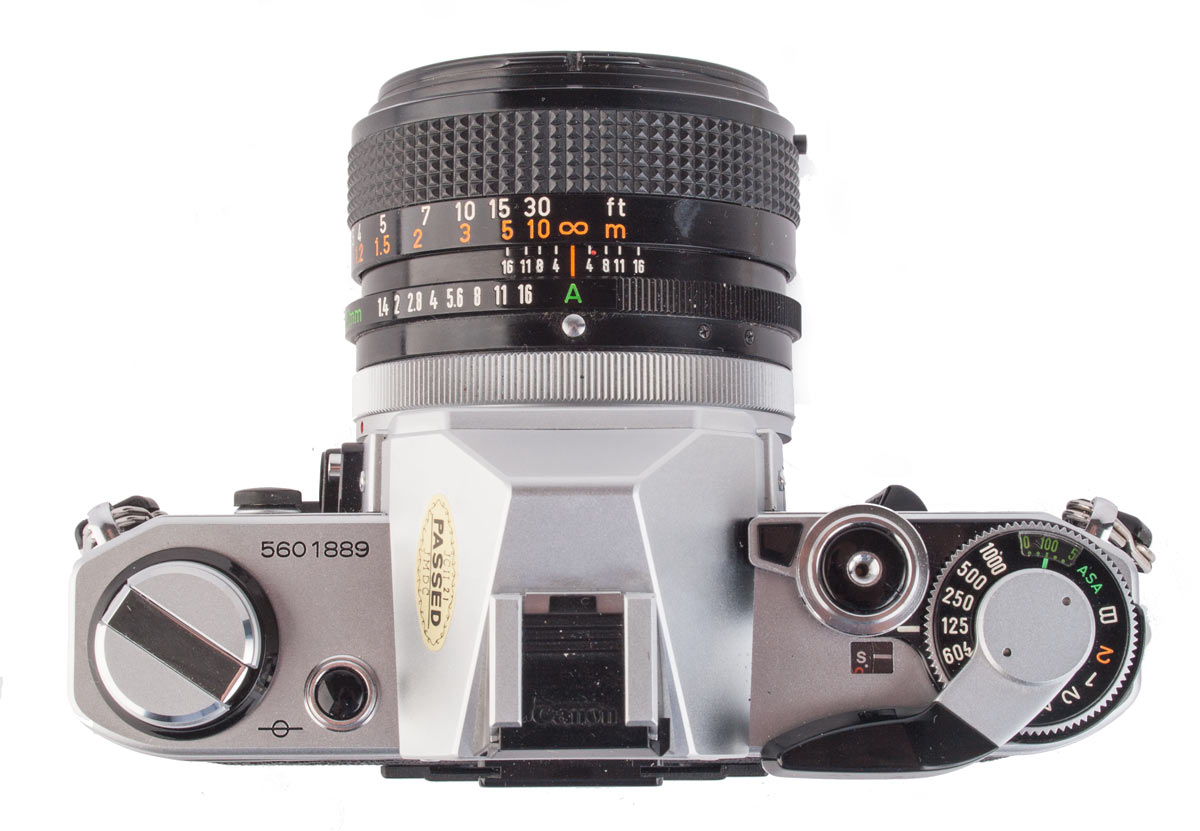
The AE-1 with an FDn 50mm f/1.8 “nifty fifty”. The FDn lenses were introduced in 1979, three years after the introduction of the AE-1 but they performed flawlessly on the camera.
To the right of the lens mount on the silver top plate is the PC Socket for flash sync with its cover in place. On the left of the lens mount is the battery compartment door which is damaged in the upper left corner. These doors are often found in a damaged state.
The AE-1
the first microprocessor equipped SLR
At the beginning of the 1970’s the SLR camera was the choice of professionals and advanced amateurs but the average consumer did not want to put out the money to buy these high end cameras with features they would never use. He was content with the less expensive but fully automatic Canon Demi and Canonet cameras and others in the “point-and-shoot” class. They were more convenient and cost effective for the few pictures that most people took.
The SLR camera market was competitive and relatively saturated but the mass consumer market was largely untapped. The SLR’s at this time were mostly manual cameras with built in light meters that operated on a “match needle” exposure system. Very few higher end SLR’s offered fully automatic exposure and those that did were really expensive.
In 1971 Canon introduced their F-1 and FTb cameras but it was becoming obvious that their F series cameras were beginning to look dated compared to the competition. Fuji introduced their ST701 in 1970, a smaller lighter SLR that proved very popular. At the 1972 Photokina show in Cologne, Germany, Olympus introduced their M-1, quickly renamed the OM-1. It was a full featured manual
camera that was smaller, lighter and quieter than other SLR’s of the day and it too proved to be popular.
While the new, and smaller, cameras were very popular Canon’s SLR’s were large, the shutters were noisy, and they were heavy. The pressure from the SLR competition and the untapped mass market led Canon to create in 1974 a team to develop a new camera that would be cheaper, smaller and fully automatic but that would outperform compact cameras and allow users to upgrade with additional lenses and accessories if they wished. The goal for this project included making a smaller full featured fully automatic camera that would be offered at a price that would make inroads into the untapped mass market.
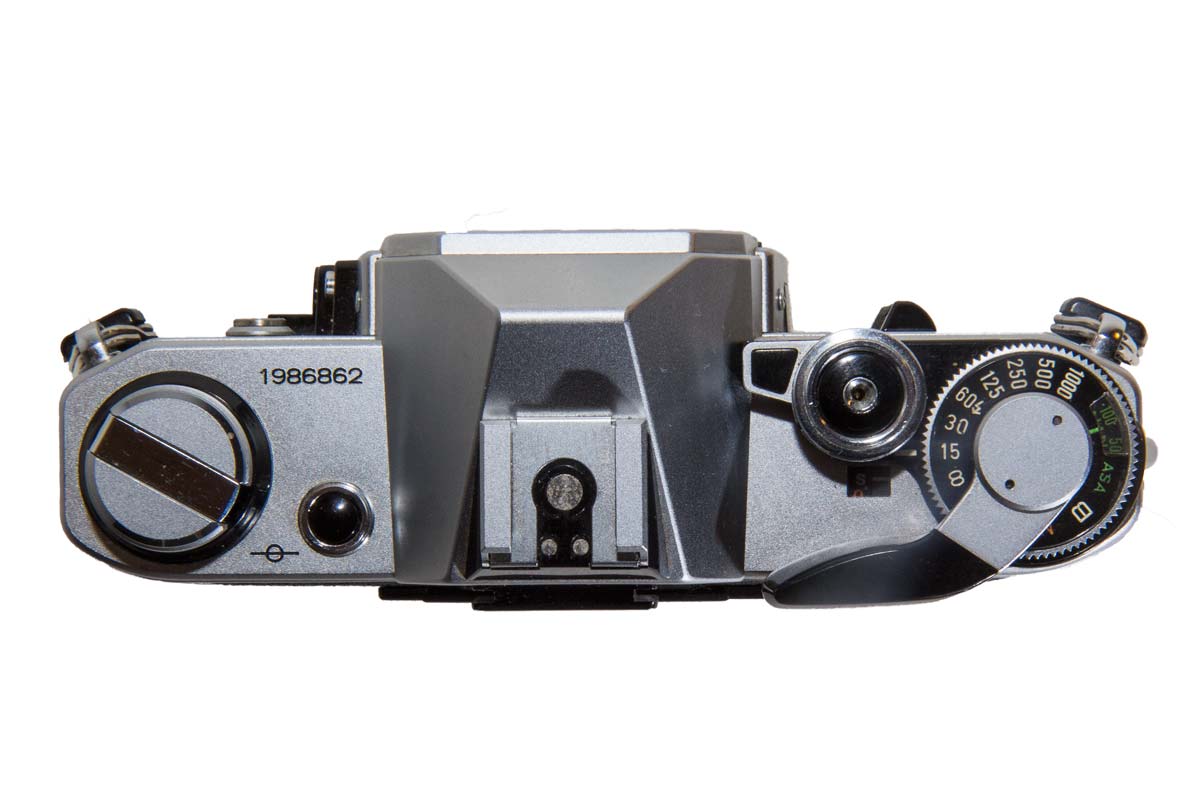
The top deck of the AE-1 appears to be a standard layout. The small black button to the left of the eyepiece is the battery test. The tab on the collar around the shutter button moves to lock the shutter, ready the camera to fire or to activate the self timer position.
The Newsletter
Yes, we have a Newsetter that we send out every …. whenever we have something to say. We won’t try to sell you stuff, we won’t give your e-mail to anyone else, and we won’t clutter your mailbox. The best part is that you can cancel at any time.
Keeping costs down meant simplifying the design, less expensive materials and simpler assembly methods to control labor costs. One of the decisions the Canon design team made to simplify assembly and keep weight down was to incorporate plastic into the construction of the camera. Plastic is cheap and it can be molded into complex shapes easily. The bottom plate of the new camera was the traditional stamped brass and the body frame was molded and machined from a light metal alloy. However, the top deck of the camera was a dense plastic, although most people never knew that. It was injection molded was then plated with layers of a metal compound and then finished in the same chrome treatment that the brass bottom received. The top deck was a complex shape that could be made very cheaply and yet retain the classic finish. The brass and the plastic parts were indistinguishable.
Inside the camera use was made of plastic gears and other parts that were easy to make and which made the camera lighter. When first introduced there was much criticism of the use of plastic parts but the 50 years since the introduction of the AE-1 has proven the design to be sound. There are lots of AE-1’s around that still work flawlessly. Those that did fail did not do so because of the use of plastic.
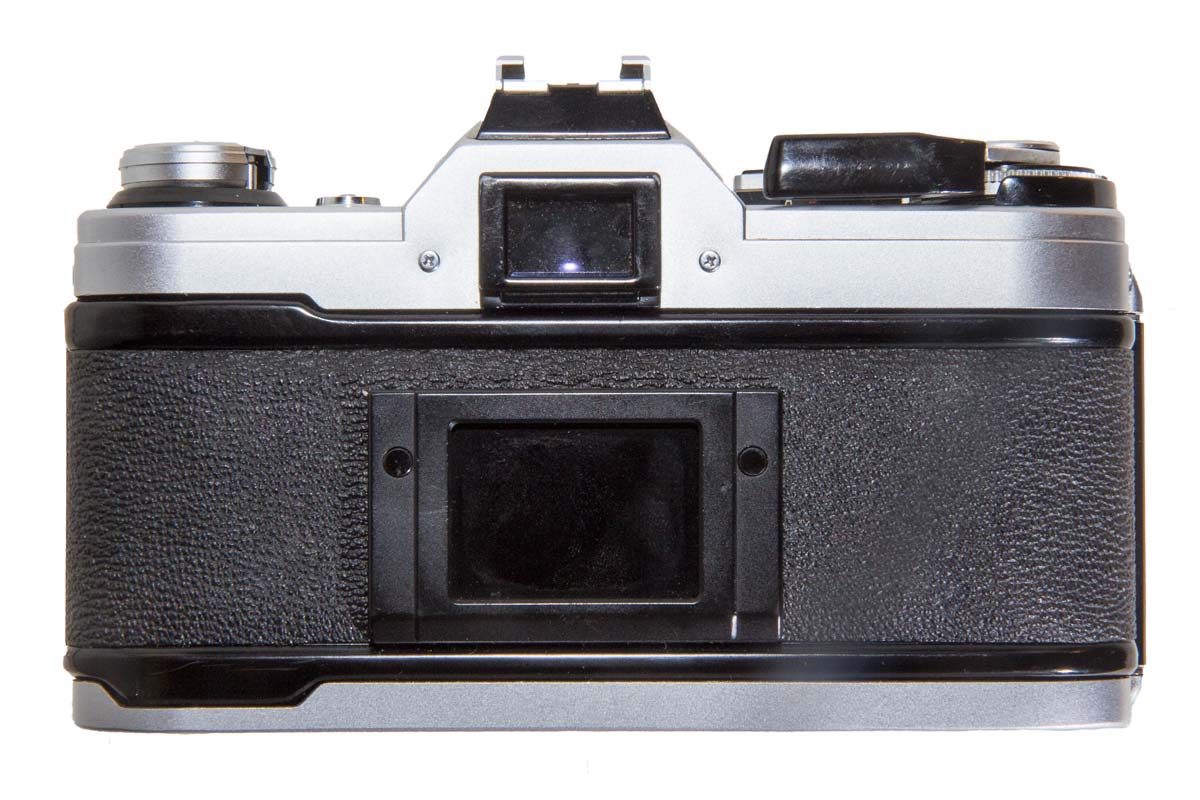
The back of the camera with the holder for the top of the film box could be removed from the camera by retracting the top hinge pin with your finger nail on the side of the pin. This allowed installation of the Data Back A which was developed for the AE-1.
There are one lever and two buttons on the left side of the lens mount. The first, on the left in the picture, is the Stop Down Lever, the round black button is the Exposure Preview Switch and the small silver button on the right is the Back Light Controll Switch.
The back opens by pulling the rewind crank up and it must remain up to load the film. Once open the camera looks like any other F Series camera without the QL device. It is not visible here but the top hinge pin on the back can be retracted and the back removed to allow installation of a Data Back for imprinting information on the edge of the film when a picture is taken.
At the time the design of the AE-1 was being worked out Canon’s business division was working with Texas Instruments to develop business calculators using microprocessors and so the company engineers were familiar with integrated circuits which were just coming into wide spread use. They went ahead with a camera design using a microprocessor to control many of its features. The AE-1 was the first camera to incorporate an integrated circuit into the camera’s operation. By doing this Canon says that they were able to eliminate about 300 mechanical parts from the camera making it cheaper and easier to assemble.
All of the camera timing functions were controlled electrically through the microprocessor. It was mounted on a flexible printed circuit which was wrapped over the top of the pentaprism under the top cover. This small
computer controlled the shutter, horizontally travelling fabric curtains, through the use of solenoids which eliminated any mechanical connection between the shutter button and the shutter mechanism. For this reason the AE-1 will not work without a battery.
Since timing was now electronic it was possible to do away with the clock work mechanisms that controlled longer shutter speeds and the self-timer meaning that the camera could be made smaller. In the new camera the only clockwork mechanism was the Mirror Damper used to soften the mirror movement.
When you remove the top deck of the camera this is what you find. In the center is the flexible printed circuit that wraps over the top of the pentaprism. The white circular object to the left of center is the light meter’s galvanometer.
On the right side of the pentaprism you can see the integrated circuit wired into the flexible circuit board. Notice the amount of descrete components soldered onto the board. This is very primitive by today’s standards but it was a beginning.
Remove the bottom and you find this. Left of center in the plastic cover is one of the three selinoids that control the shutter. Another is visible to the left of center attached to the red wire.
Years before the introduction of the AE-1, when Canon came out with the FD lens mount and lenses, they had anticipated fully automatic exposure and FD lenses had an automatic setting indicated, on early lenses, by a green “o” on the Preset Aperture Ring, and on later versions by a green “A”. They offered fully automatic exposure on the F-1 but that was an expensive professional camera. Other manufacturers offered the same in their high end cameras.
The AE-1 was to be aimed at entry level users but Canon wanted a camera with advanced features that was still economically priced. They already had lenses designed for automatic operation, the lens mount was capable of it, and so it was decided that the AE-1 would have fully automatic exposure. In fact, it was intended that the camera be fully automatic with manual operation offered as a backup. It was designed to be a “point and shoot” camera with the option of using it manually or adding lenses and accessories for a more advanced experience.
Introduction of the AE-1
The introduction of the AE-1, AE being the initials of “Automatic Exposure”, in April of 1976 was timed to coincide with the 1976 Olympics in Montreal. Canon had developed an advertising relationship with sporting events and had become the official camera of several events including the Olympics. They even created commemorative cameras such as the F-1 for the Montreal Olympics in 1976, the Lake Placid Olympics in 1980 and the Los Angeles Olympics in 1984.
Canon did not create a commemorative camera for the AE-1 but the Olympics features heavily in its advertising. And there was a commemorative lens cap , shown on the left, which appeared on the AE-1.
Canon began an extensive international advertising campaign with a heavy
emphasis on sports photography and featuring endorsements from prominent sports celebrities. This, combined with the advanced features and amazingly low price, propelled the AE-1 to sales of over 5 million units during its production run from 1976 till 1984. It was the first SLR to achieve sales of one million cameras and eventually it was the best selling SLR of all time.
Features of the AE-1
The AE-1 was offered with either the FD 50mm f/1.4 S.S.C. of the FD 50mm f/1.8 S.C. lenses. Although intended as a fully automatic entry level camera the AE-1 had sophisticated features and abilities and would accept all of Canon’s F Series lenses. When the AE-1 was introduced the FDn lenses were still three years in the future but it worked flawlessly with them. Of course, having no mirror lockup facility, lenses that extended back into the mirror box, such as the FL 19mm f/3.5 cannot mount n the AE-1. FL lenses could also mount on the AE-1 but to use the built in light meter readings had to be taken with the camera stopped down and of course the aperture had to be set by hand.
The shutter was two horizontally travelling cloth curtains timed and controlled electrically. Shutter speeds were 2 seconds to 1/1000th of a second. X and B settings were included and an electronic self timer was activated by pushing the Electronic Self-Timer Lever (located under the shutter button) forward. This revealed a flashing LED to indicate that the timer was engaged.
Flash sync was via a hot shoe on top of the prism housing or the PC Socket on the front of the camera. More about that below.
The viewfinder screen has a round microprism focusing area in the center of the screen with a split image in the middle of that for accurate focus. Along the right edge was an f/stop scale and the meter needle indicated the correct f/stop for the shutter speed chosen. The shutter speed was not indicated in the viewfinder. A flashing red M in the upper right corner indicated the lens was set in manual mode and a flashing red LED in the lower right corner indicated that there was not enough light. At the top of the scale is a two part red area. The lower part is for lenses with a minimum f/16 aperture and the top part is for lenses with a minimum f/22 aperture. If the meter needle is pointing to this area there is too much light for proper exposure.
The light metering system used an SPC (Silicon Photo Cell) mounted just above the eyepiece and sensitivity was averaged over the viewfinder area with emphasis on the center portion. Canon called this Center Weighted Averaging.
The lens could be stopped down to check depth of field and also to allow for stop down metering with the Stopped-Down Lever if one is using FL or Canonflex lenses lenses.
If the user was taking a picture of a backlit subject he could press the Backligth Control Switch which would add one and a half stops to the measured light level.
Finally, the Exposure Preview Switch would activate the light meter even if the shutter button was locked
Film speeds that could be selected were from ISO 25 to 3200 which covered any film the target user would come across. Outside this range films were definitely “special purpose” products.
With the AE-1 the venerable mercury cell was done away with and the camera used a 6 volt alkaline battery such as the 4LR44. Presumably a voltage regulating circuit was employed to compensate for declining voltage as the battery aged.
Mirror lockup was omitted in the AE-1 as was the ability to make double exposures.
Using the AE-1
In preparation for writing this post I loaded film into one of my AE-1 cameras and took it for a walk. I do not understand some of the posts on the internet that express disappointment with this camera. Using the AE-1 is a totally pleasant experience for a film shooter.
Let’s deal with the “plastic issue”. I have handled many hundreds of AE-1 and other A Series cameras over the years in every state of disrepair. The only time I have found broken, dented or worn plastic top decks on these cameras a metal part would have suffered equally.
In the Viewfinder Display the Manual Aperture Control Signal is a flashing red “M” that singals the lens is in Manual Mode. The Under Exposure Warning Lamp lights if there is not enough light to take the picture with the current shutter setting.
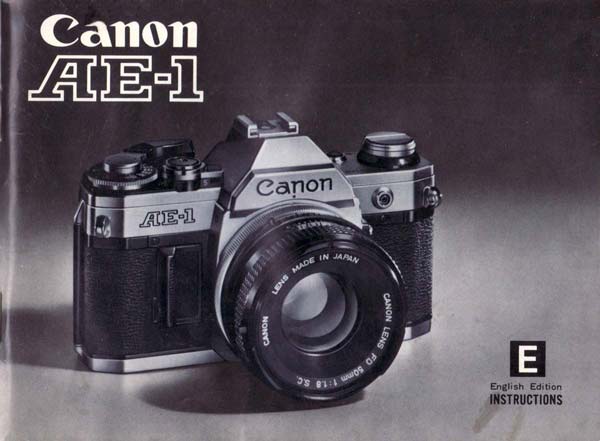
For detailed operating instructions read the booklet that came with the camera. It is full of great information.
These cameras have stood up as well as F Series cameras and their metal tops to heavy use. The use of plastic is simply a non-issue. Those complaining about it like to hear their own voices! Enough said.
For my test roll of film I decided to use the camera as it was intended to be used and I kept the lens set to “A“. This made the shooting so easy. Literally, aim, focus and push the shutter button. There was no hesitation. The camera fired reliably every time. The shutter release was reasonably crisp and did not contribute to any “flinch”.
In preparation for writing this post I loaded film into one of my AE-1 cameras and took it for a walk. I do not understand some of the posts on the internet that express disappointment with this camera. Using the AE-1 is a totally pleasant experience for a film shooter.
When I developed the roll of film, 36 exposures, the negatives were evenly exposed. They were a little dense indicating over exposure but only about a half stop or so. I wonder if the light meter had drifted in the 45 years since the camera was made. Comparing the indicated exposure in the camera with my Sekonic digital meter that too indicated about one half to a full stop of over exposure. However, all of the negatives were acceptable.
The AE-1 is a great film camera. I love it. And if I want to get more creative, I can put any FD lens on it. I can work manually using an external meter and I can add various accessories to get really creative. I just don’t know what’s not to like about this camera.
Because the AE-1 was designed as an entry level camera do not think it is not a sophisticated
camera capable of great photography. It can mount a wide range of Canon accessories like power winder, bellows
units, extension tubes, angles finders, and of course it will accept any of Canon’s FL, FD and FDn lenses and work flawlessly with them.
Flash Photography with the AE-1
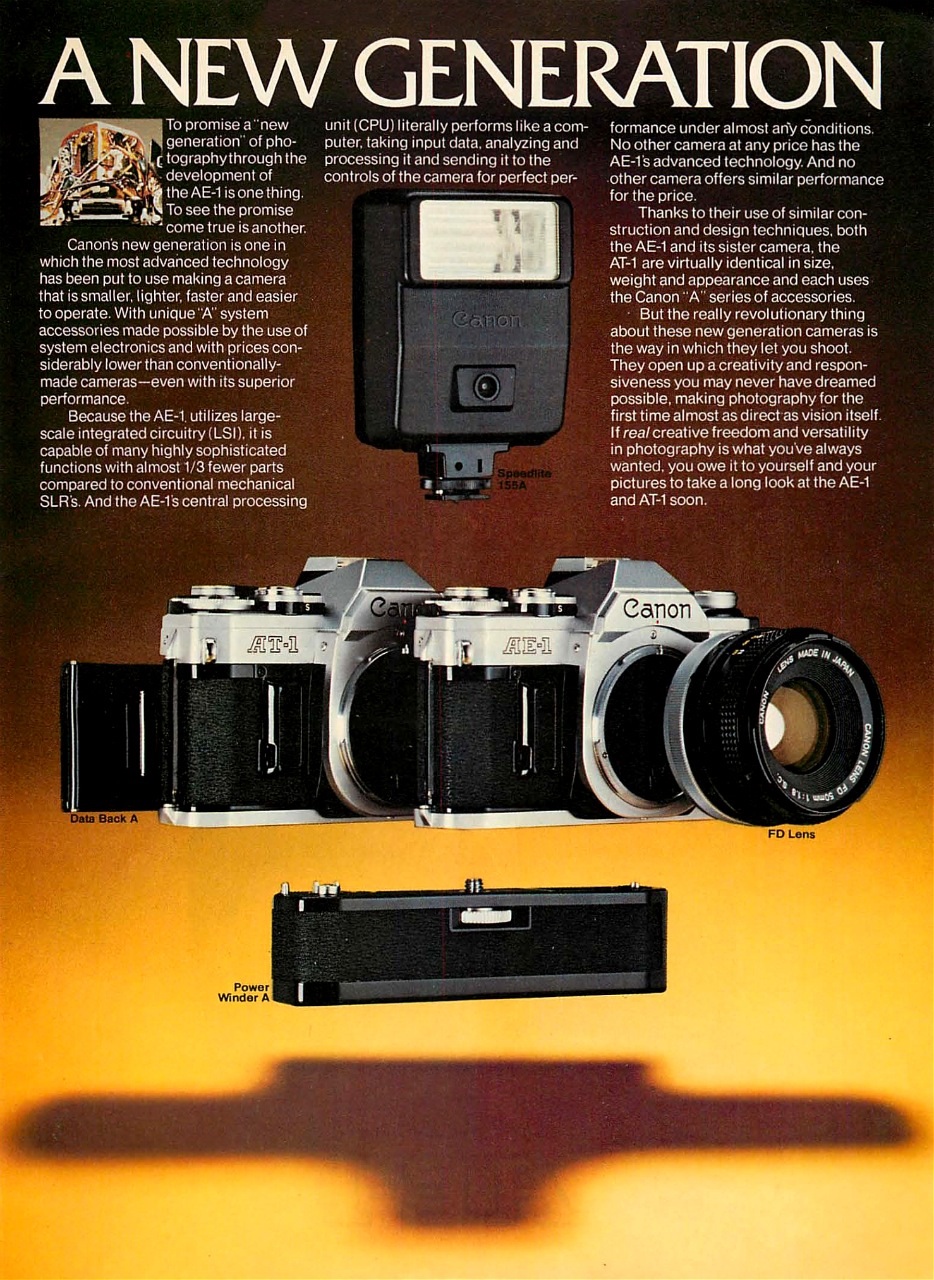
We have to talk about using a flash with the AE-1 because the modern Speedlite sees its beginnings here. The Speedlite 155A was designed specifically for the AE-1 and when used together flash photography was almost totally automatic.
On the front of the Speedlite 155A is a photosensor that measures light reflected back from the subject and when it determines that enough light for proper exposure has fallen on the subject it cuts off the flash.
The 155a can be used in manual mode on most cameras of the time like any other flash. In such a case the Guide Number must be used to determine F-stop. The guide Number is 17 when using meters and 55
in feet at ASA 100. This presupposes fresh batteries and you wait 30 seconds from the time the pilot light comes on for the capacitor
to reach full charge.
On the AE-1 the 155A automatically sets the shutter speed to
1/60th of a second if the red pilot light is on and, if the FD lens
is set to the Automatic “A” setting sets the f/stop to one of two
of the selected values. On the back of the Speedlite is a
calculator dial. One sets the ASA value of the film and selects
one of two f/stops based on distance to the subject. From that
point on the Speedlite and camera work together to give you the
correct exposure.
The Speedlite 199A was also made to function on the AE-1 but it
was a little more sophisticated. Check out the operation of these
two flash units in the Manual for the AE-1 at Page 59 and have a
look at the Instructions for the 155A for a more detailed
examination of that Speedlite
The AE-1 can function very well with older style flash units,
even those using flash bulbs, but the camera has to be operated manually and using the flash unit Guide Number. The flash sync
can be used either through the Hot Shoe or in the PC Socket on
the front of the camera. Two flash units can be triggered
simultaneously if one is plugged into the PC Socket and the
other into the Hot Shoe. The 155A can be turned off but left on
the camera and the camera will function in AE mode as if it
were not there.
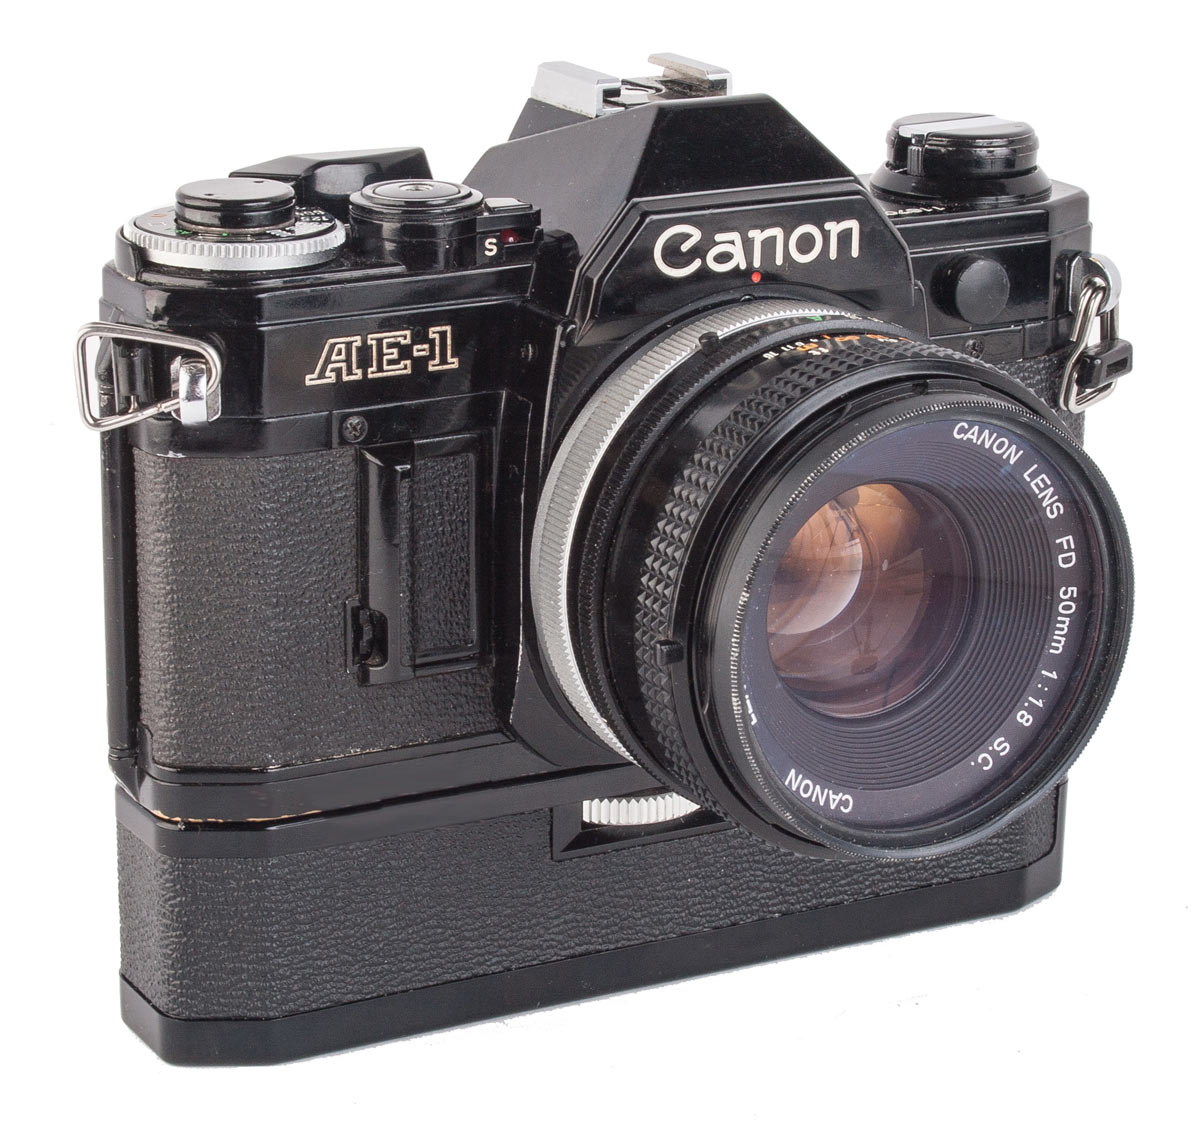
A small number of AE-1’s were released in an all black finish. These cameras were identical to their “silver” counterparts. This camera is shown with the Canon Auto Winder “A”. which gives you automatic film advance after each exposure. However, it does not offer auto rewind.
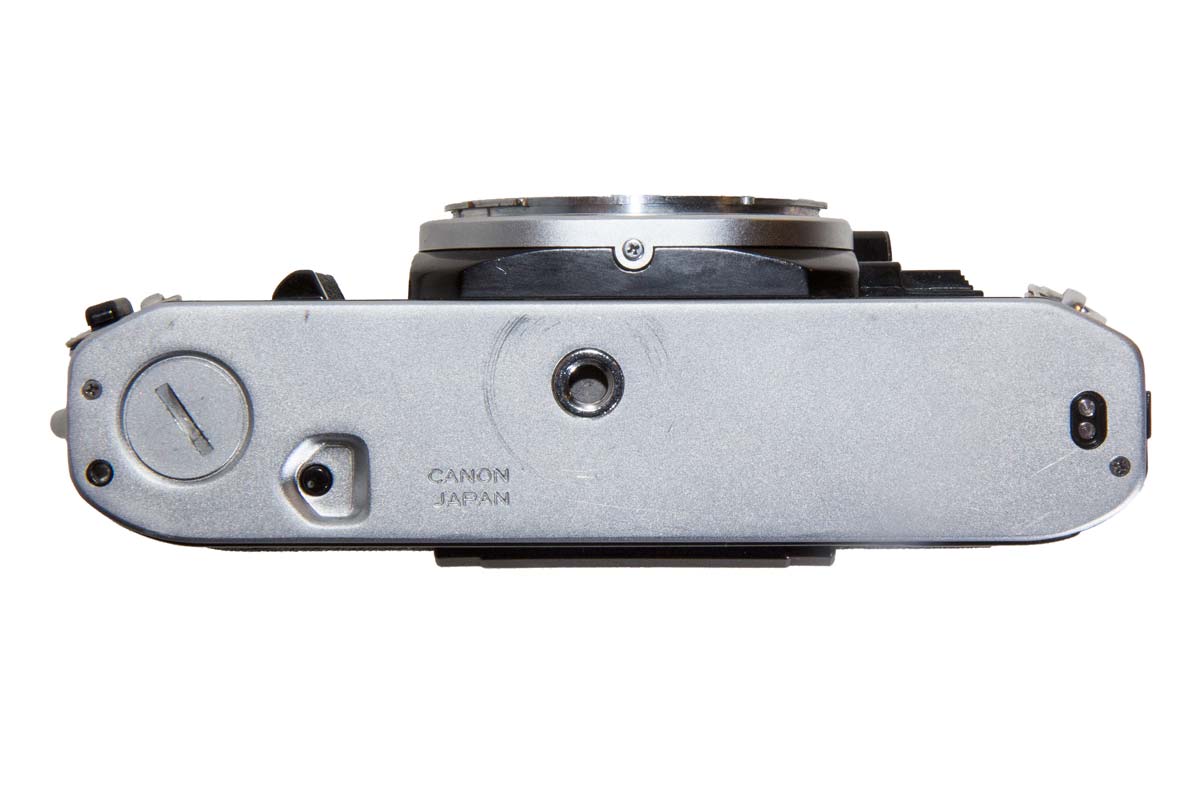
On the bottom of the AE-1 is a screw in cover. Remove it an you have the Power Coupler that the Power Winder A connects to to advance the film.
The back on the AE-1 could be easily removed by retracting one of the hinge pins. The Data Back A was a replacement back that connected to the camera via the PC Socket on the from of the top deck. It drew its power from its own 6 volt battery to imprint dates and characters on the edge of the film.
AE-1 Variations
The most obvious variation on the AE-1 was the balck version. As Canon did with many other models, the AE-1 was available in an all black finish which was very attractive. This camera was in all respects a regular AE-1 except for the color.
I have found no other commemorative issues of the AE-1 although the Olympics were cited in its advertising and there were F-1 Olympic commemorative issues. You will find AE-1’s with Olympic commemorative lens caps but these were made in large numbers and not related to any particular camera.
AE-1 Accessories
Any accessory that attached via the lens mount would work with the AE-1. This included such devices as the Bellows FL or Auto Bellows. Any of the accessories for the “F” Series that connected to the eyepiece worked on the AE-1.
The Camera Holders F-3 and F-4 appear to have been made for the AE-1 and the rest of the A Series. These were useful in holding the camera rock solid on a tripod or copy stand.
There were two accessories discussed in the AE-1 Instruction Manual that originated with this camera but were compatible with later A Series cameras.
The Power Winder A
The first we should mention is the Power Winder A. This compact little winder used four AA batteries to advance the film every time after the shutter was fired. If the shutter button was held down the camera with Power Winder would continue taking pictures at a rate of about two frames per second as long as the shutter button was depressed.
On the bottom of the camera was a small round cover that screwed out to expose the Power Coupler that the Winder A engaged with to advance the film. This simple device proved very popular.
The Data Back A
The second accessory created for the AE-1 was the Data Back A which was a removable back that connected to the camera through the PC Socket on the left front panel. With this back installed the user could imprint the date and other alpha numeric characters on the edge of the negative. The Data Back had its own 6 volt battery for power and was triggered by the shutter through the PC Socket.
And in Conclusion …..
So, considering all of the above, does the AE-1 seem to be an entry level camera? It had an entry level price and it was easy to use. But if the user wanted to dig deeper into photography, this was the camera to have. The lenses and accessories available made the camera almost professional grade. You could not change the focusing screens or prism finders and you could not lock the lens up. Otherwise, this camera compared well with the New F-1 and it did so for a lot less money.
The experience in the decades since this camera was introduced has shown Canon’s design decisions were sound. The big takeaway was that naysayers were wrong about the plastic not being durable. It has stood up as well as metal and it has certainly been less subject to dents. The electronics have proven sound as well. There are lots of AE-1’s available on the collector market that still function just fine.
The AE-1 has been a great camera and it still is for the beginner or the more serious film shooter.