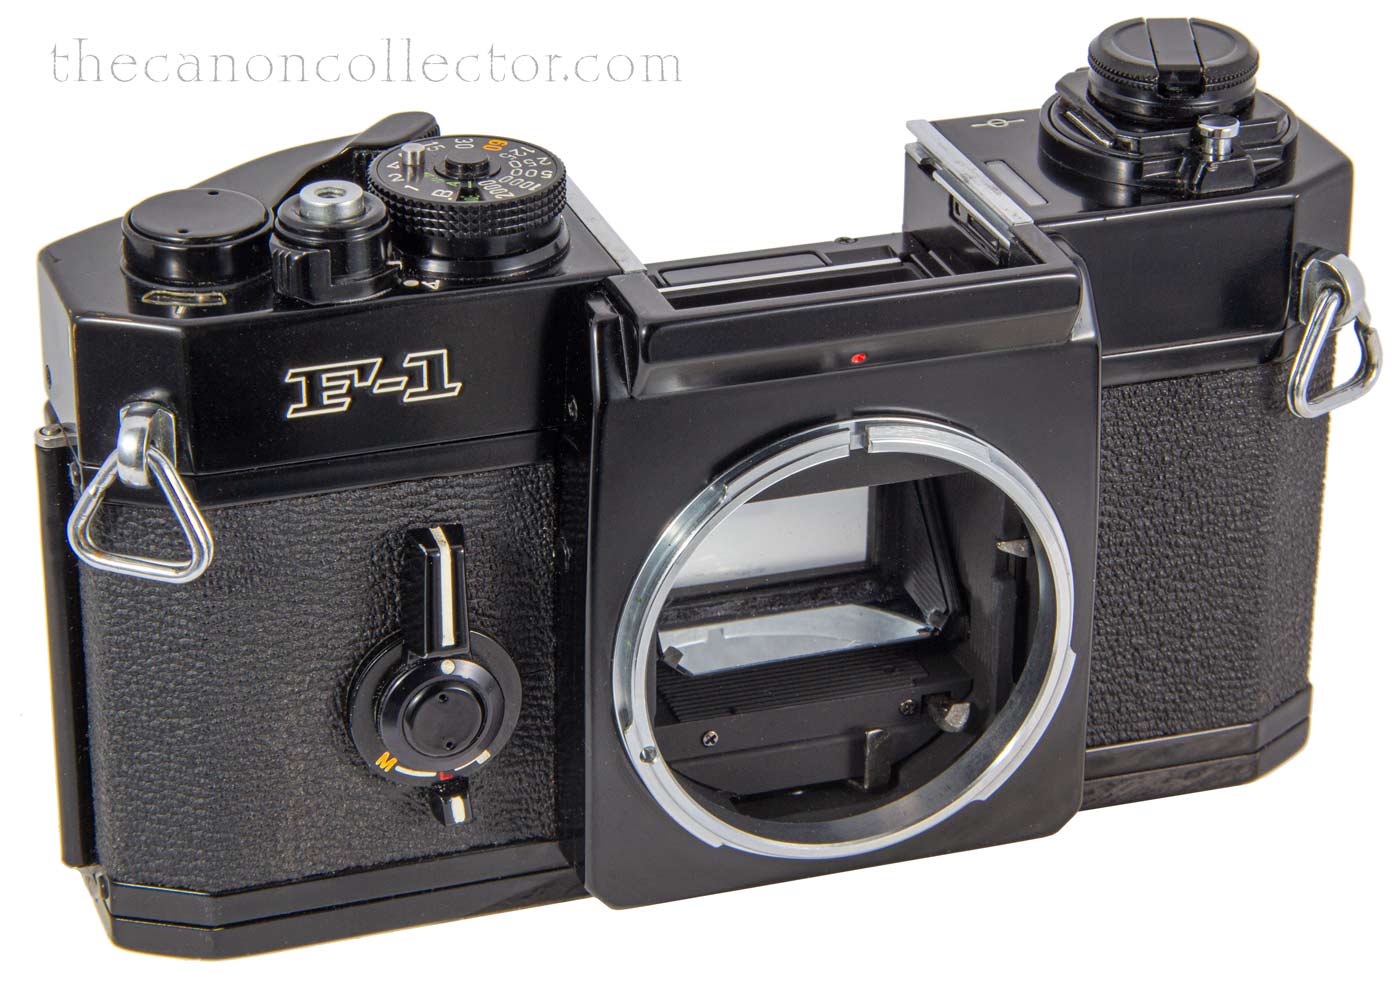
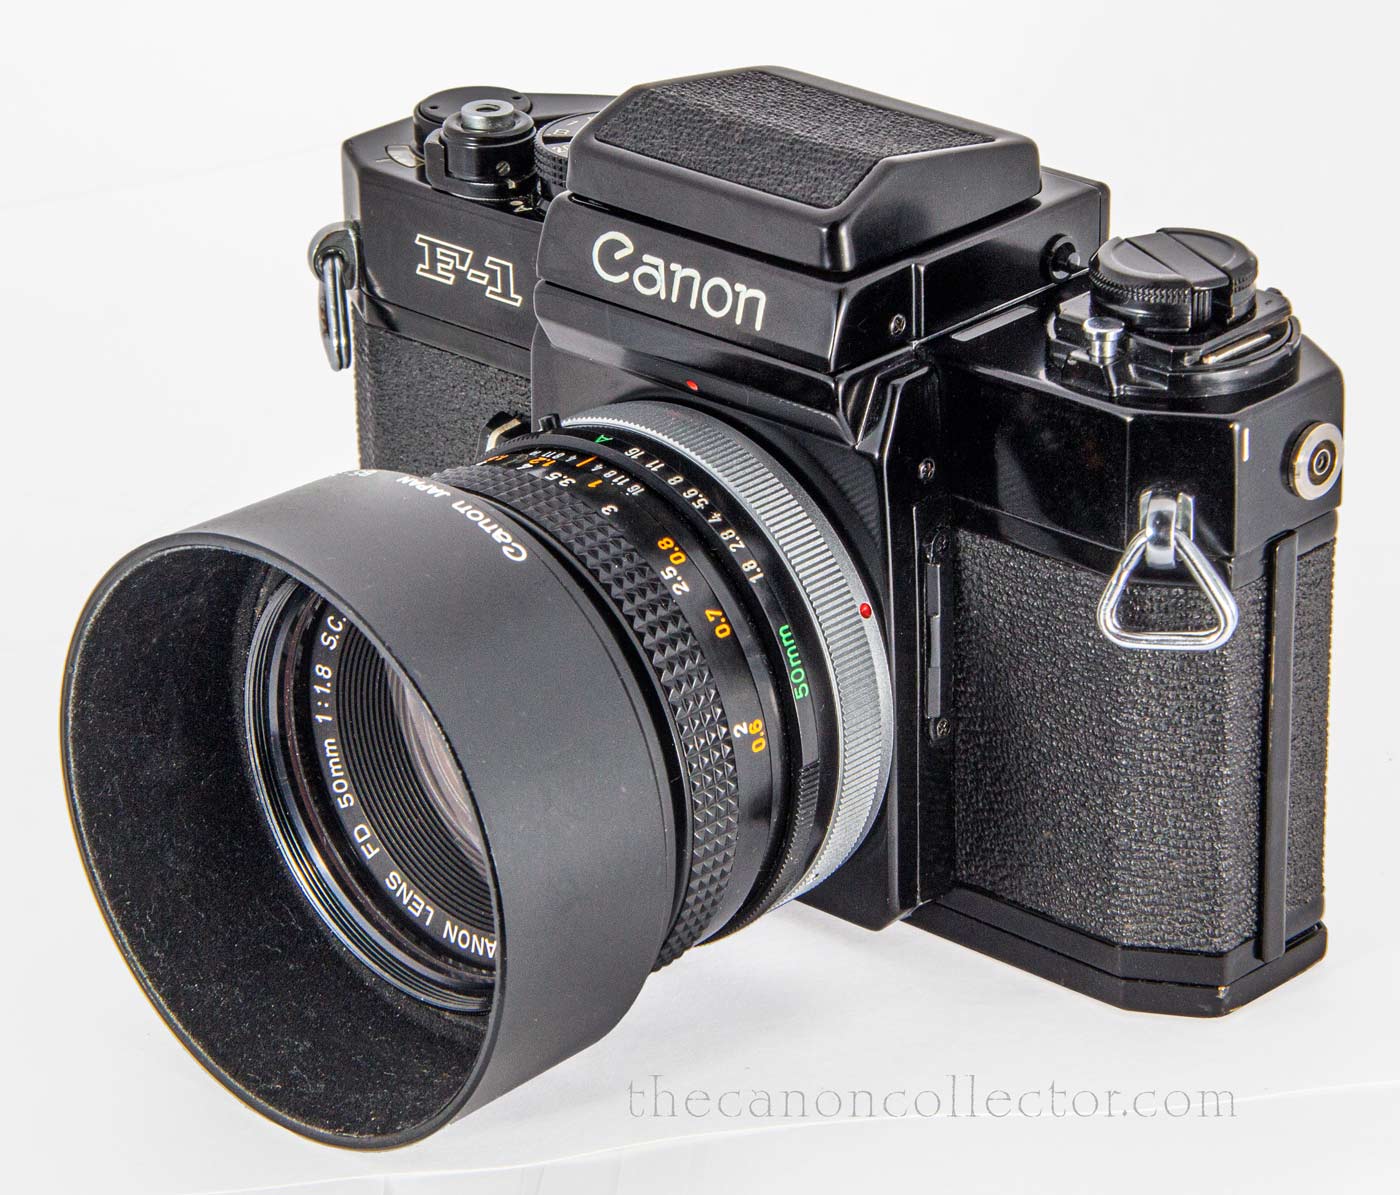
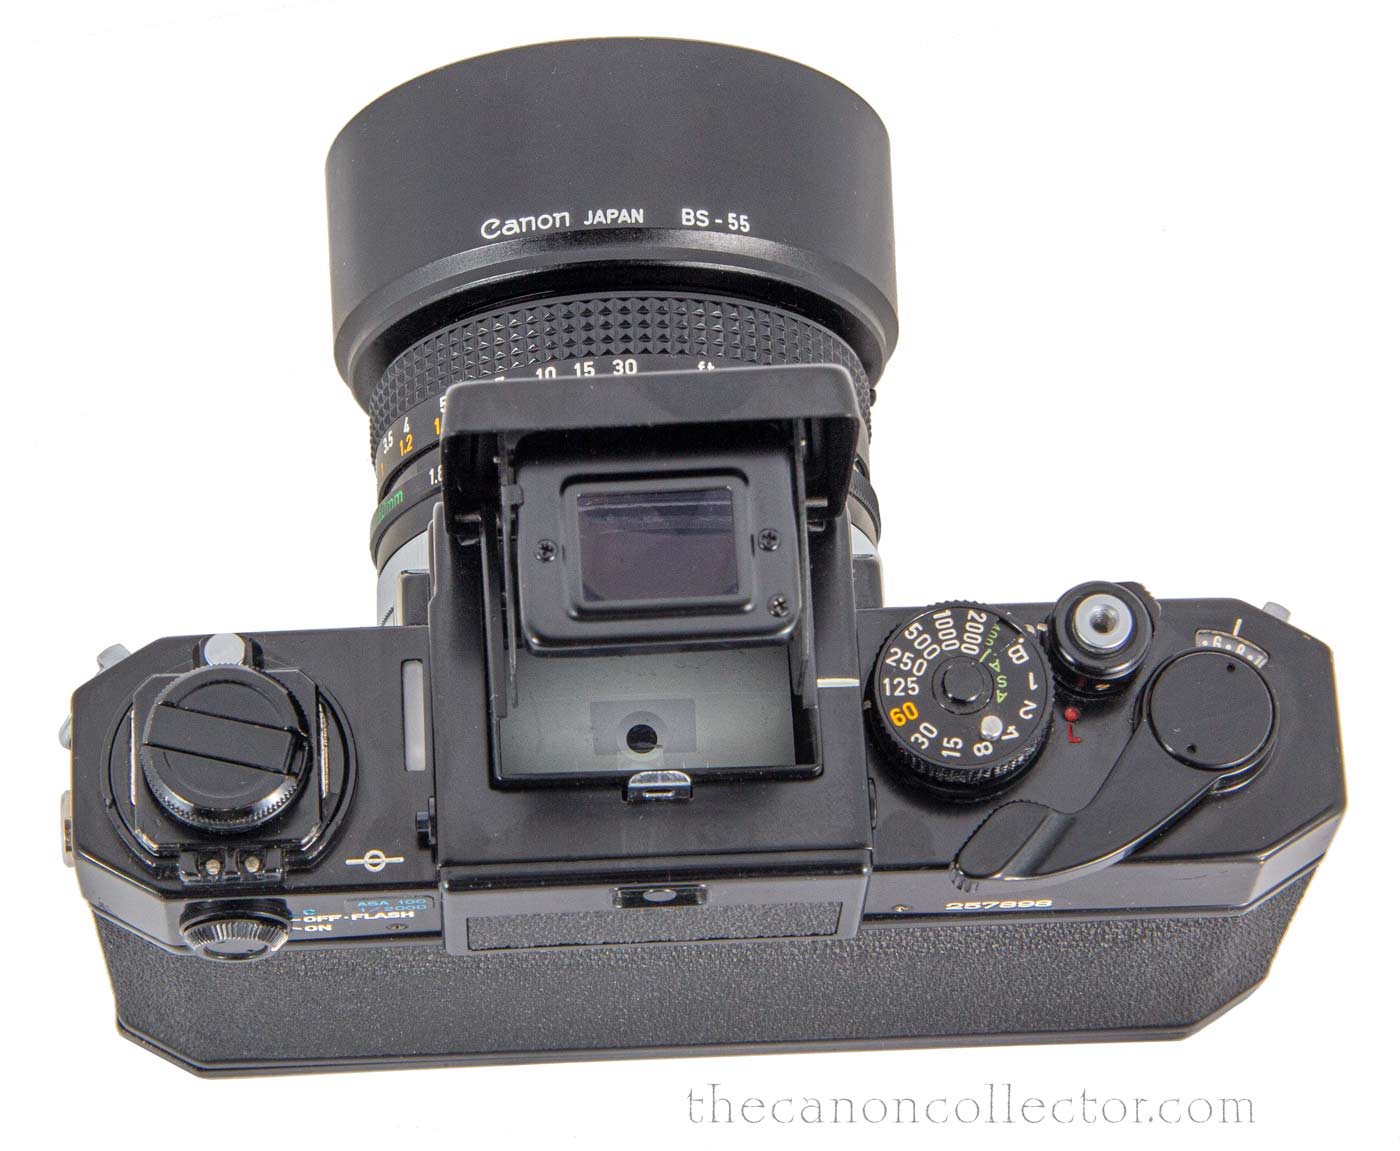
The Viewfinder can be removed from the F-1 exposing the interchangable focusing screen. It can still be used in this condition but stray light may spoil the image.
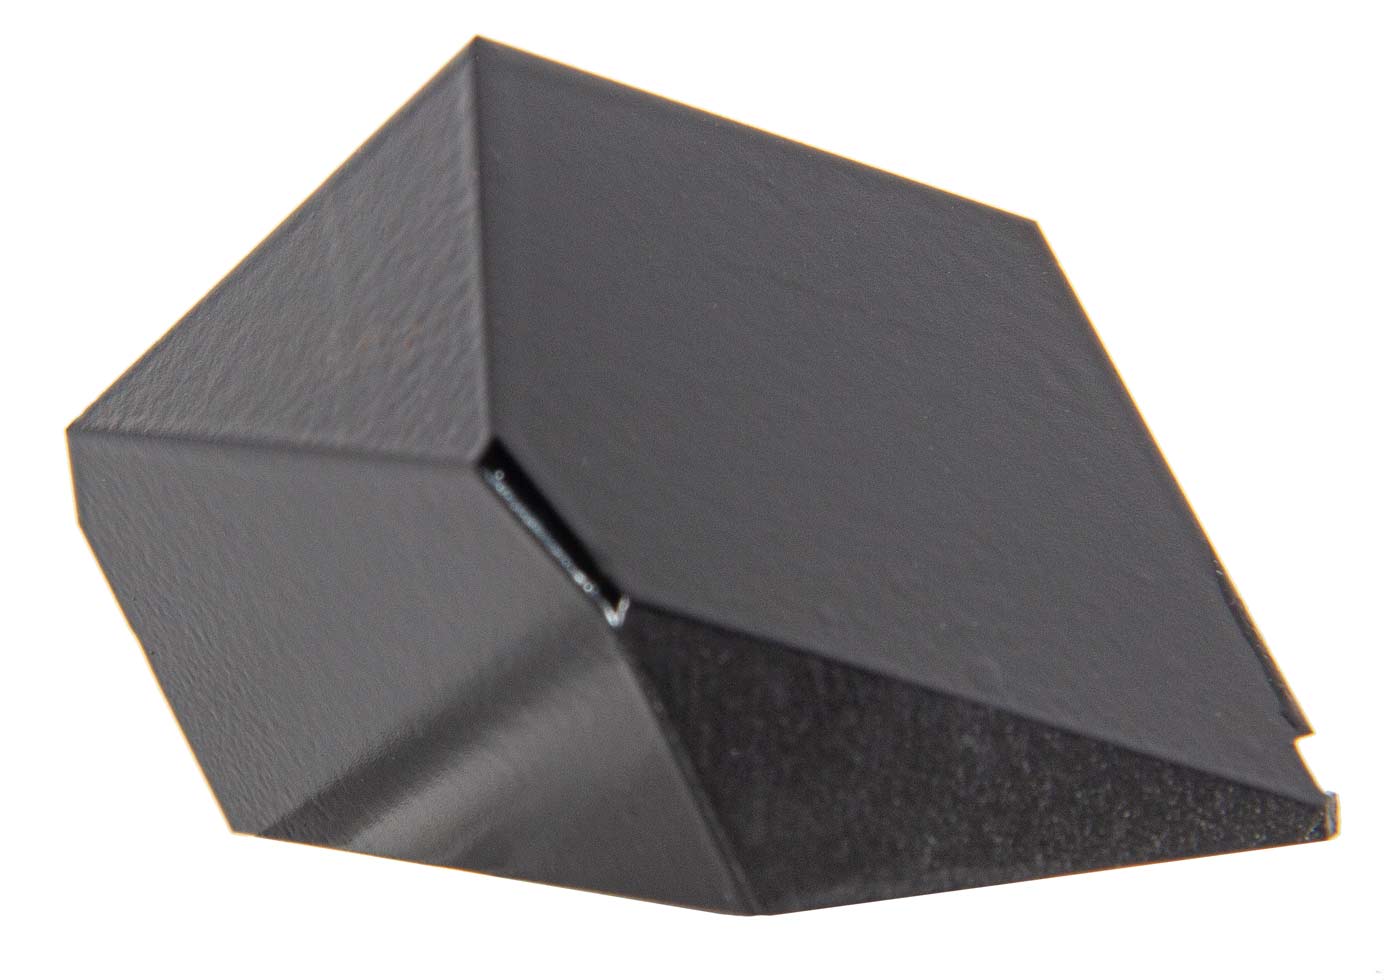
Penta-prism from a Canon SLR viewed from the Left Front and showing the silvered and painted surfaces.
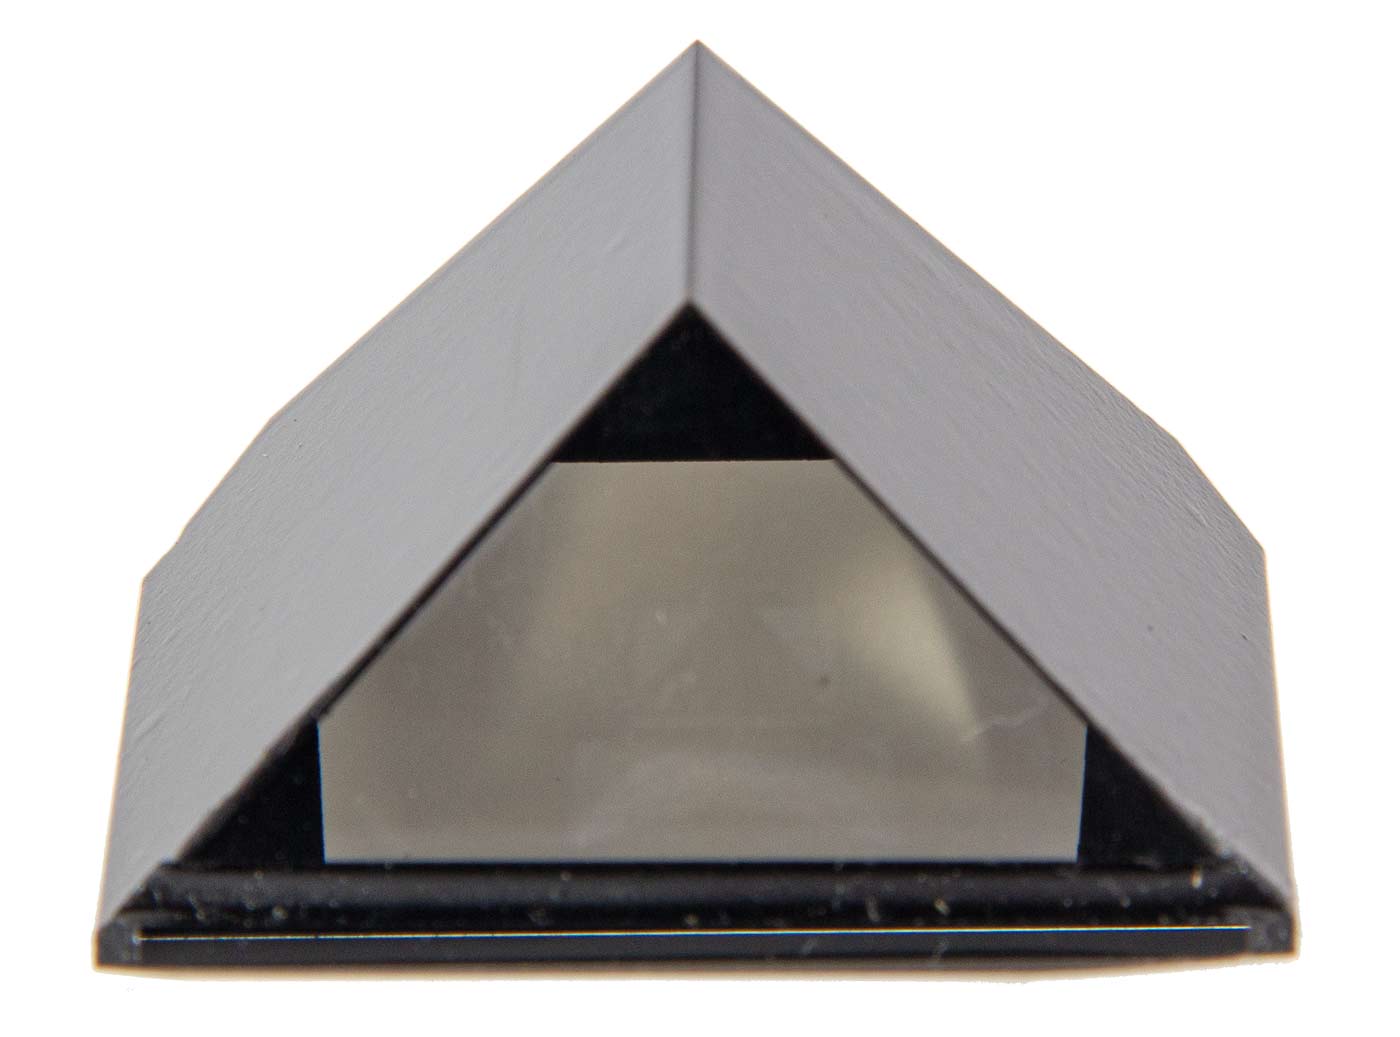
The same prism viewed from the backshowing the clear surface and the image of the bottom surface. The top surface has the distinctive tent shape necessary to correct the horizontally reversed image.
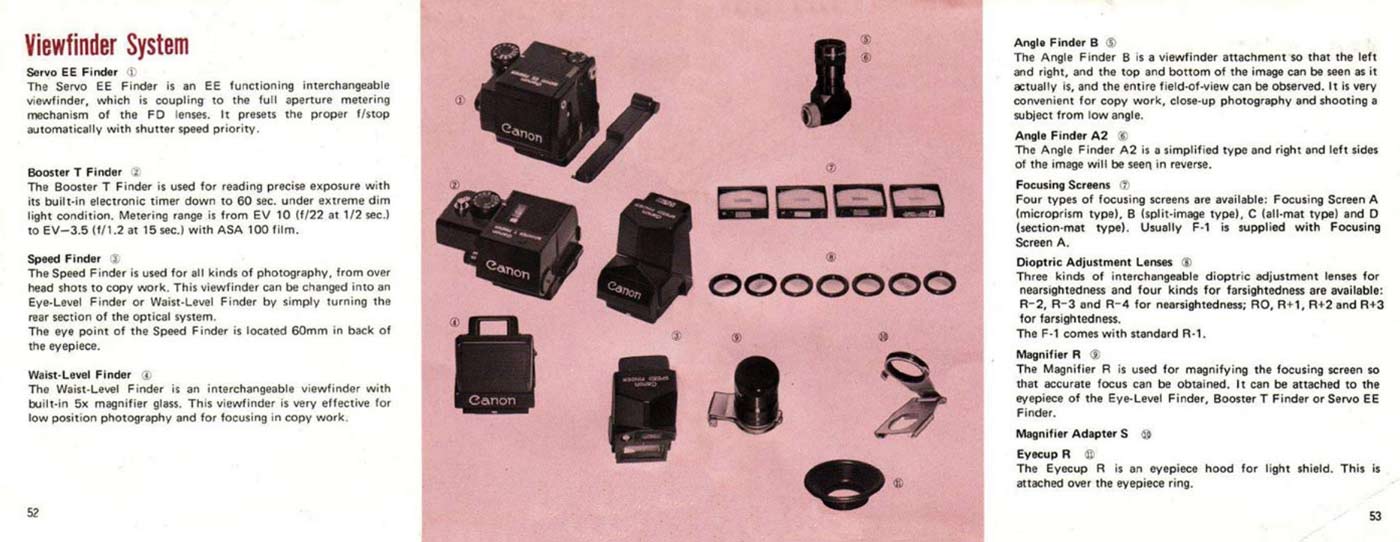
F-1 Viewfinder System
Almost all single lens reflex cameras
rely on a Pentaprism ( the prefix penta
is from the Greek for the number five)
to allow the eye to look horizontally
into the back of the camera and see
the image on the horizontal focusing screen.
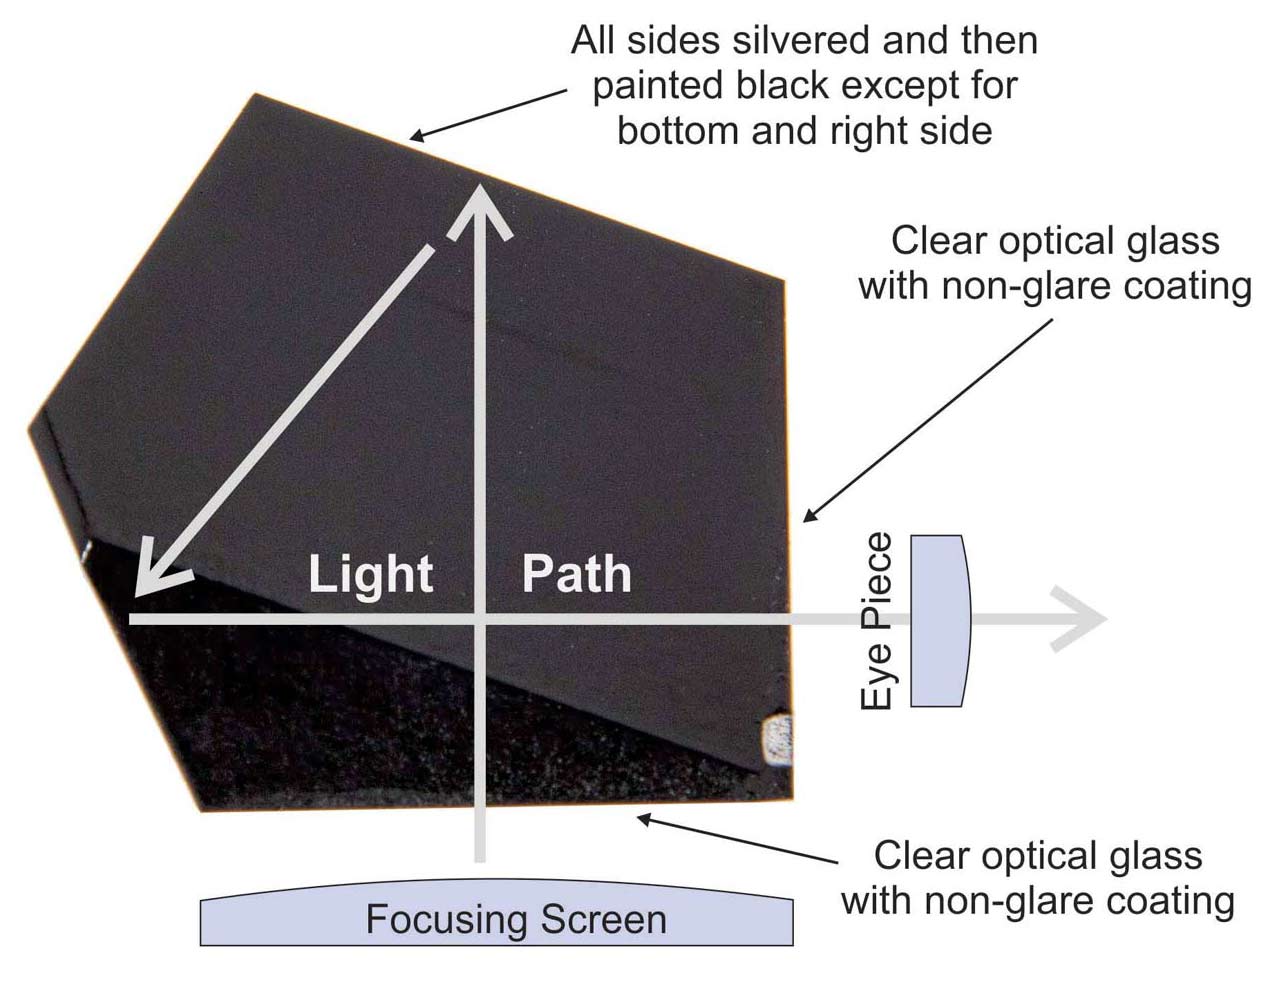
It does this with a piece of optical glass cut into the shape of a five sided prism. Light from the focusing screen is reflected up into the prism and it then reflects internally to come out the back of the prism horizontally.
In a simple five sided prism the image would be reversed horizontally however by shaping the roof of the prism into two precisely aligned surfaces the image can
be horizontally corrected at the same time it is directed out through the eyepiece of the camera. That is why the roof of the prism is two surface in a tent shape and not simply flat.
All surfaces of the prism, except two, are silvered to make them reflect internally and then painted black to protect the delicate silvered surface. The bottom surface facing the focusing screen and the rear surface facing the eyepiece are clear and given an optical anti-reflection coating.
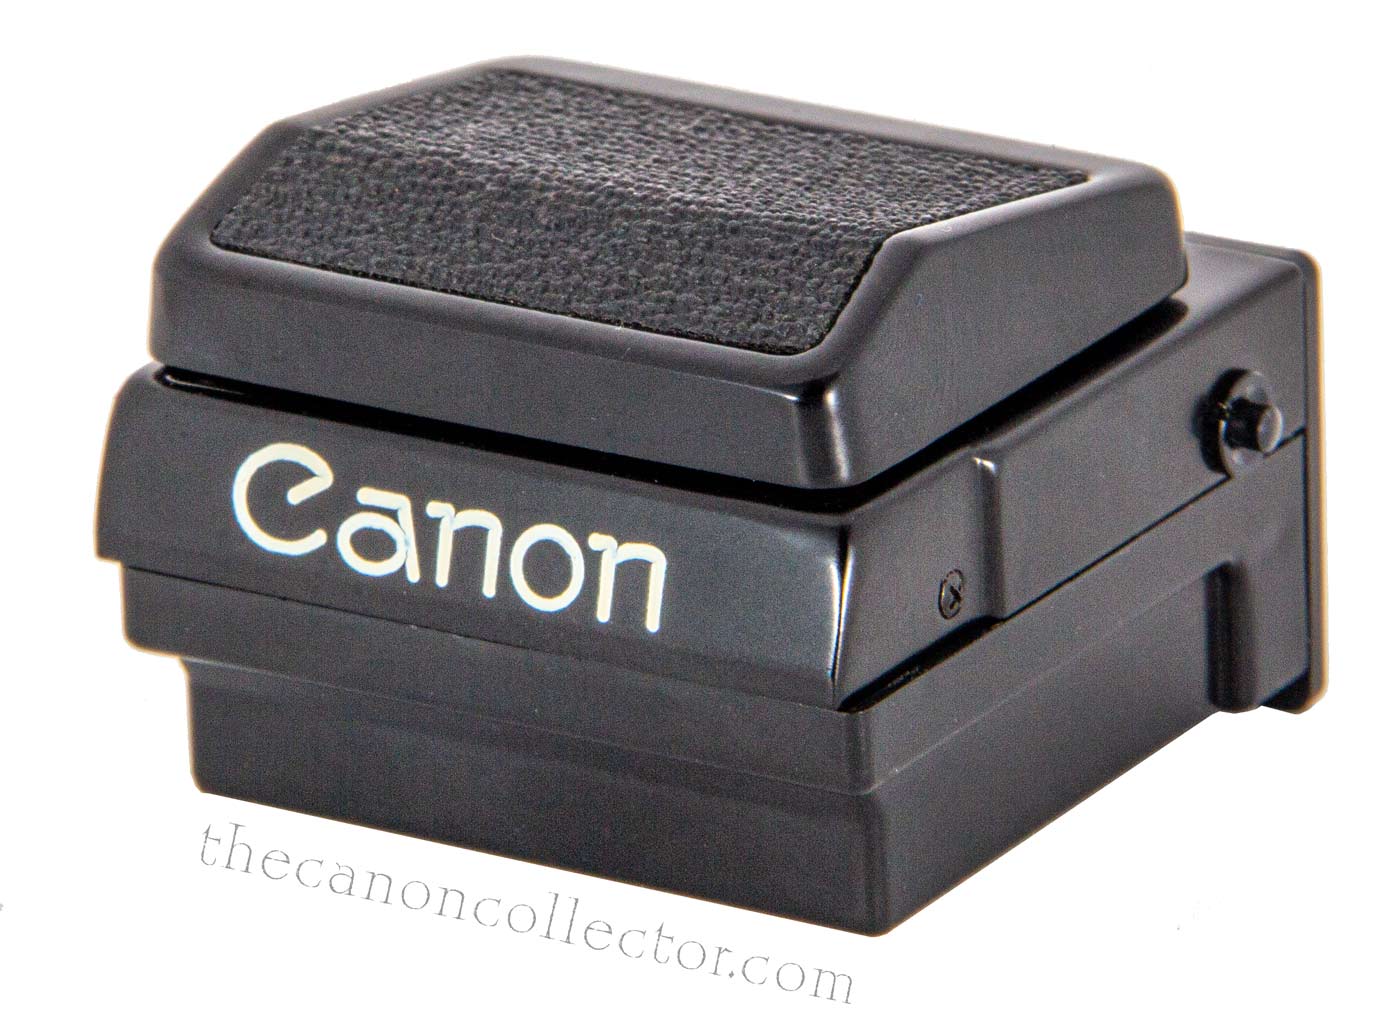
The F-1 had five finders available, four of which were based on the pentaprism. These were the Eye Level Finder which was the standard finder that came with the camera, the Speed Finder, the Booster T Finder and the Servo EE Finder. The Waist Level finder had no optics in it as you look directly down on the focusing screen except for a pop-up magnifier for accurate focusing.
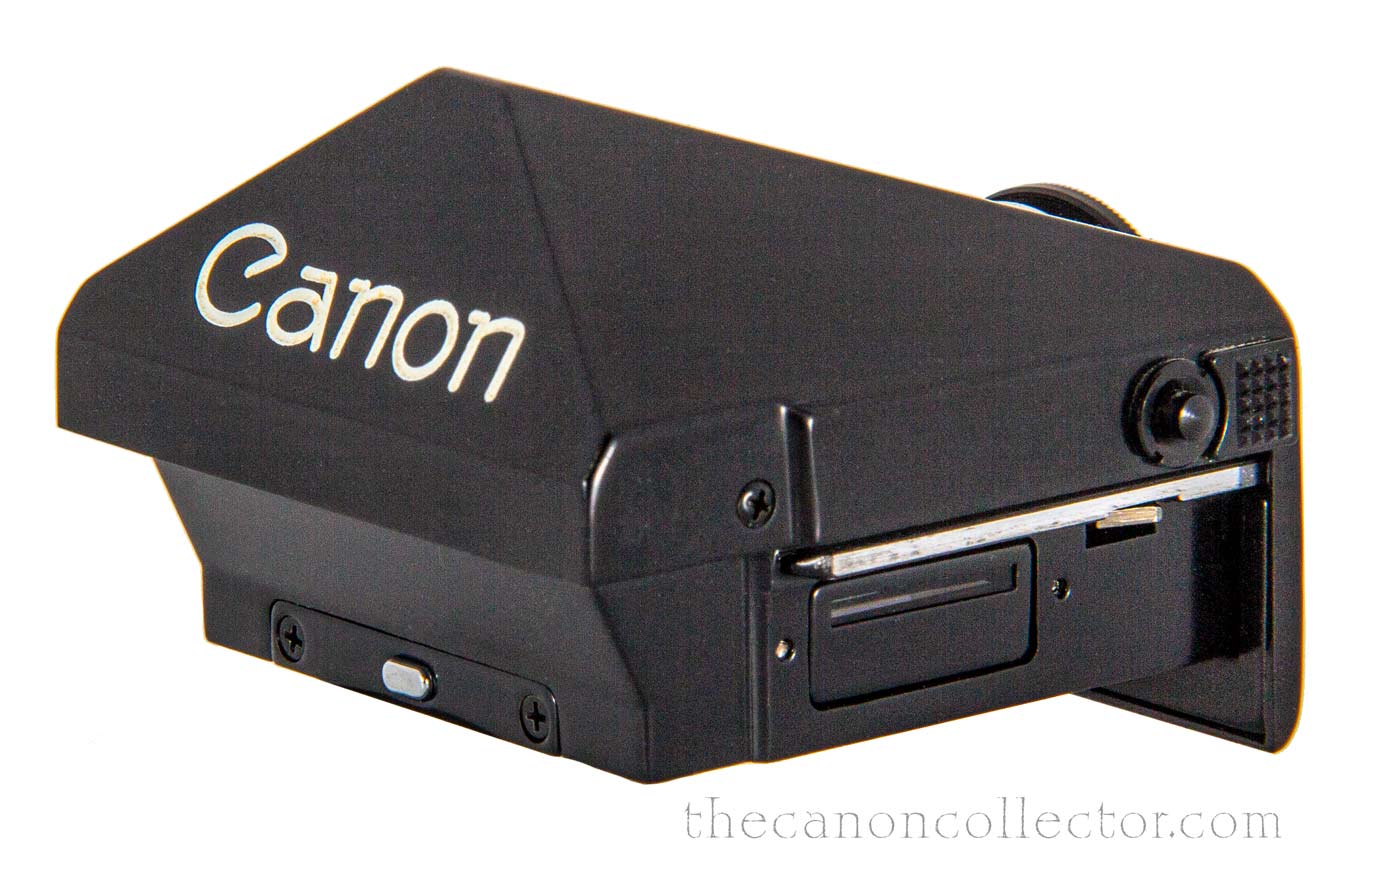
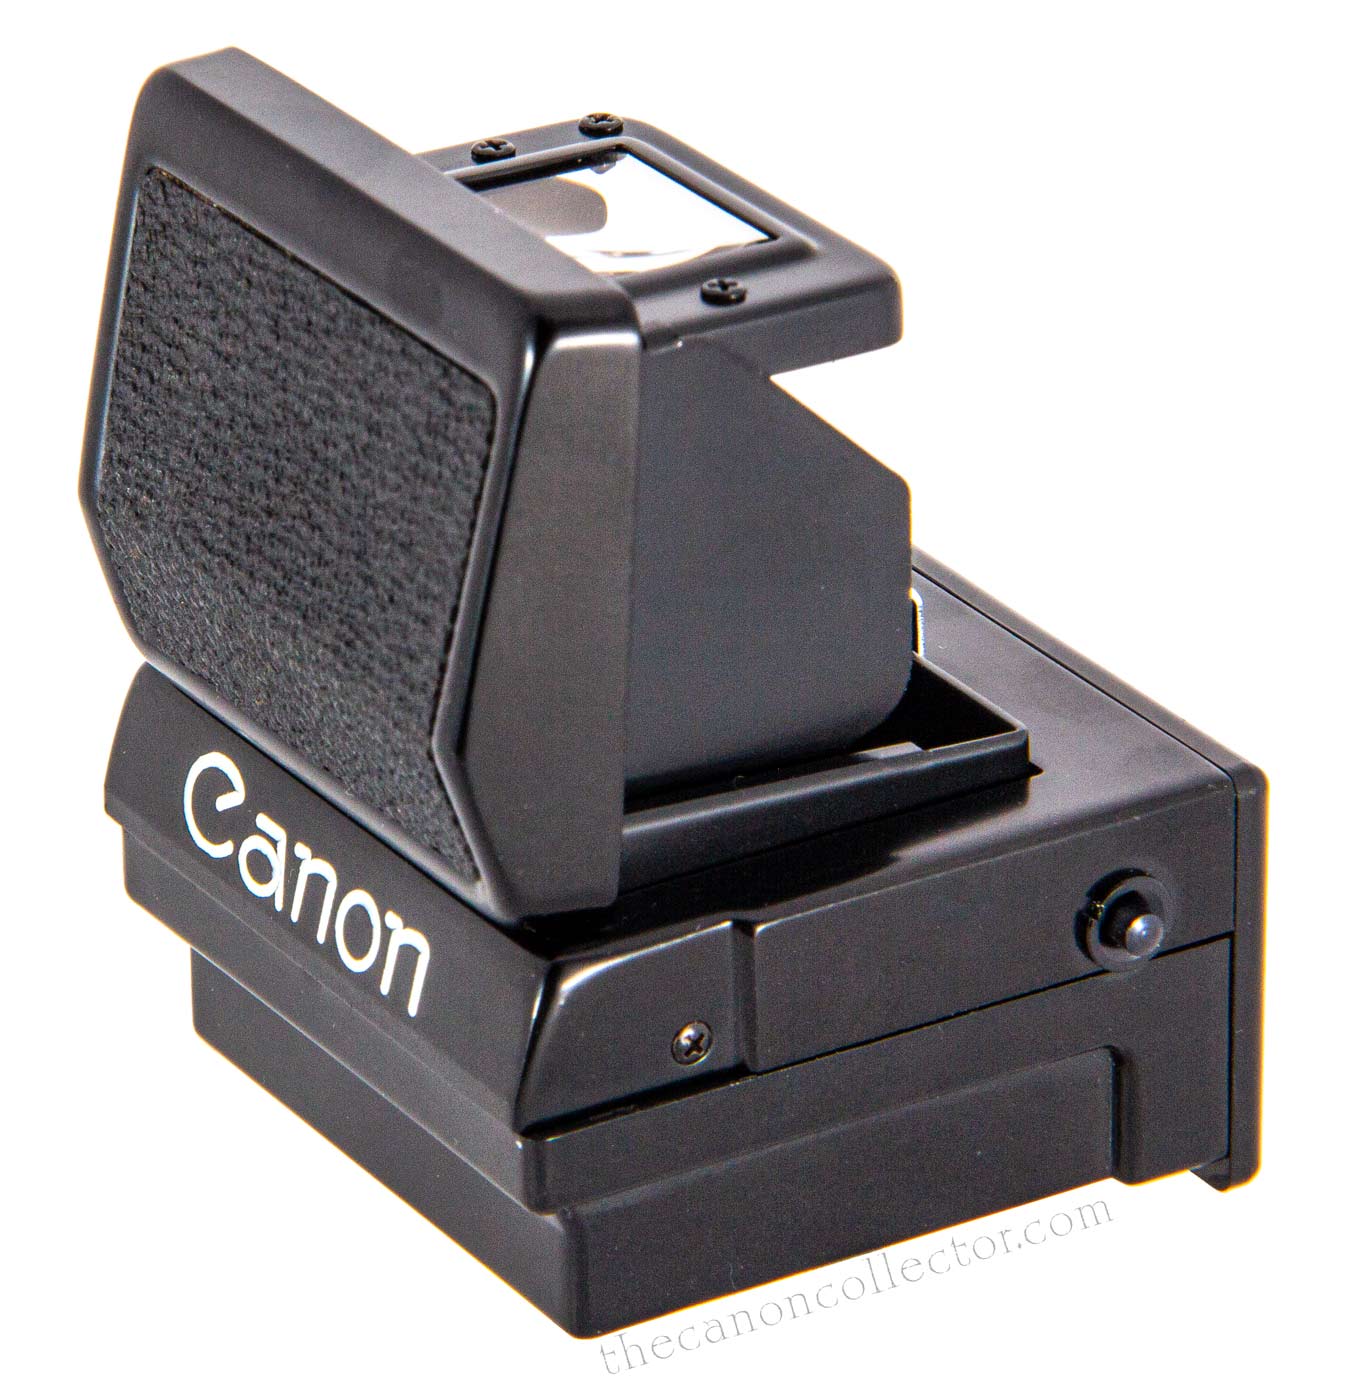
The Eye Level Viewfinder is in the shape of the pentaprism inside. At the back, right side in the photograph, is one of the buttons that one presses to remove it from the camera. Under the mounting rail, the bright line from the center to and running towards the right edge, is a small window onto light meter needles which are located in the side of the viewfinder mount in the camera body.
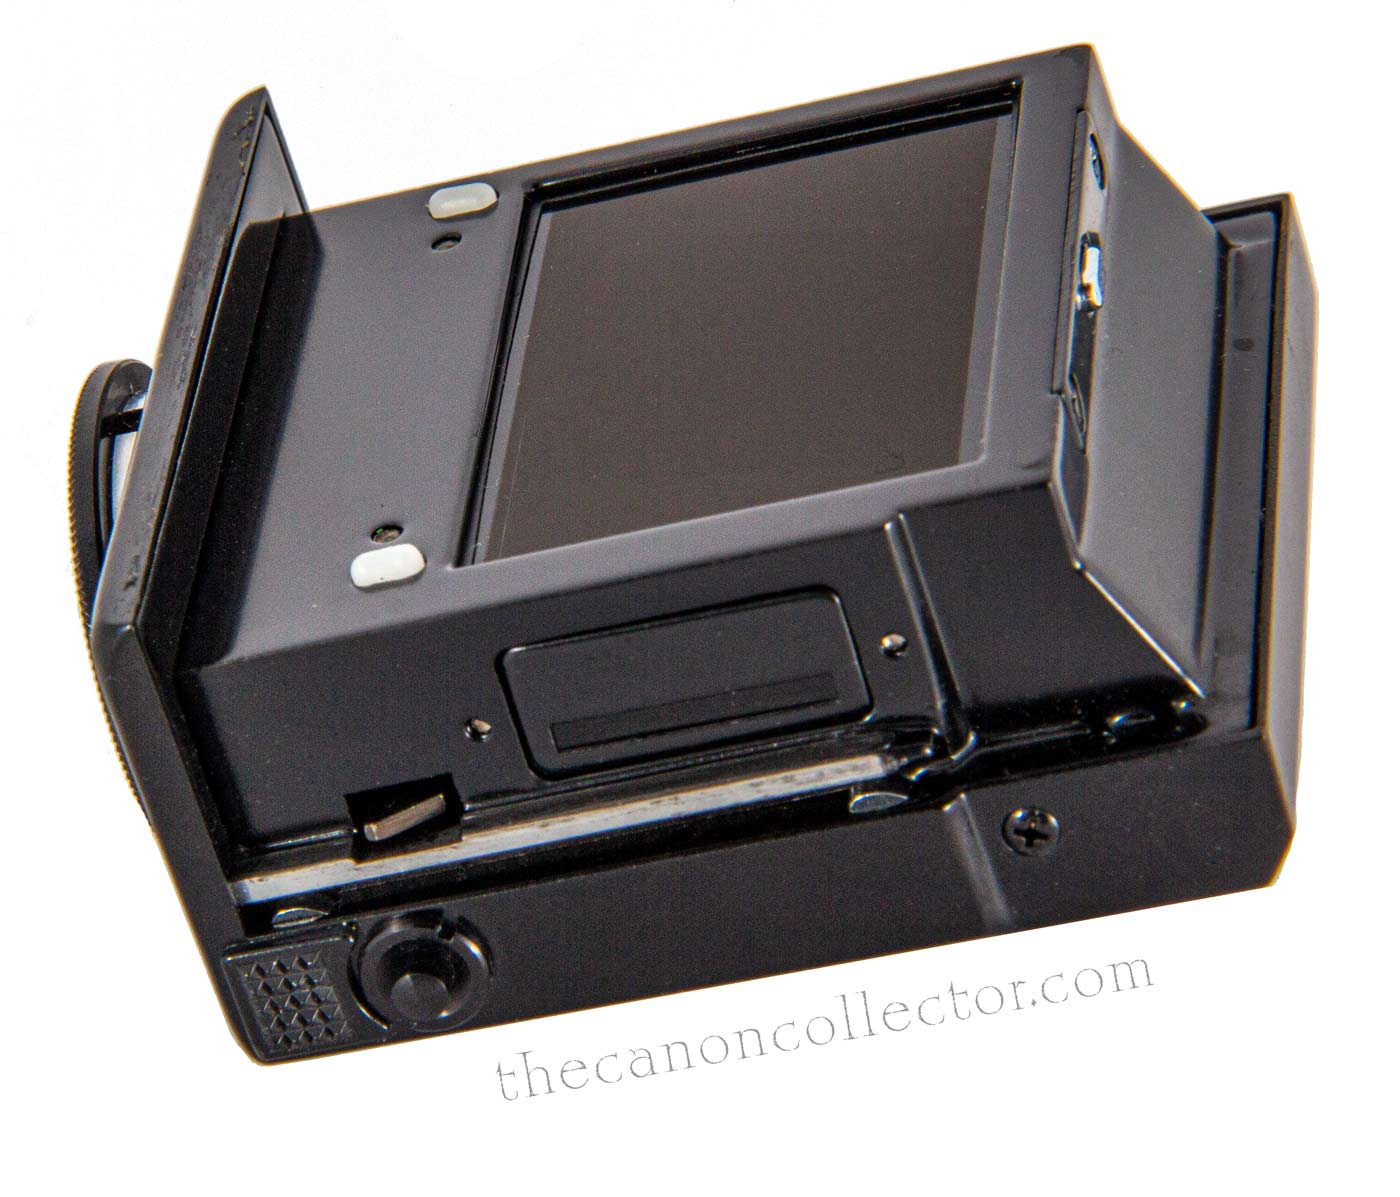
Above: Under the Viewfinder is the focusing screen which can be seen here as the viewfinder prism is moved to the rear.
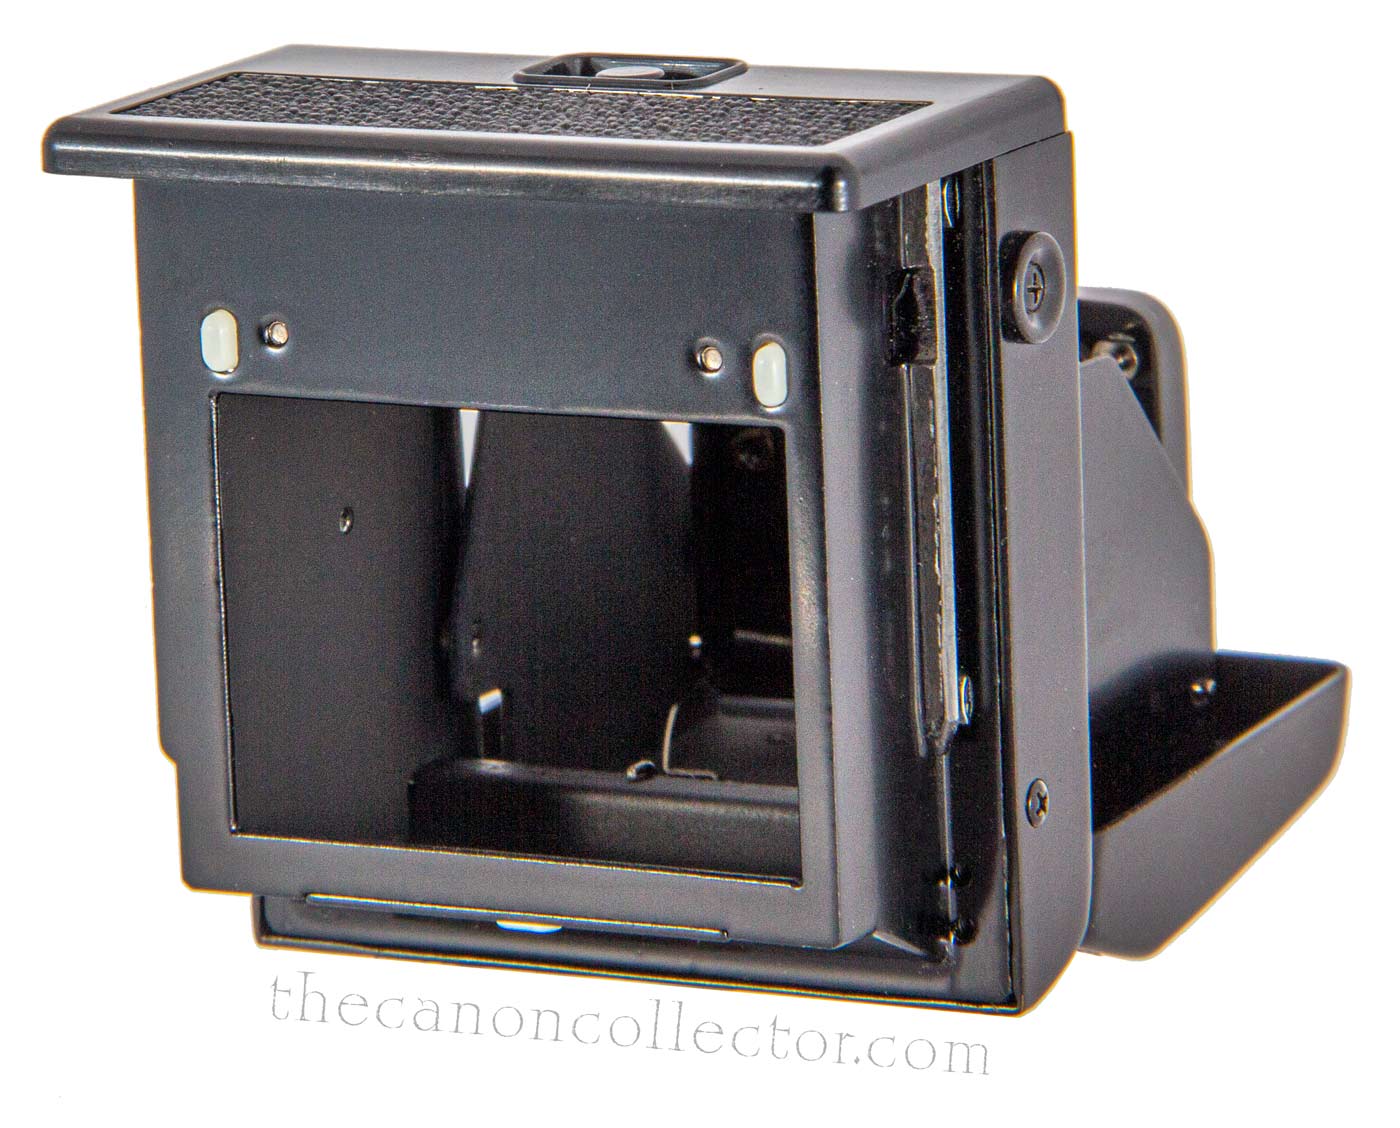
Right: The bottom of the Viewfinder is simply the bottom surface of the pentaprism. The window for viewing the light meter needle is clearly visible in the center of the image.
The Eye Level Finder, also called the Interchangeable Pentaprism by the User Instructions, is not listed
above as an accessory for the F-1 camera. That is
because this is the viewfinfder that comes with
every camera. As a result it is the most common
viewfinder that people are likely to encounter.
Looking at the Viewfinder it is obvious that its shape
is the same as the actual shape of the pentaprism. The
Viewfinder is simply the pentaprism with a metal
cover over it and an eyepiece lens on the back.
(Note: the metal on the top of the prism is prone to
denting and care should be taken not to allow it to
strike anything.)
The viewfinder is removed from the body by
squeezing the two buttons on either side of the rear
of the housing on each side of the eyepiece while pushing it to the rear and then sliding it off.
On the left side of the prism housing, under the mounting rail, is a long thin window to allow viewing of the light meter needles which are located in the body of the camera. The light meter needle is illuminated through a window on the top deck of the camera between the prism and the rewind crank.
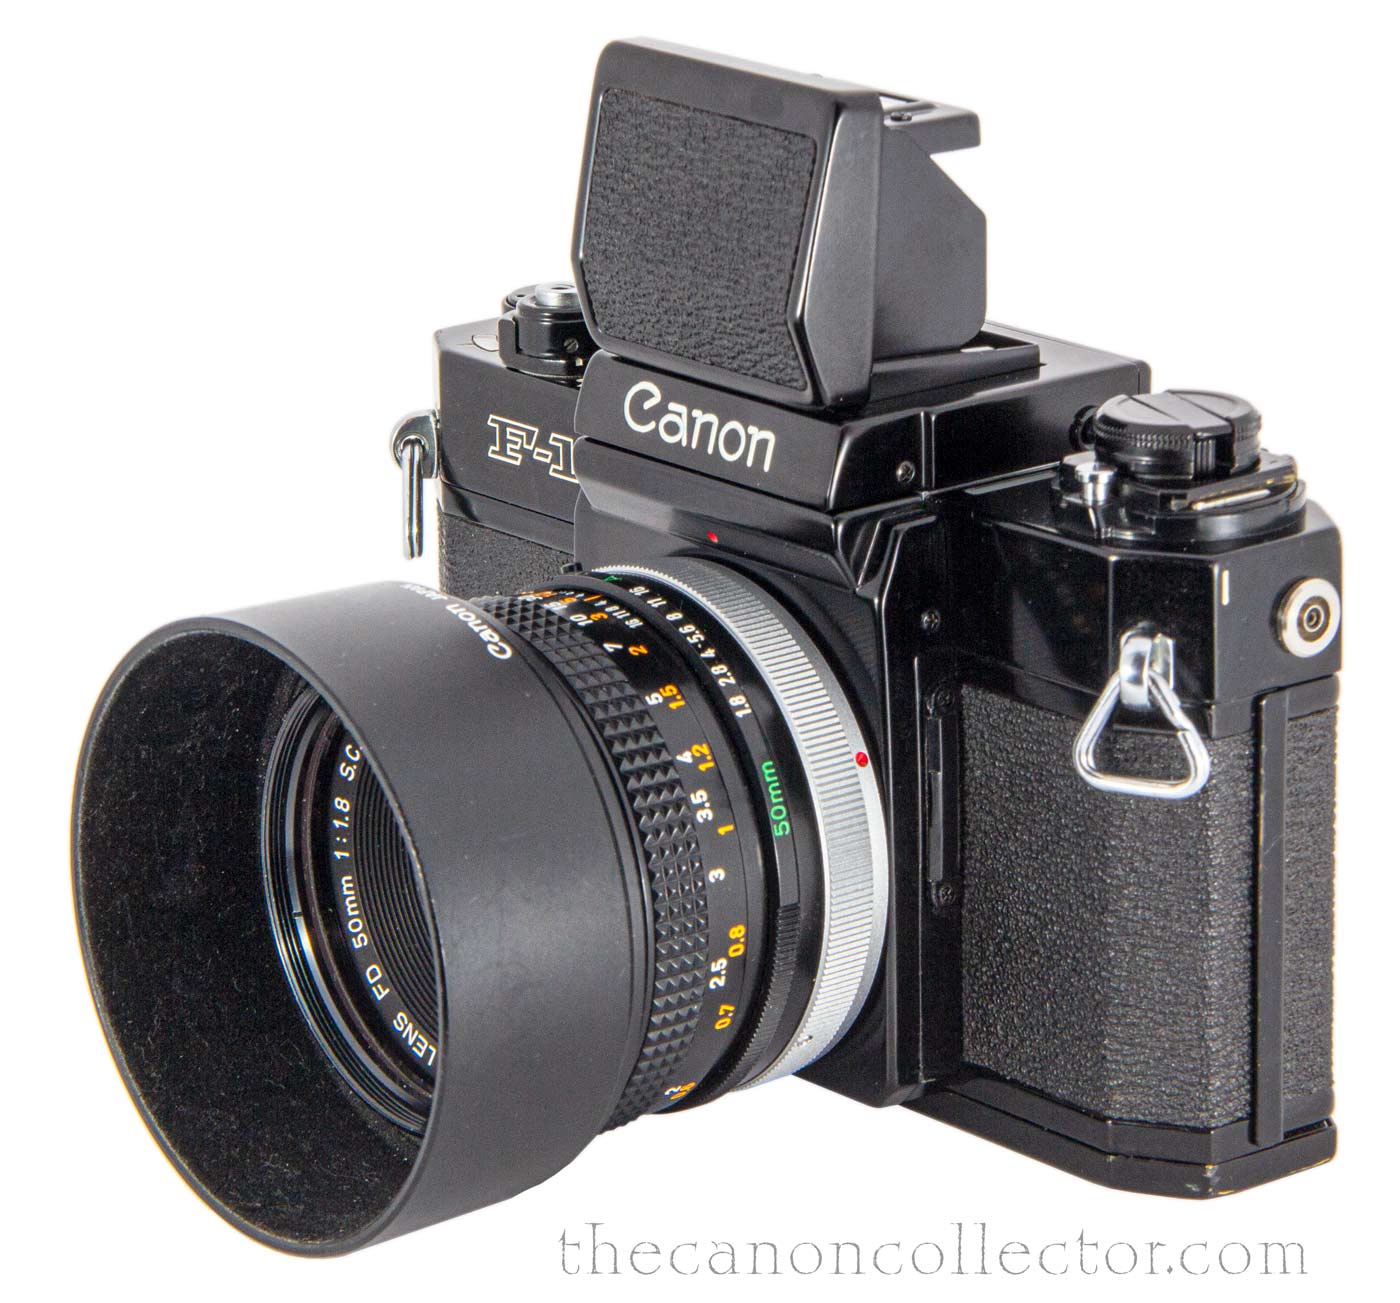
Above is a Canon F-1 with the Waist Level Viewfinder attached. The finder is open and the magnifying lens is deployed.
The Waist Level Viewfinder is the simplest of the viewfinders. By simply removing the prism you can look straight down on the focusing screen and use it to focus and compose the picture. The screen is small and hard to use so a pop-up magnifier is included in the top of the hood which allowed a magnified view. This addition is essential for fine focus.
The hood that shields the focus screen from
extraneous light closes over the screen when
not in use keeping it both clean and safe.
The viewfinder was mounted and removed in the
same way as the Eye Level Viewfinder by pressing the
two buttons at the rear of the finder and moving it
to the rear.
It is to be noted that this viewfinders gives no view of the light meter needle so it must be used with an external light meter.
Closed the Waist Level Finder sits low on the top of the camera protecting the focusing screen below it. There is no provision in this viewfinder for observing the light meter needle so an external light meter must be used.
The Waist Level Viewfinder is useful for vertical photography, such as on a copy stand or when the camera is placed very low to the ground or table top making the usual eyepiece hard to use.
There is no optical glass in the Waist Level Viewfinder (except for the pop-up magnifying glass). Looking up from the bottom you are simply looking at the folding top, from the bottom.
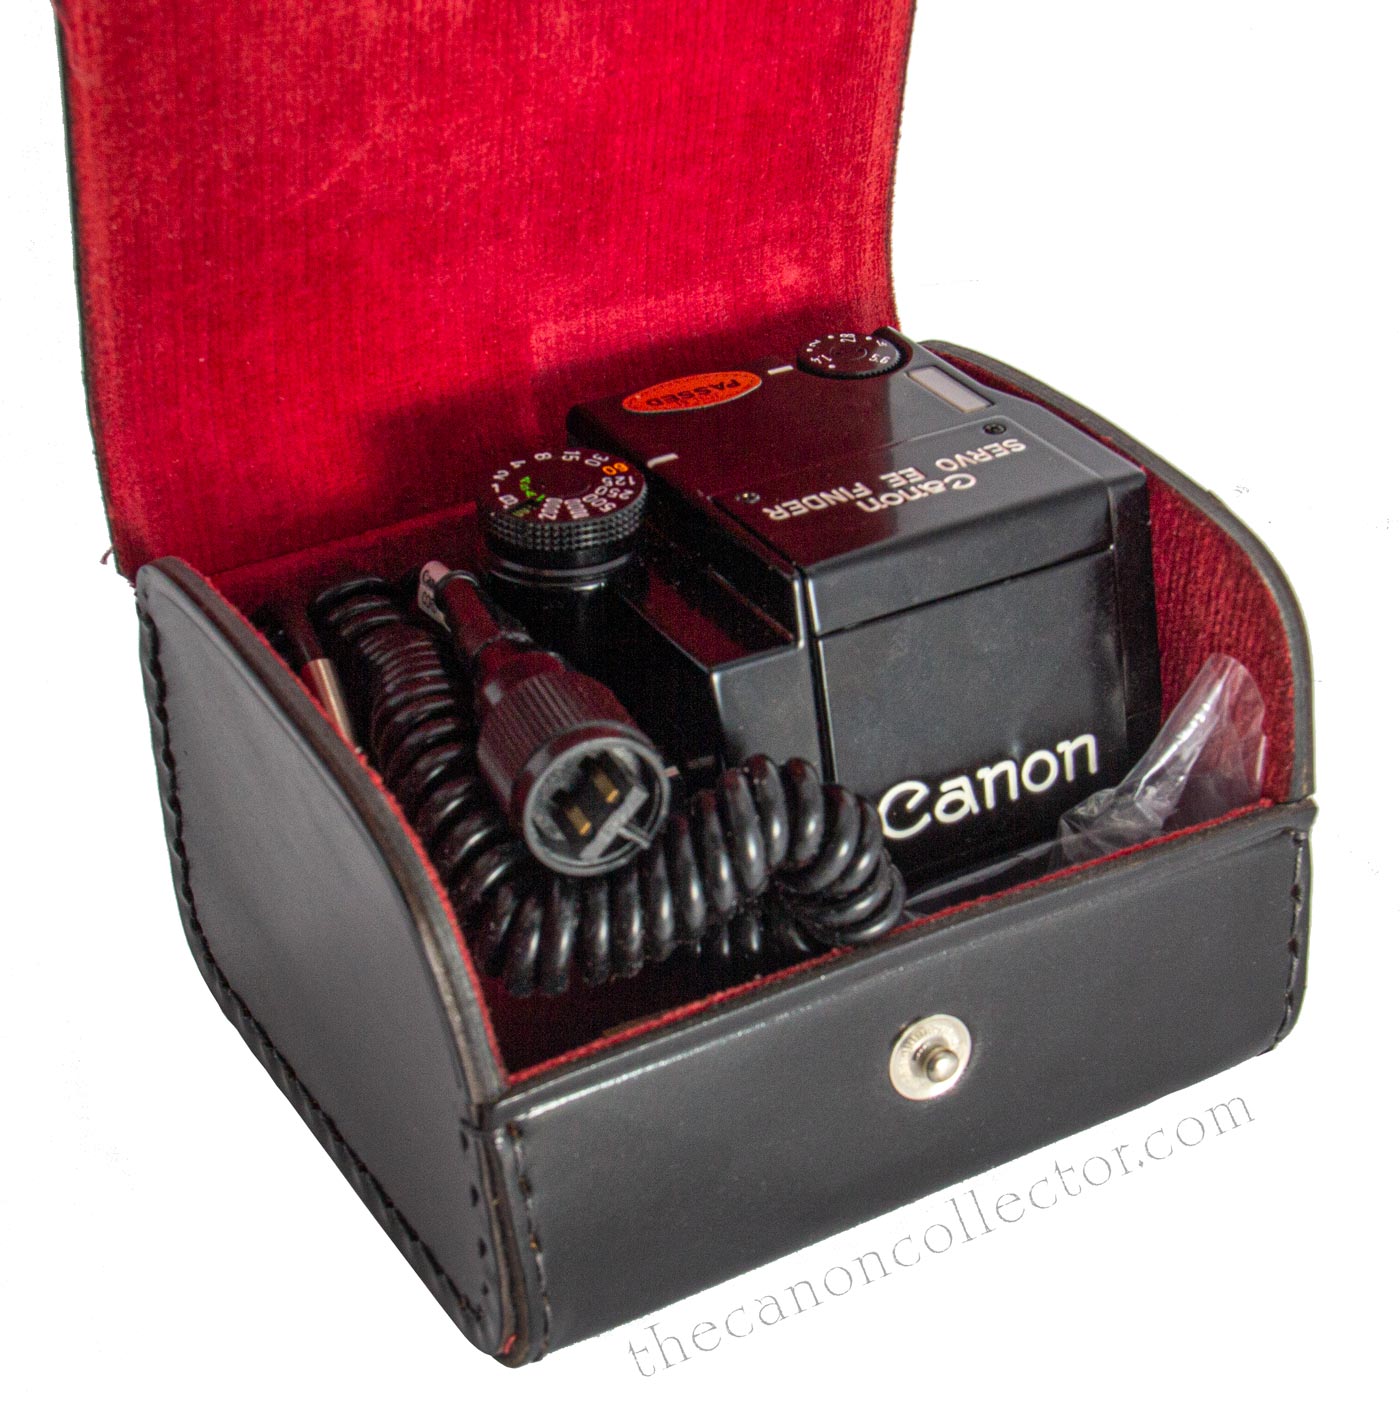
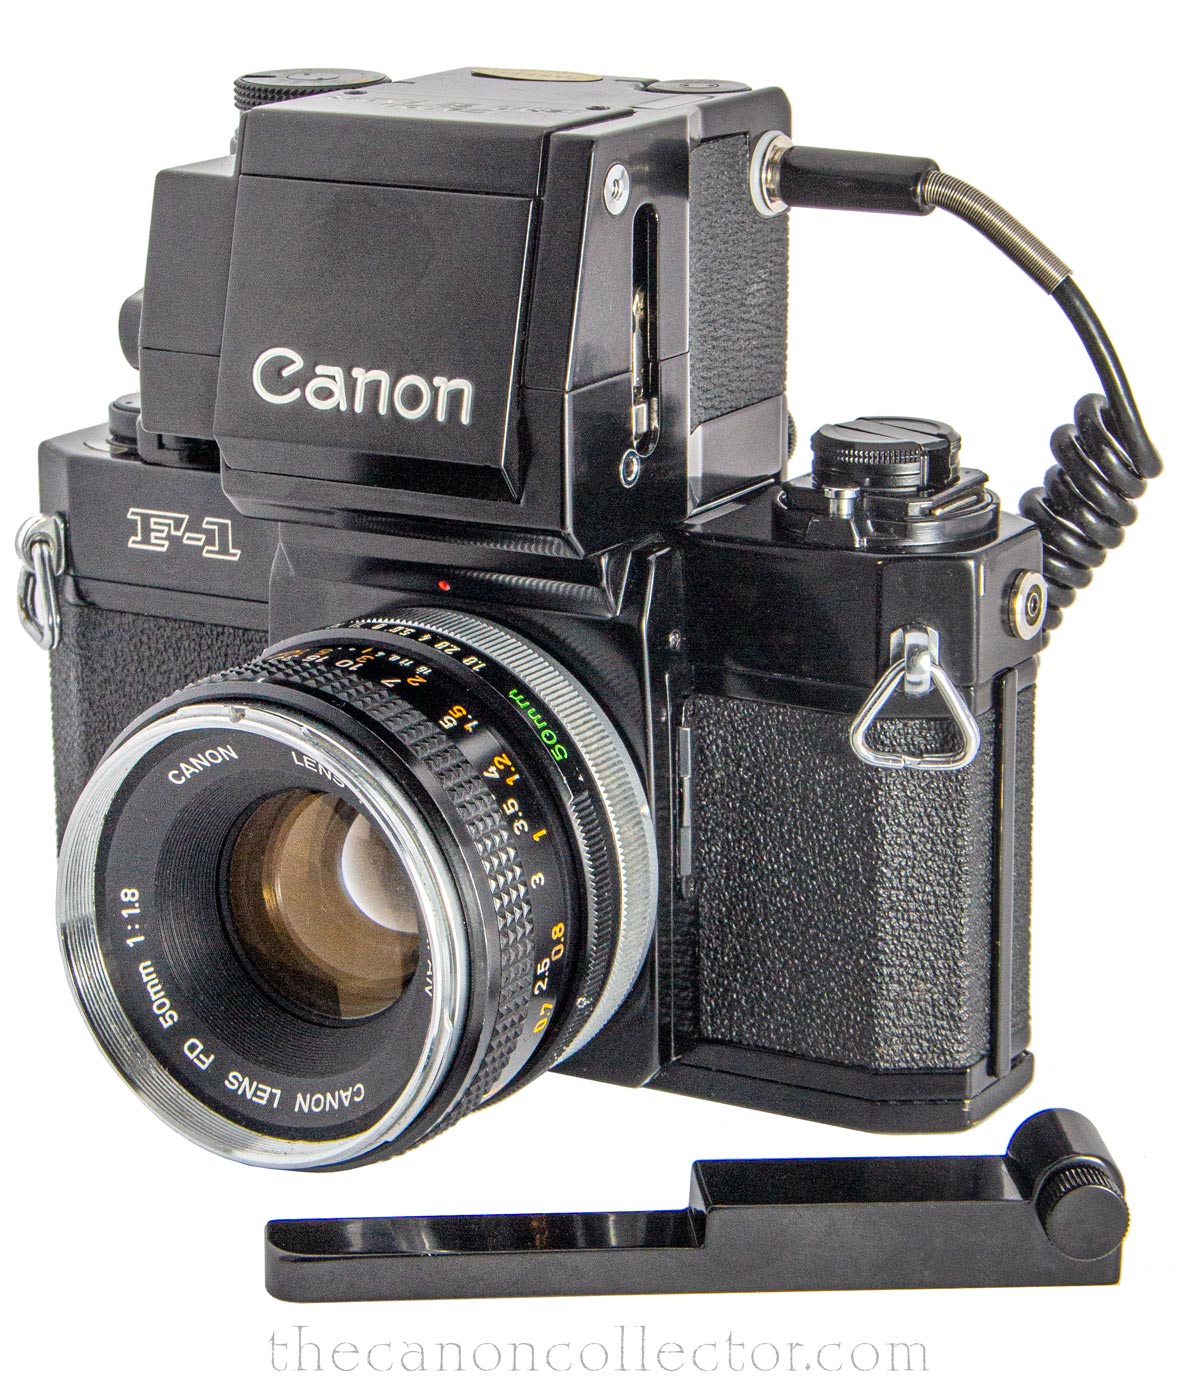
The Servo EE Finder comes in a fitted leather case with the EE Coupler and power cable to connect to the Battery Pack.
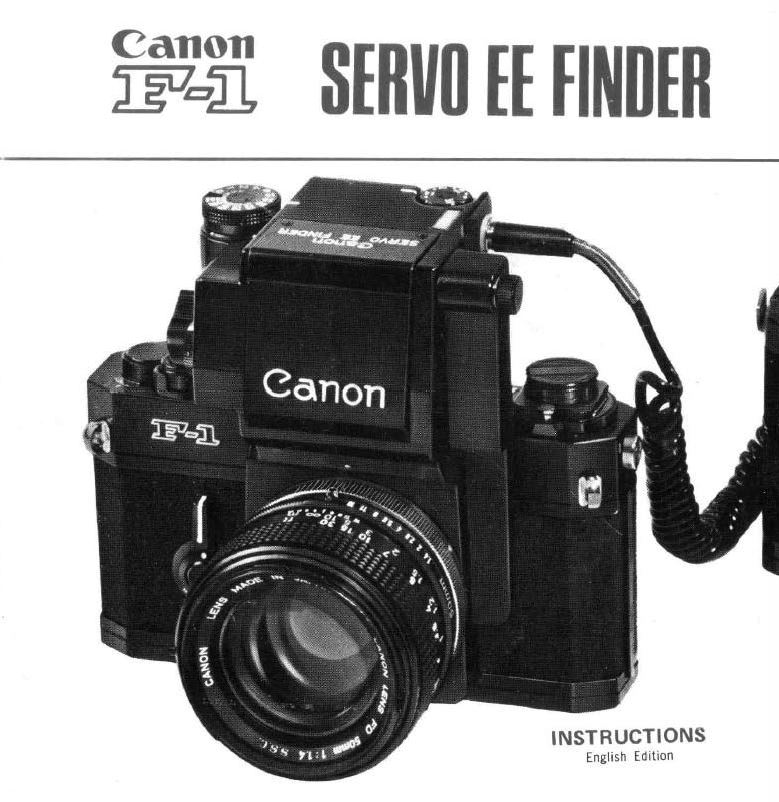
The Instructions, available here, give detailed instructions for attaching the Servo EE Finder and using it.
In 1970, when the F-1 was first introduced, auto exposure was a thing of the future. However, Canon was creating a camera system that was capable of remote, even unattended, shooting and they required a means of controlling exposure that was also automatic. And so they developed the Servo EE Finder.
This is an interesting device and it is a shame that
the AE-1 made it obsolete. So how does it function?
Of course it is a viewfinder with the usual pentaprism construction. That much is straightforward. It slides
onto the F-1 body on the camera body’s mounting
rails and the shutter speed dial couples with the
shutter speed dial of the camera. The device operates
in shutter priority mode and so the user selects the
shutter speed and the Servo EE finder selects the aperture.
The Servo unit measures the light coming up from the focusing screen giving extra weight to the central portion of the image. This measurement activates a servo motor in the unit that sets the aperture correctly via the EE Coupler which inserts a finger behind the lens to communicate with the Aperture Signal Lever on the lens. It is a strange combination of electrical and mechanical technology but it worked.
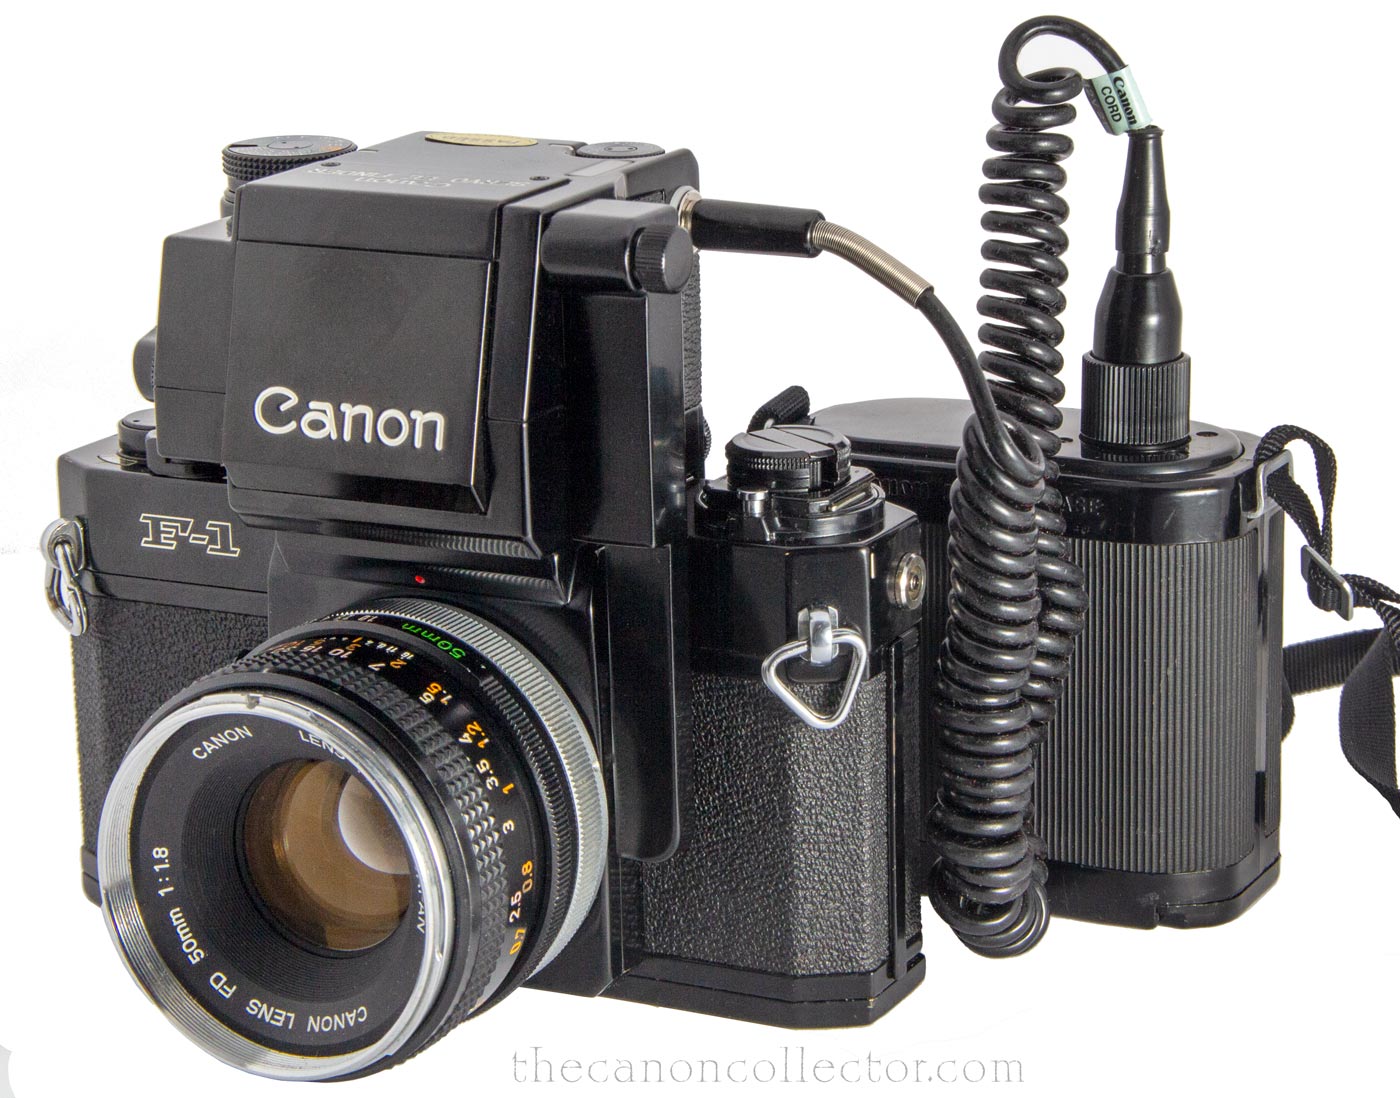
How it was actually used is explained in the User Manual which is available on the left. What is not apparent right away is that this unit requires the Canon Battery Pack to power it. The Servo EE Finder comes in a fitted leather case with the correct power cable but without the Battery Pack. That has to be acquired separately.
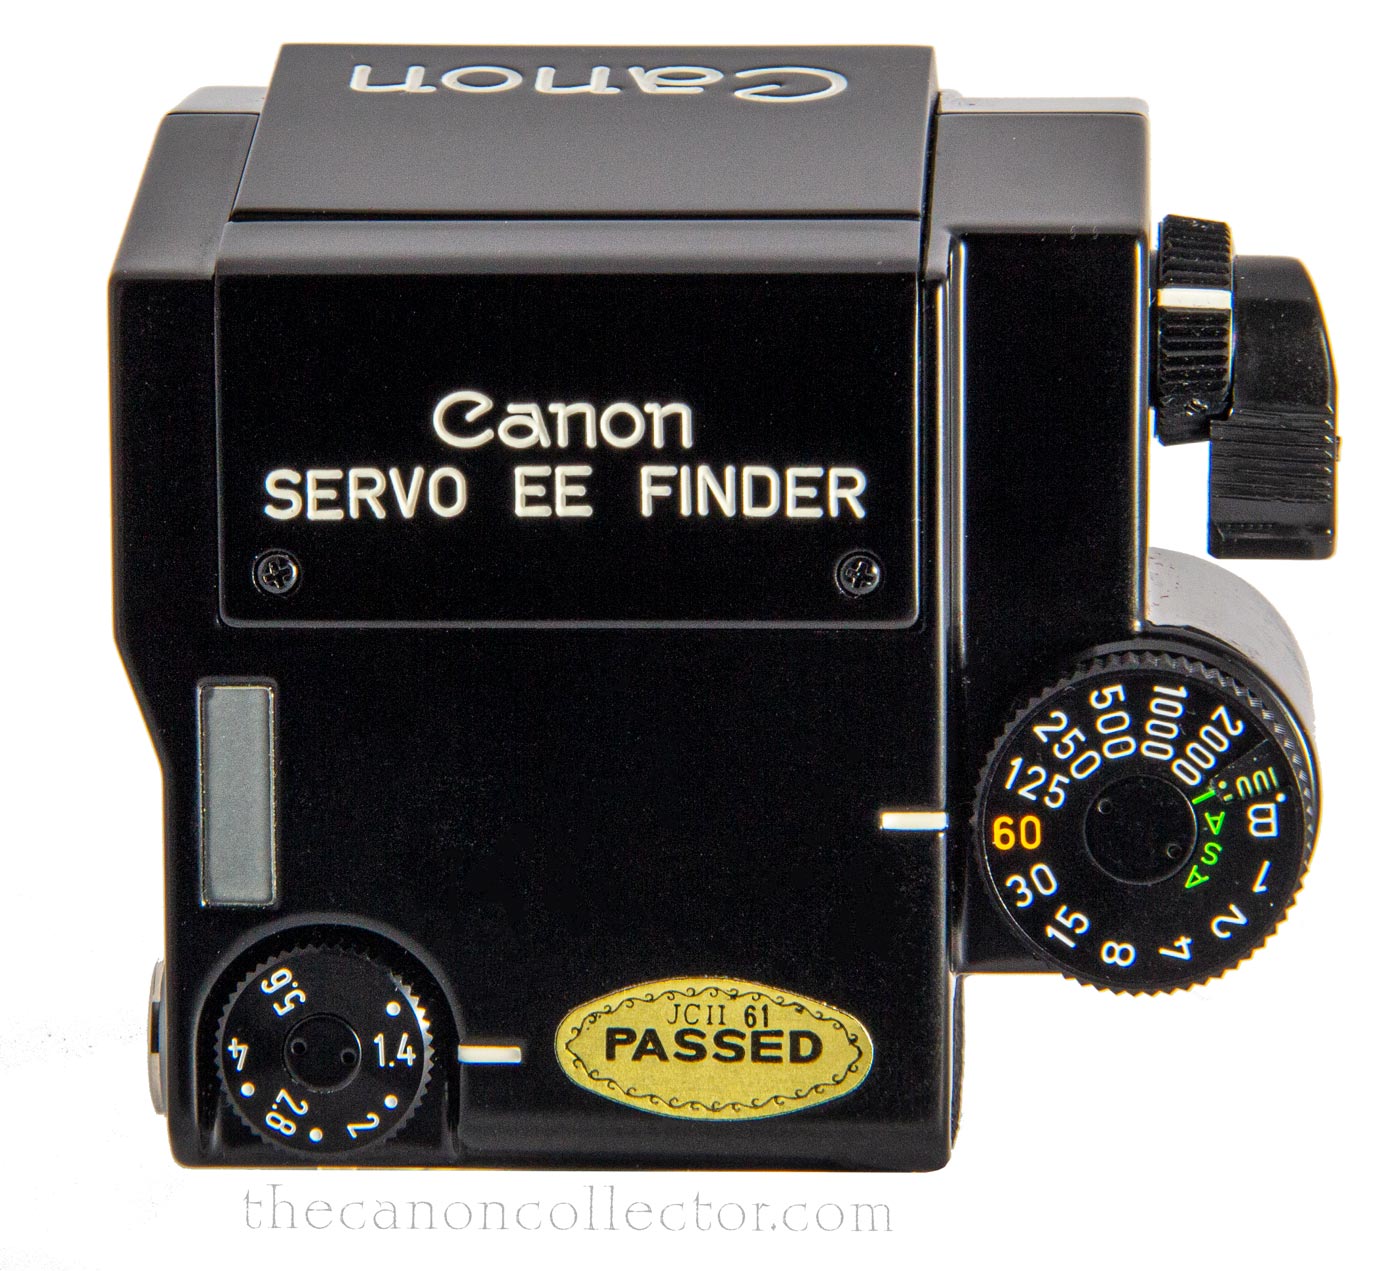
Another required piece is the EE Connector which comes with the Servo EE Finder. This connects the device to the lens through a port in the side of the mirror box housing. It inserts a finger into the back of the lens where its position tells the lens what aperture is required. However, metering and focusing is at full aperture. Interestingly the full aperture of the lens must be dialed into the finder via a dial on the top of the unit.
I don’t know if my copy of the finder, Serial Number 22348, is actually working. I have never connected it to the Battery Pack and tried to use it. I don’t see why it would not be working except for its age. It is in the original leather case with all of the pieces and looks unused. That is a good sign. One of these days I will set some time aside and try it out. I will update this page when I have done so.
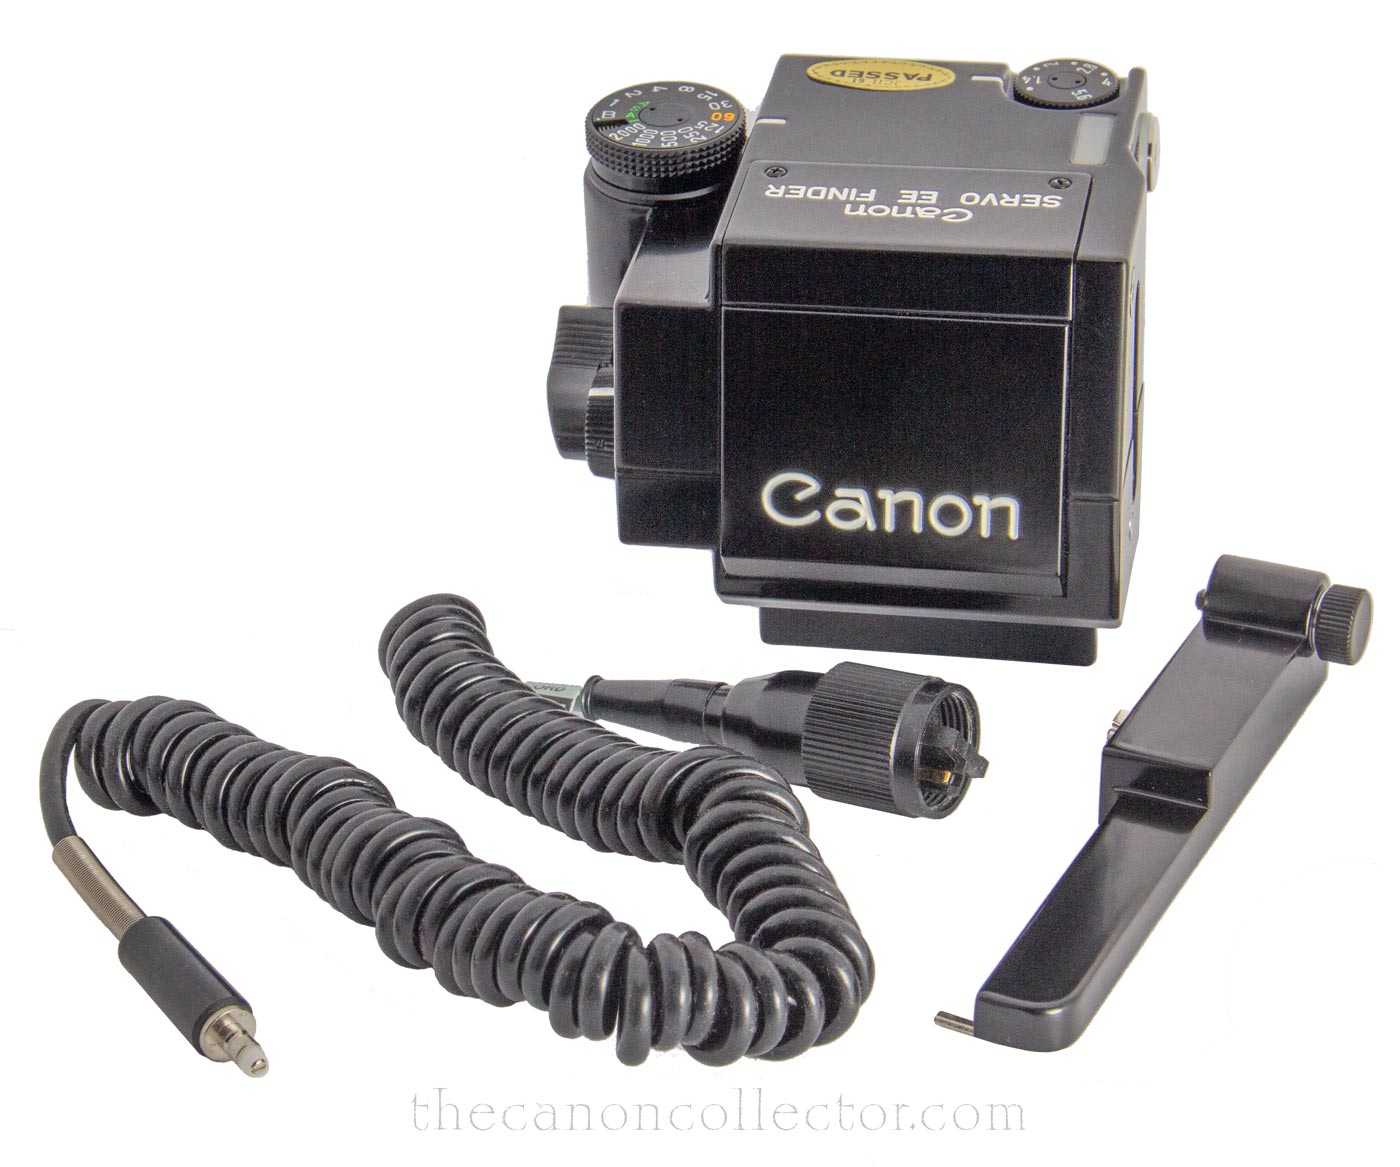
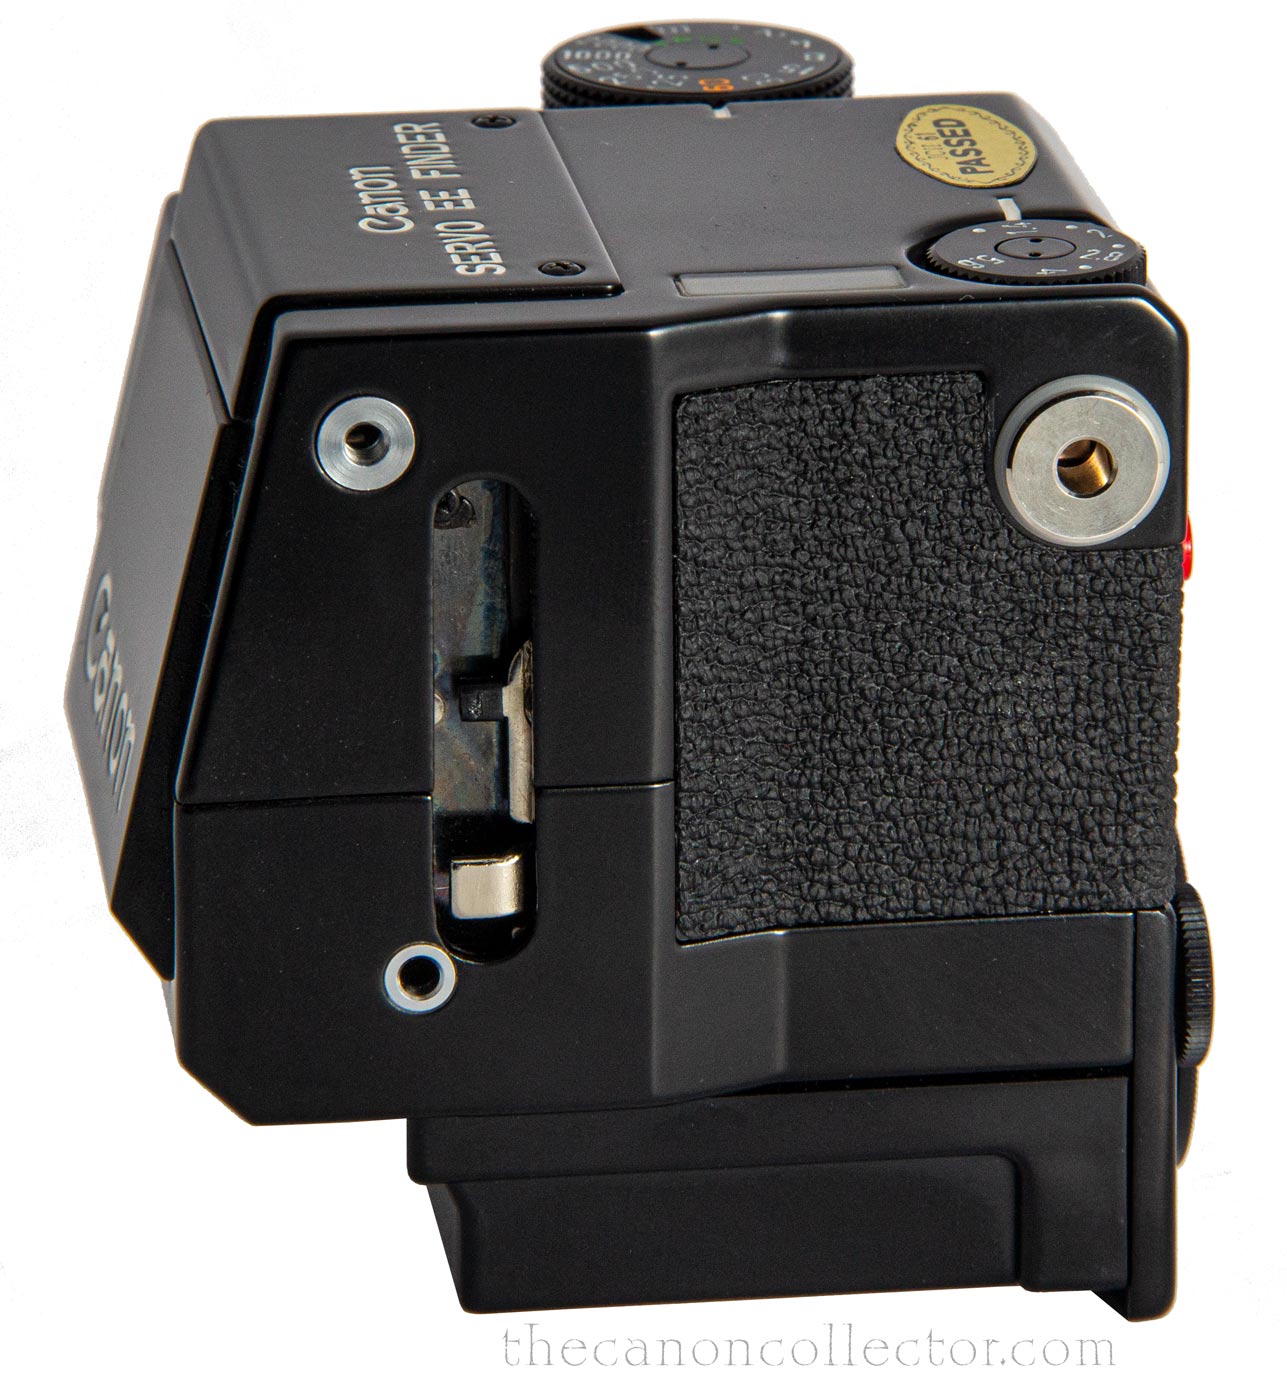
The three parts of the Servo EE Finder are the finder housing itself, the EE Coupler and the power cord for attaching the Finder to the Battery Pack.
The EE Coupler attaches to the side of the Servo Unit and down the front of the camera body against the mirror box wall where it interacts with the lens’s Aperture Signal Lever.
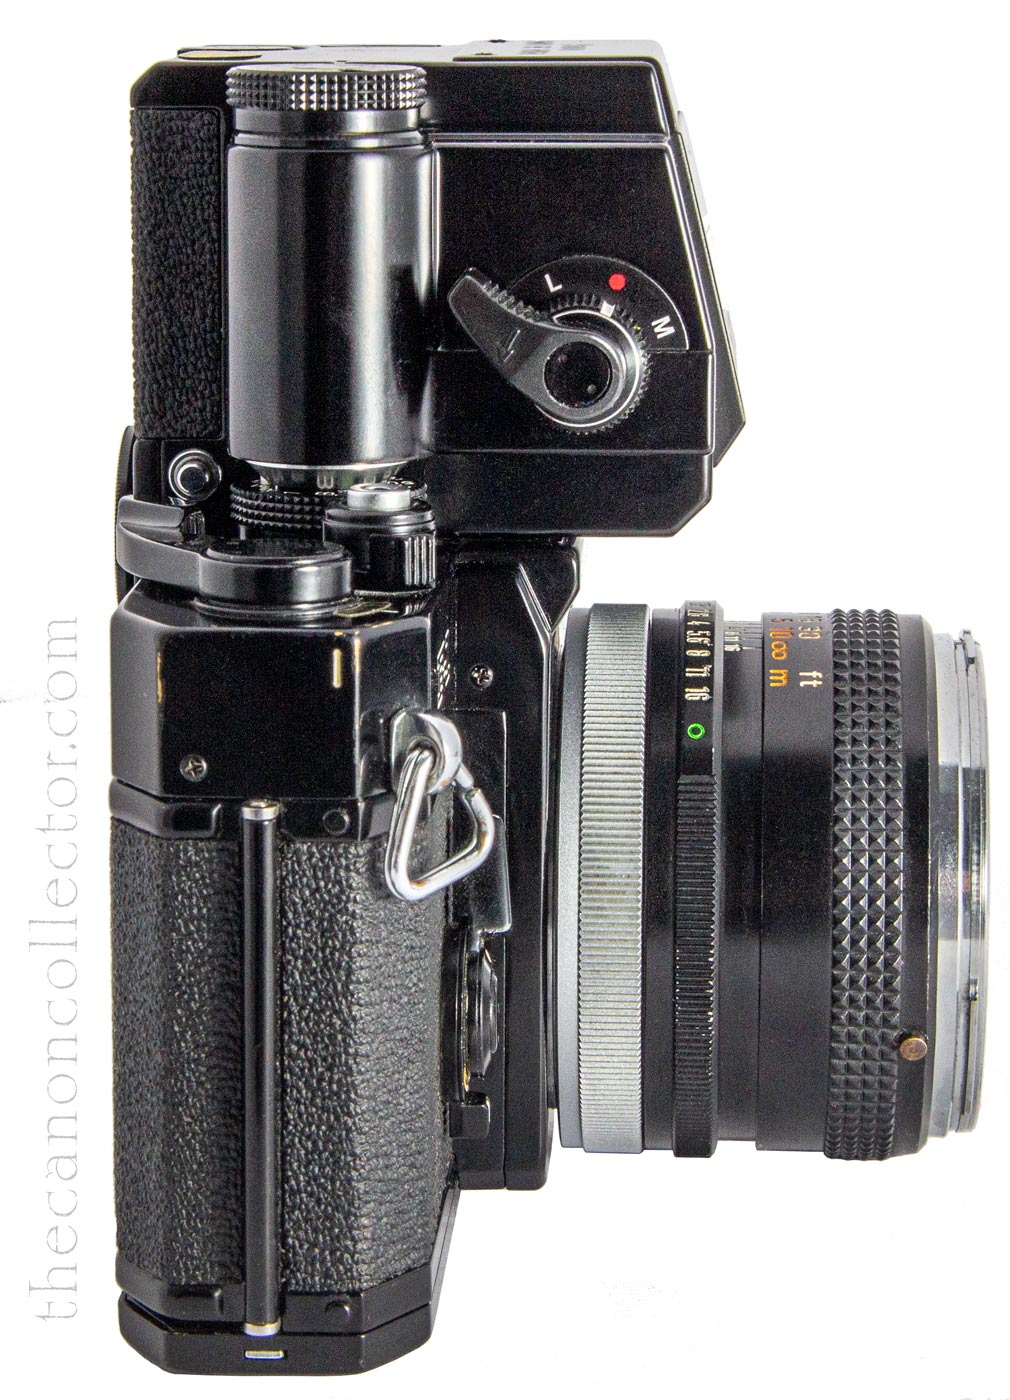
The Servo EE Finder is the largest of the viewfinders. The Master Lever Switch is seen here on the right side of the finder.
On the top of the finder are two dials. The shutter speed dial is on the right and on the left by the “Passed” sticker is where you dial in the maximum aperture of the lens in use.
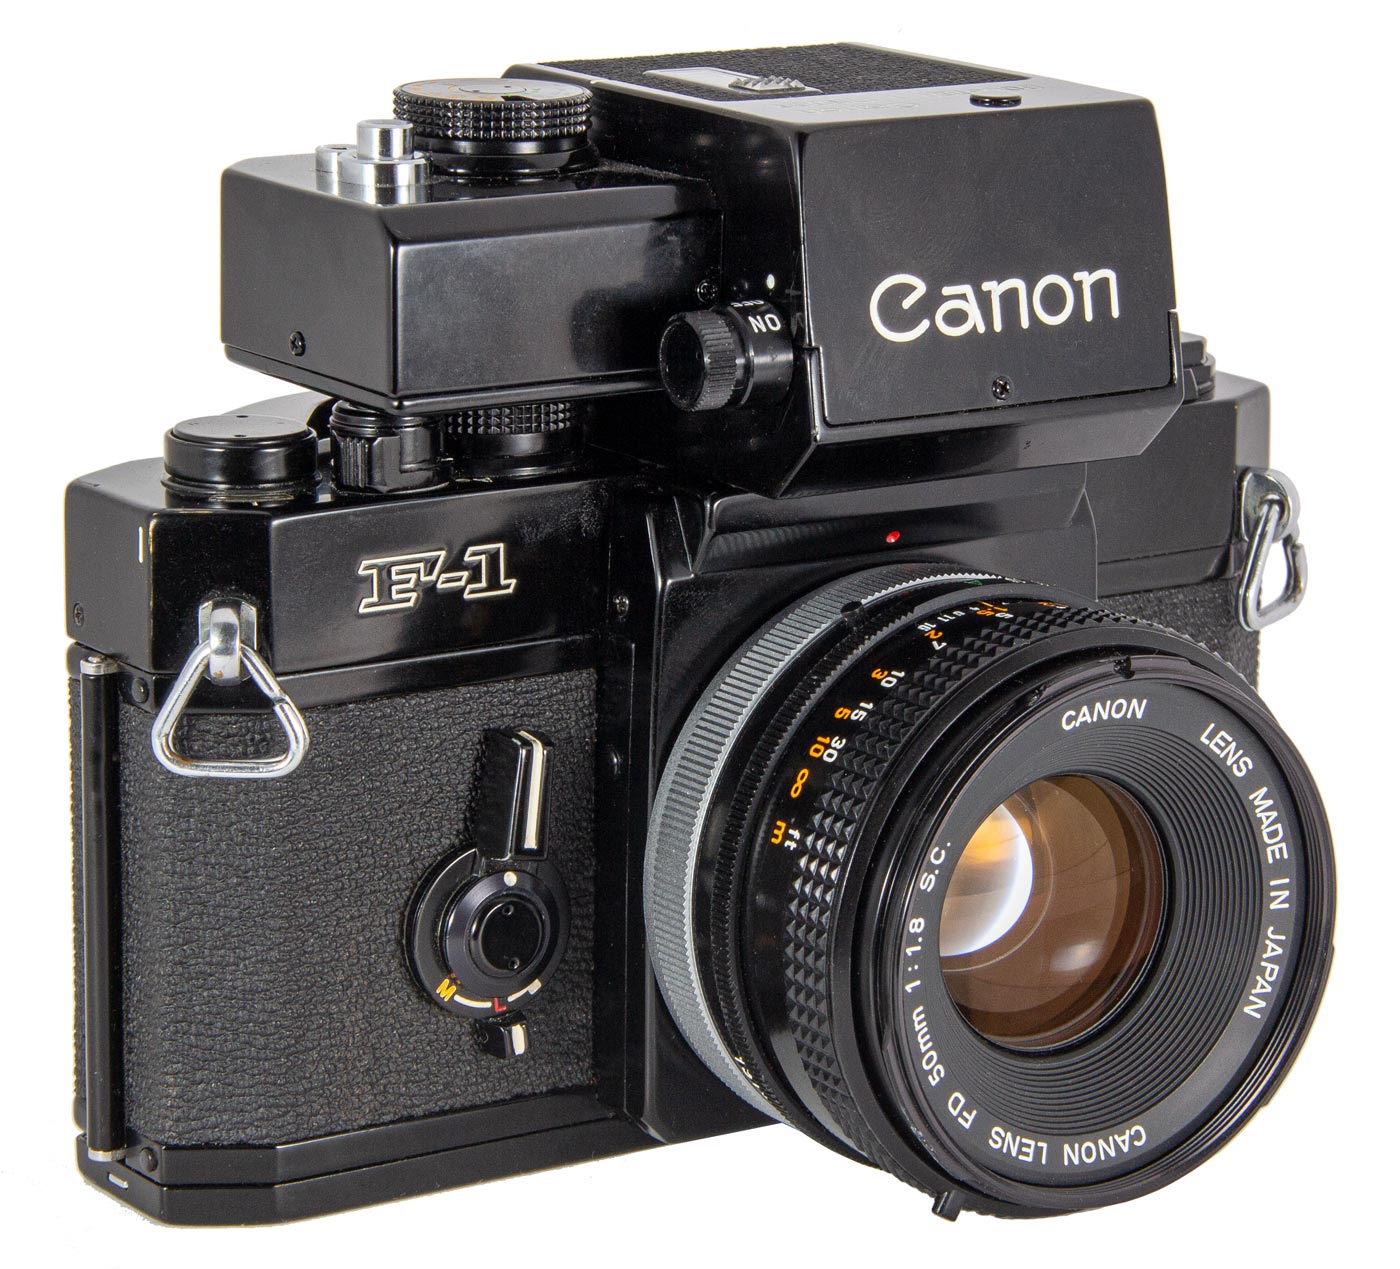
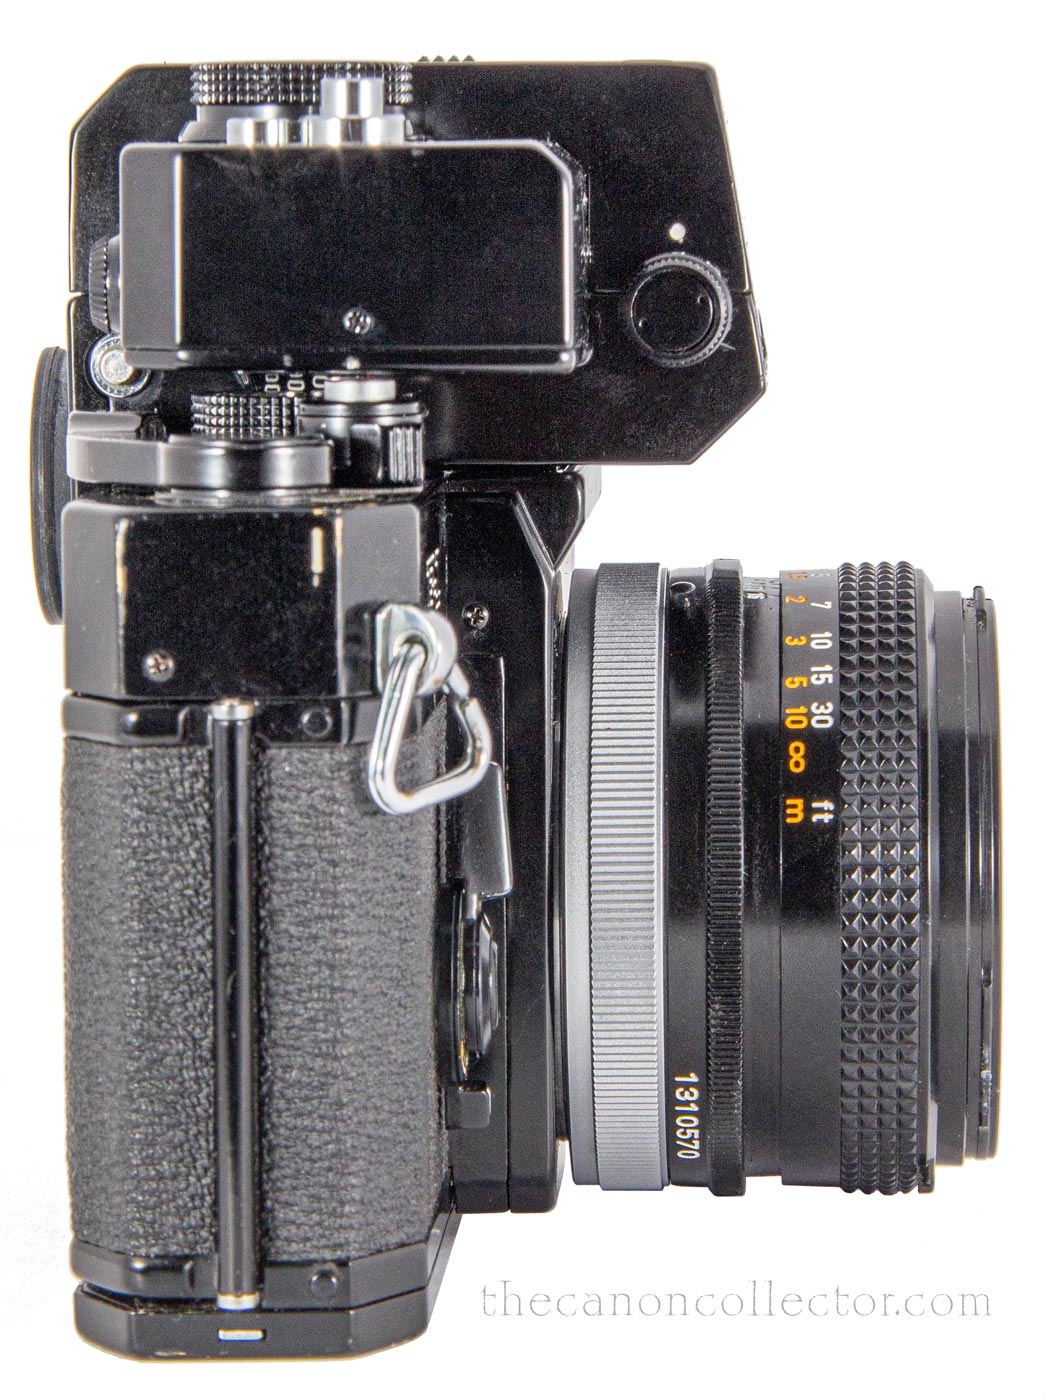
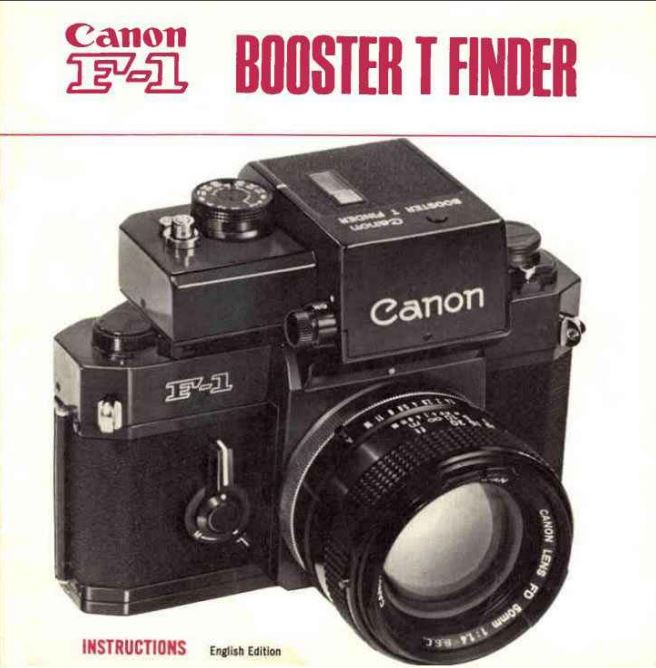
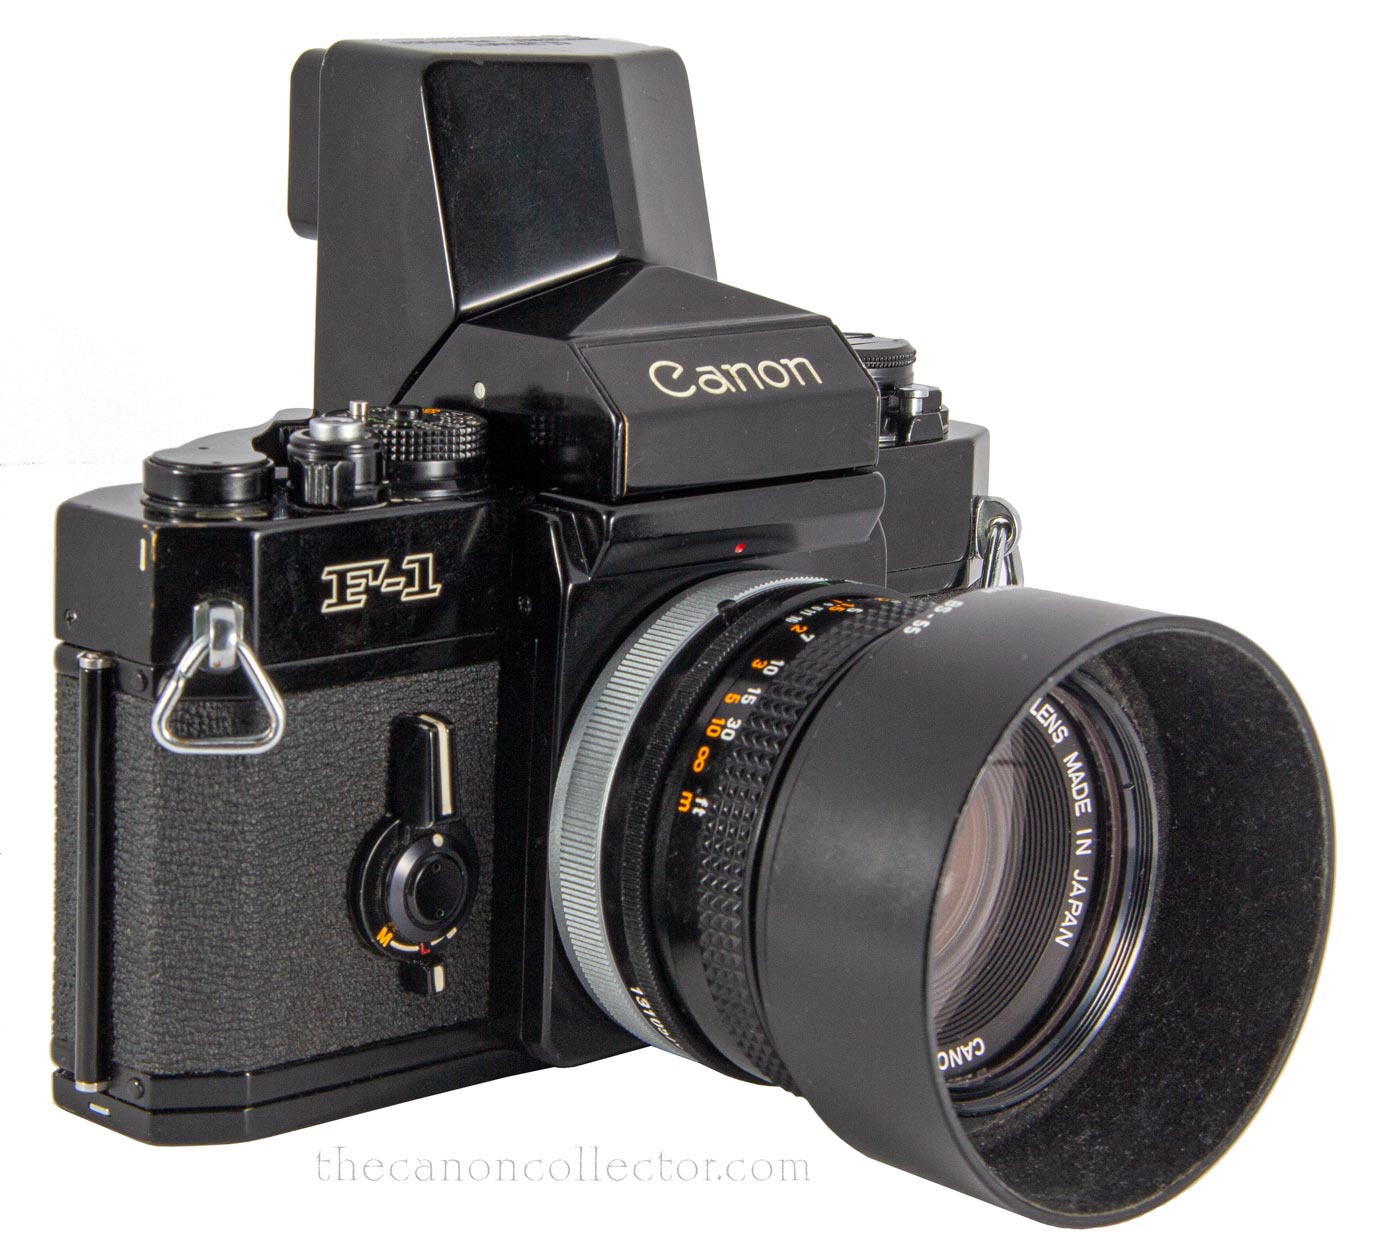
The Booster T Finder mounts on the F-1 as any Finder does sliding into the mounting rails from the rear.
The F-1 has an internal CdS light meter for normal use. That means it must be able to measure the brightest sunlit scene or a dull cloudy day. Unfortunately the demands made of the camera in normal use result in its being poor at measuring very low light levels. However, there are situations where a truly professional camera needs to work with very little light.
To provide for this Canon created the Booster T Viewfinder which specializes in low light levels. It consists of a normal pentaprism viewfinder with its own built in CdS metering system and a very sensitive metering circuit that can manage shutter speeds between 3 and 60 seconds.
It is a rather ingenious device. The shutter dial engages the shutter dial on the camera so that the shutter is controlled from the Booster. The normal meter in the camera can be used or the meter in the Booster can be used depending on what is required.
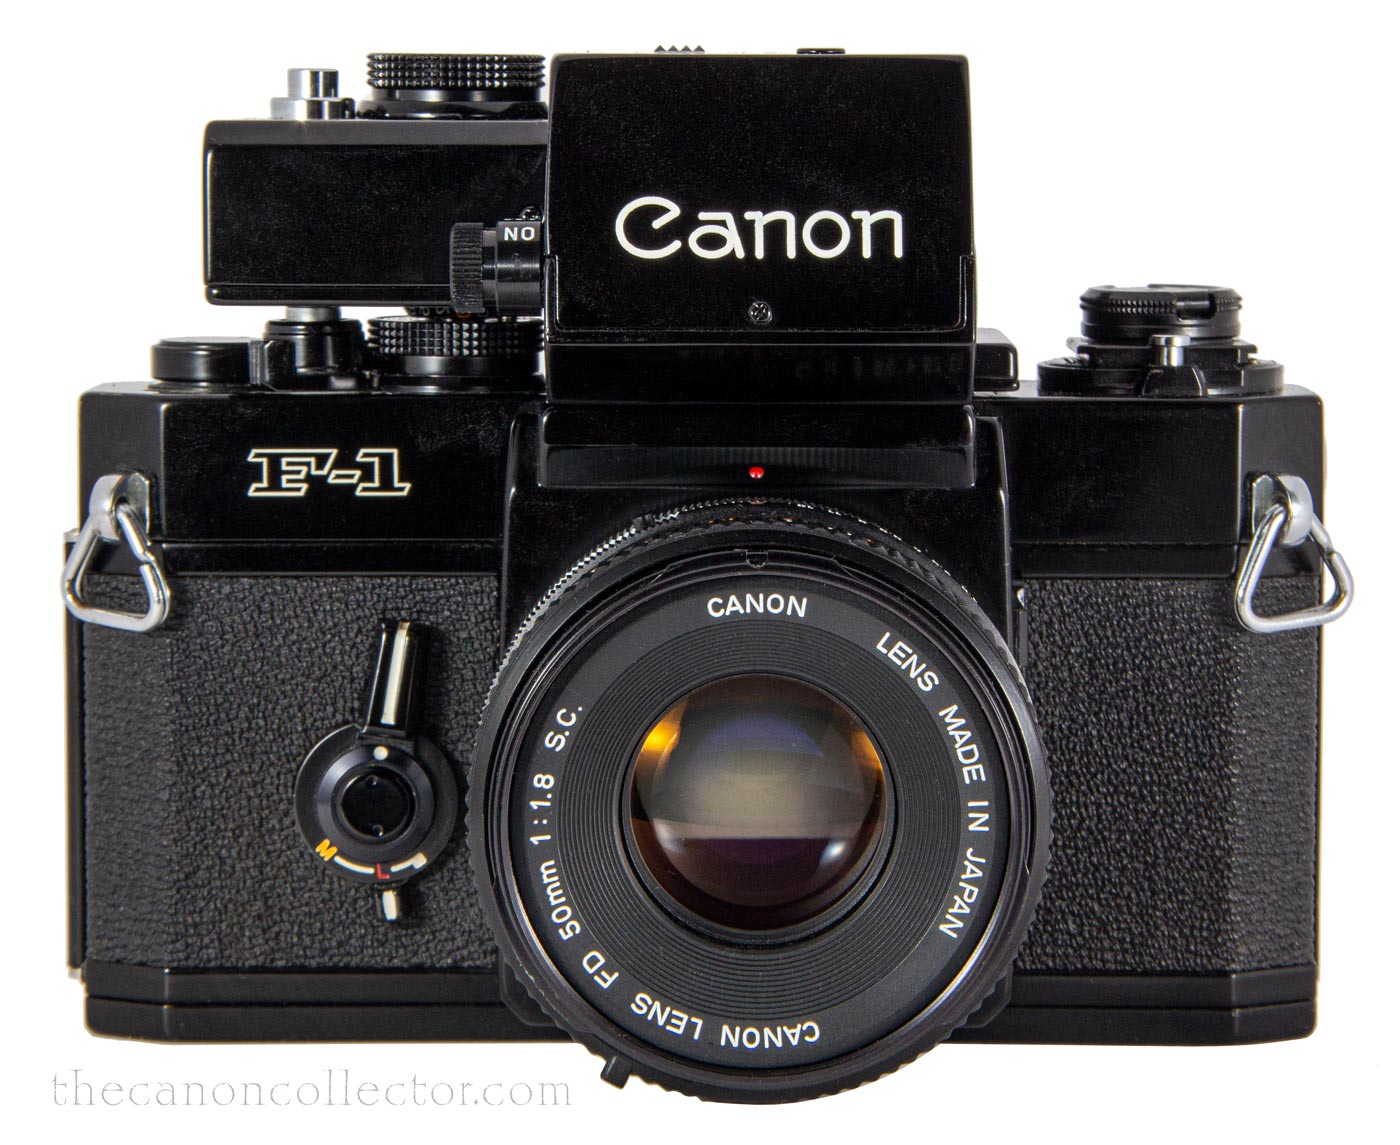
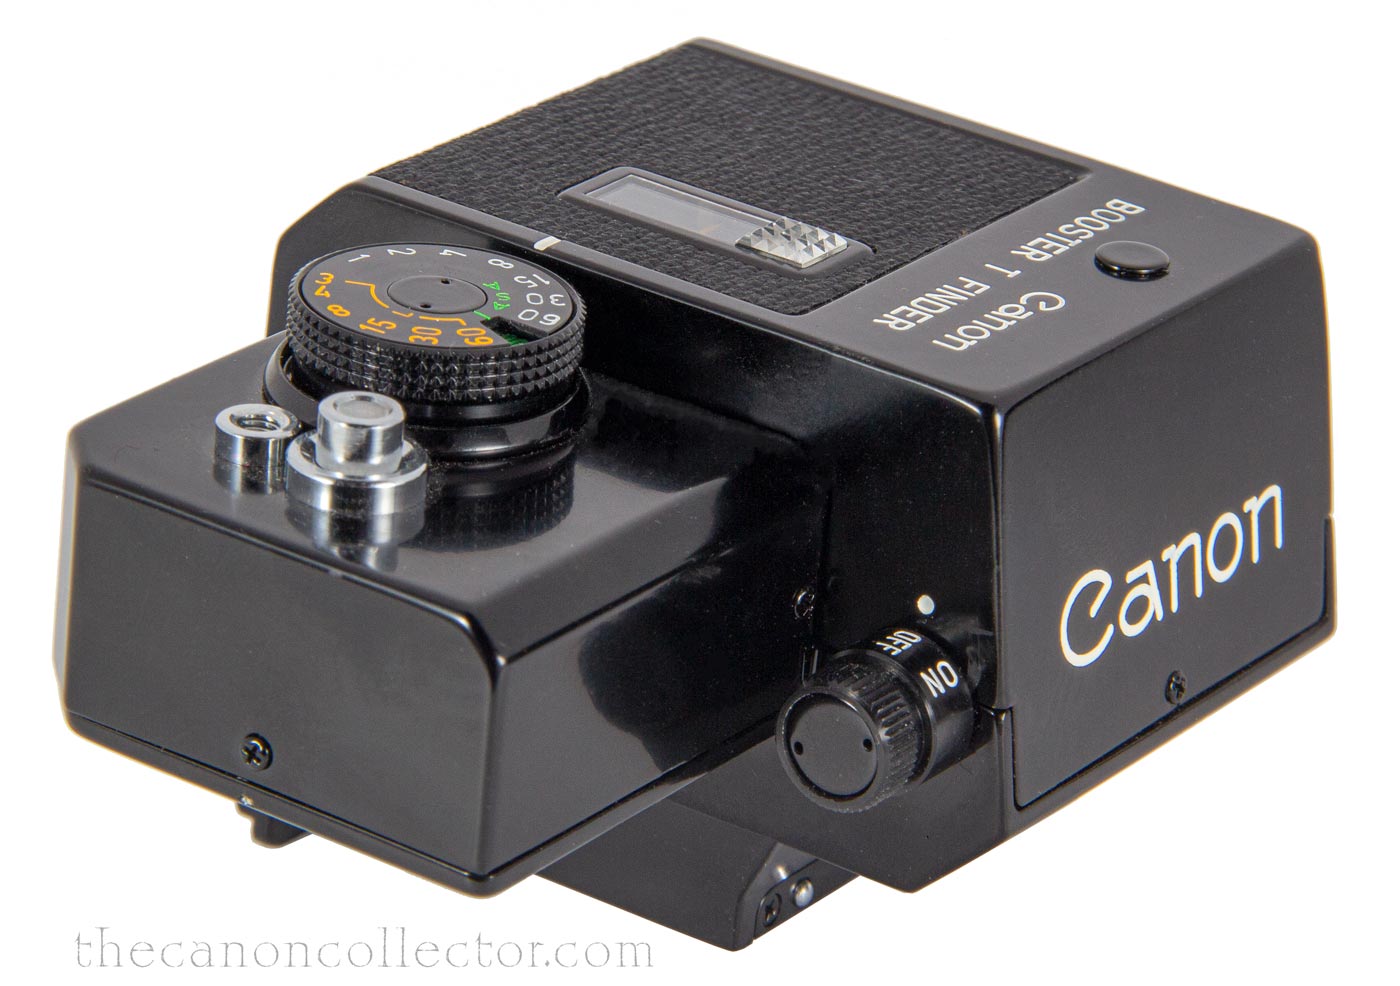
From the front you can see the Booster T Finder extending out over the shutter dial and shutter button on the camera.
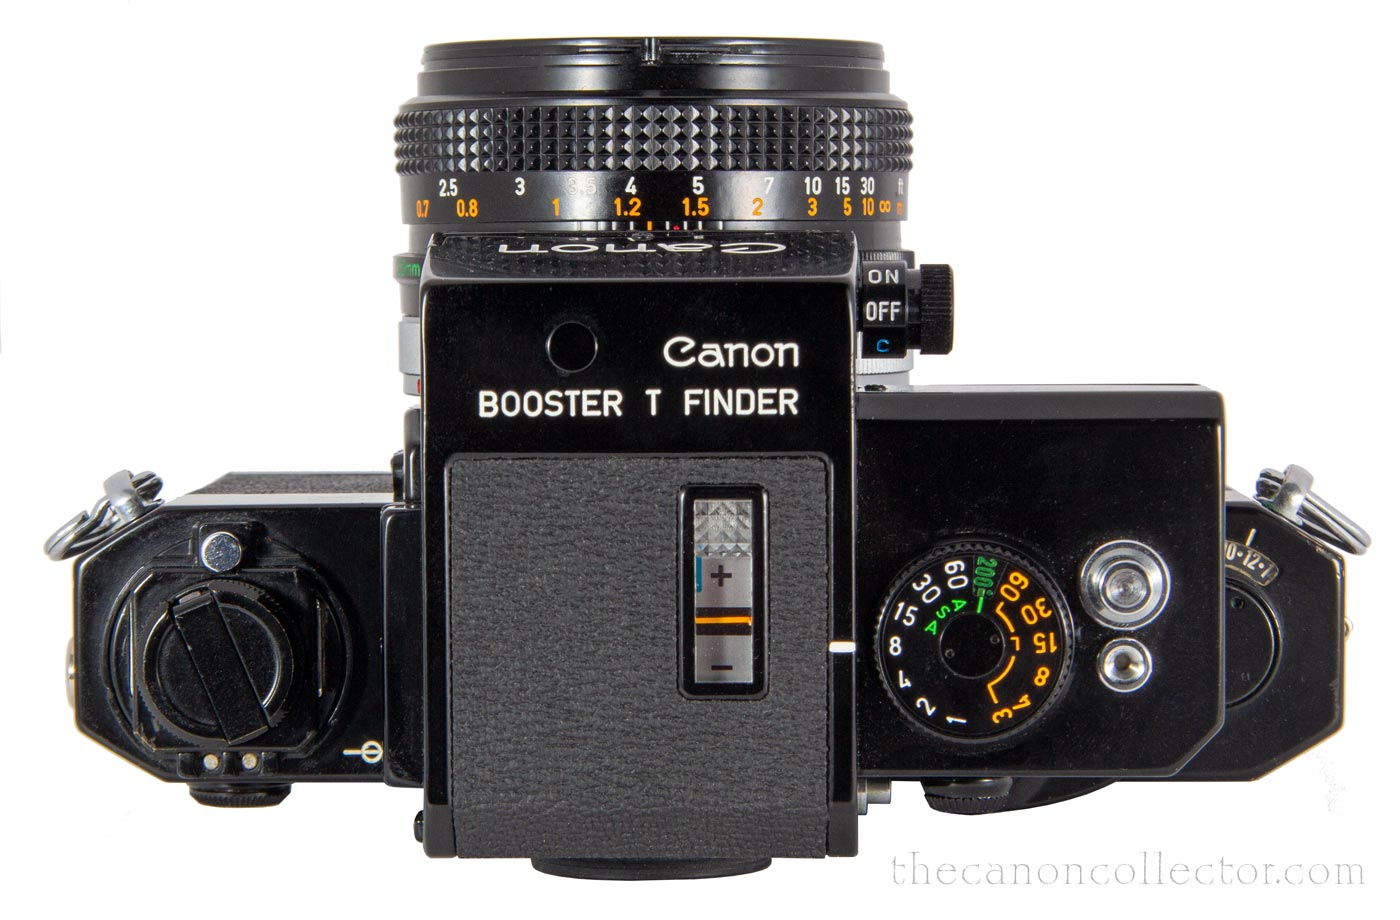
On the right of the top is the shutter dial with a white scale for normal use and an orange scale for speeds from 3 to 60 seconds.
The Booster T Finder is turned on and off by the round switch to right of center. To activate the metering in the Booster one must close the eyepiece shutter on the back of the device.
The Booster T takes a 6 volt 544 Silver Oxide battery which is the same battery that the AE-1 takes. It can also use the Canon Battery Case for external power using a special cable provided with the Booster.
Operational details are provided in the manual but I found the manual a bit hard to understand. It takes some study and fiddling with the Booster to actually figure it out.
I’m not really sure what I think about the Booster T Finder. I found it a bit obscure to use. My Sekonic light meter is a lot easier. But it does provide an internal timer for the longer shutter speeds.
As a viewfinder, it works as well as any of the others. Buried within its depths is a typical pentaprism. However, as a light meter in dim light it is very slow to reach a reading. Something to do with how the circuit works but it totally escapes me.
When the device is set to any speed from three to sixty seconds, the orange numbers on the shutter dial, the camera shutter is set to “B” and the timer in the Booster is engaged. It controls the shutter.
When the shutter is set to the white numbers on the Booster, the light meter in the camera is used. At this time the Booster has a light bulb to illuminate the light meter needle which then appears in the viewfinder.
All in all, whether it is practical or not, it is an intriging device that borders on the magical. I have had a very enjoyable time learning how to use it.
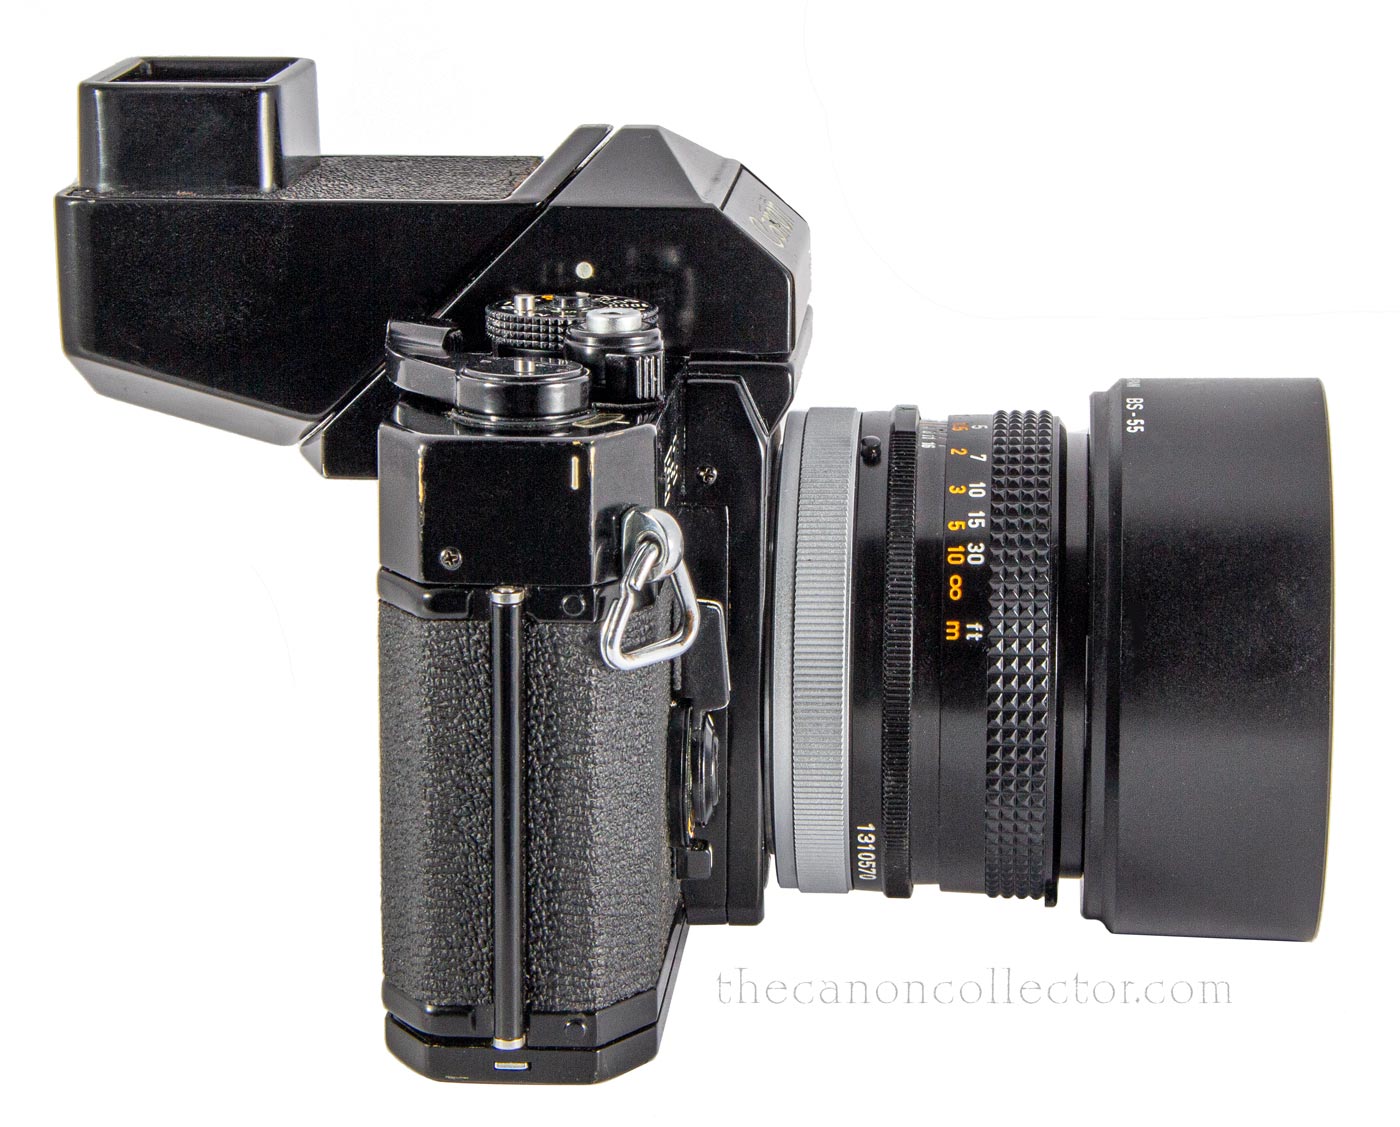
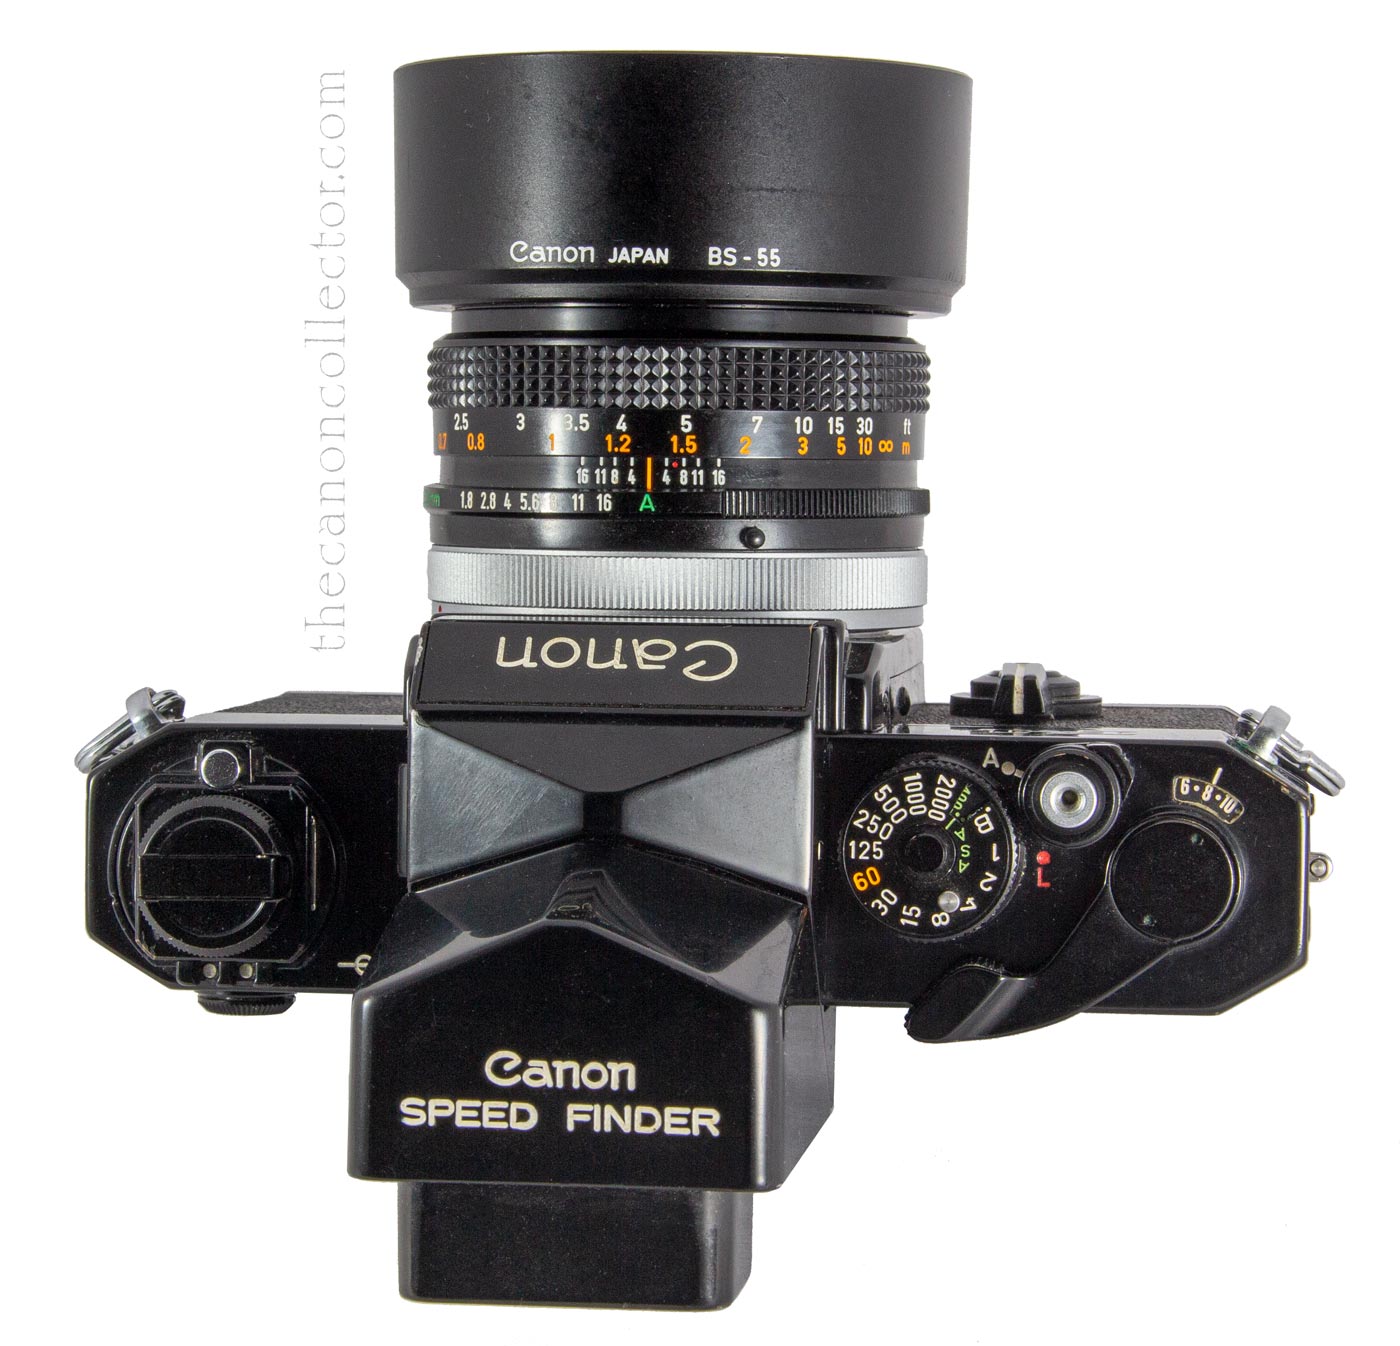
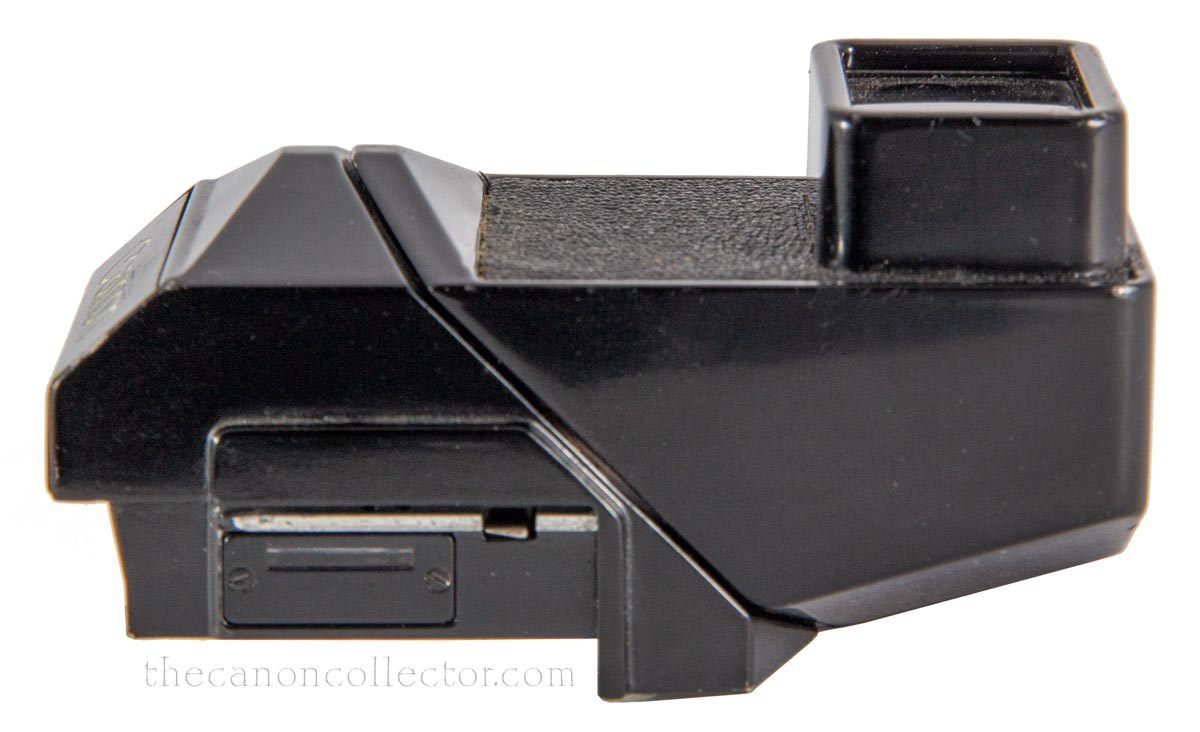
The Speedfinder is an arrangement of two prisms, one over the
focusing screen above the mirror box and one on the back of
the first one which can rotate around to allow using the viewfinder from the back at eye level or from above like a waist level finder.
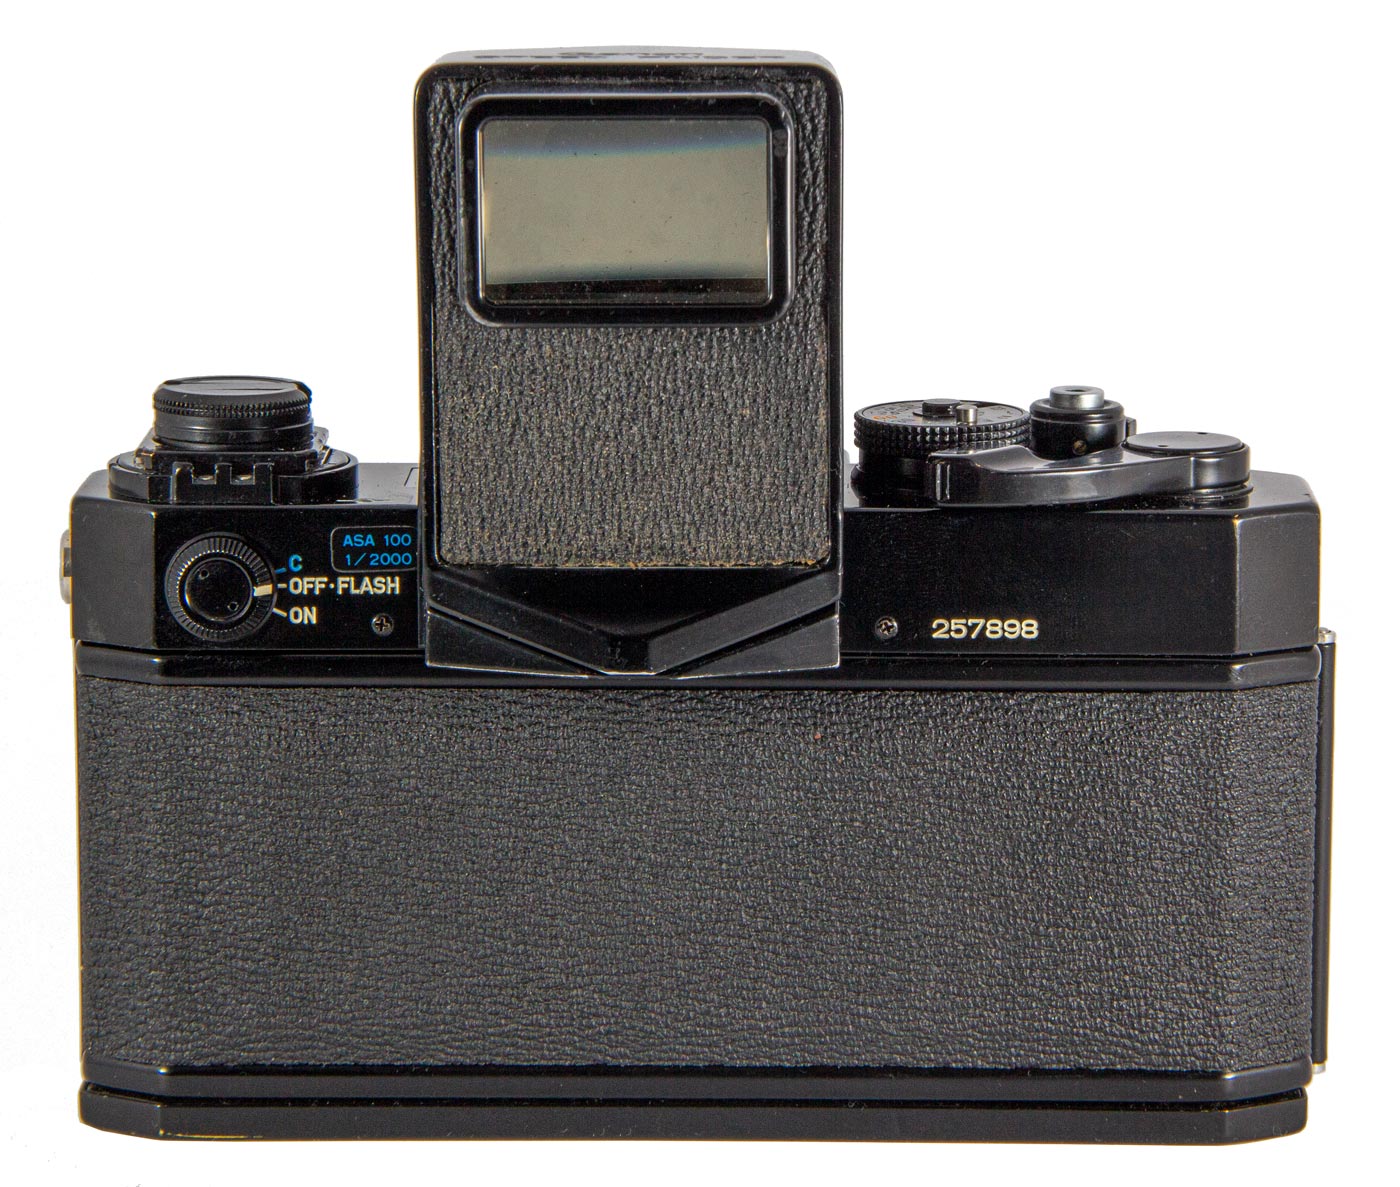
Eye relief is the longest distance between the eyepiece and the eye of the user that will still give the user the full field of view. This is usually very small and as a result the eye must be right up to the eyepiece to see the full image. The result is that eyeglass users have a problem with many eyepieces and with the eye so close the user has no peripheral awareness.
Canon created the Speed Viewfinder to overcome
some of the problems of short eye relief. This is
a neat device. You can see the full focus screen
with the eye several inches back from the
eyepiece. But, as you can see in the pictures,
the actual eyepiece can rotate on the back of the
penta-prism to allow the device to be used at eye
level or from the top.
Not only does this device solve the problem eyeglass users have but it allows the user to have peripheral vision and thus be aware of action that may be moving into the field of view. Perfect for things like sports photography.
The Speed Finder turned for viewng straight down so you can shoot from a low position and not have to get eye right down to the eyepiece. Very useful!
In the vertical position the Speed Finder can be used at eye level but the eye can be back far enough that it can see past the camera to anticipate the action.
This is the Fast Finder turned for viewing straight down viewed from the side. Under the mounting rail is a small horizontal window used for viewing the light meter needle which is under the top deck to the left of the mirror box.
A Few Observations
So there we are: four accessory viewfinders plus the Eye Level Viewfinder that comes with the camera. Some of these devices may seem outdated (they are) or even rather odd. But as I have said before in these pages, when judging history or old artifacts, you must do so from the point of view of the times. And for their time these devices were the cutting edge of photography. It didn’t get any better. Well, actually, it got much better but you know what I mean!
The Waist Level Finder and the Speed Finder, and of course the Eye Level Finder, are useful even today when shooting with the F-1. The Booster T Finder is outdated and a Sekonic light meter is a much better answer. The Servo EE Finder is another matter. If you were going to use an F-1 in a remote setup it might be your only option. But it is unlikely that the old F-1 would be used nowadays in such an application. It has long since been retired to the much less demanding requirements of hobbyists. And a fitting and honorable retirement it is.
All of the photographs on this page are of my own view finders in my collection as is the very excellent F-1 which is one of the cameras I shoot with regularly. I don’t know what it is about taking pictures but I love doing it with all of my old cameras.
This website is the work of R. Flynn Marr who is solely responsible for its contents which are subject to his claim of copyright. User Manuals, Brochures and Advertising Materials of Canon and other manufacturers available on this site are subject to the copyright claims and are the property of Canon and other manufacturers and they are offered here for personal use only.

