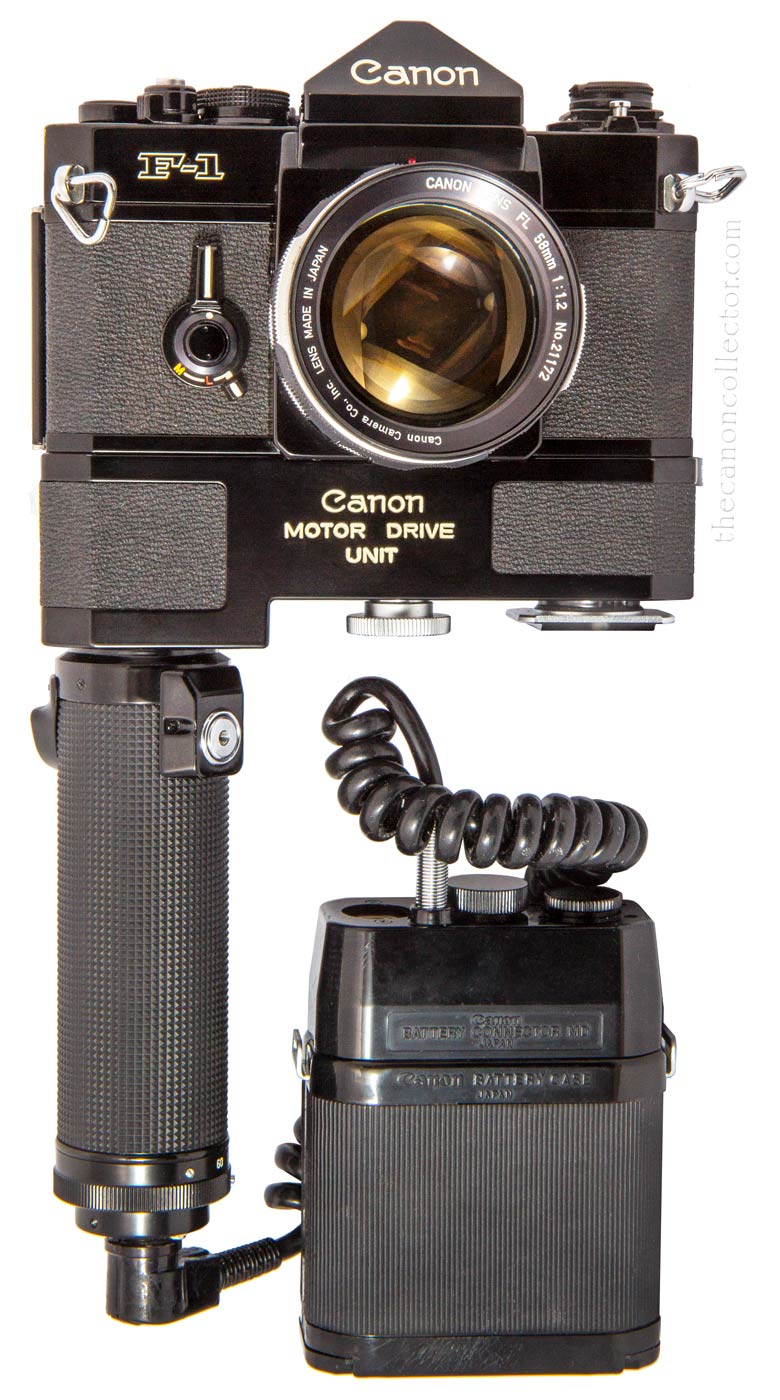
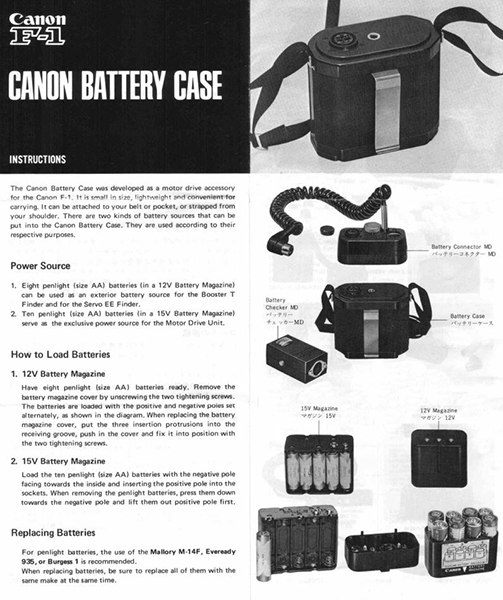
The Canon Motor Drive Unit on my F-1 “shooter” showing the battery pack which is necessary to its functioning.
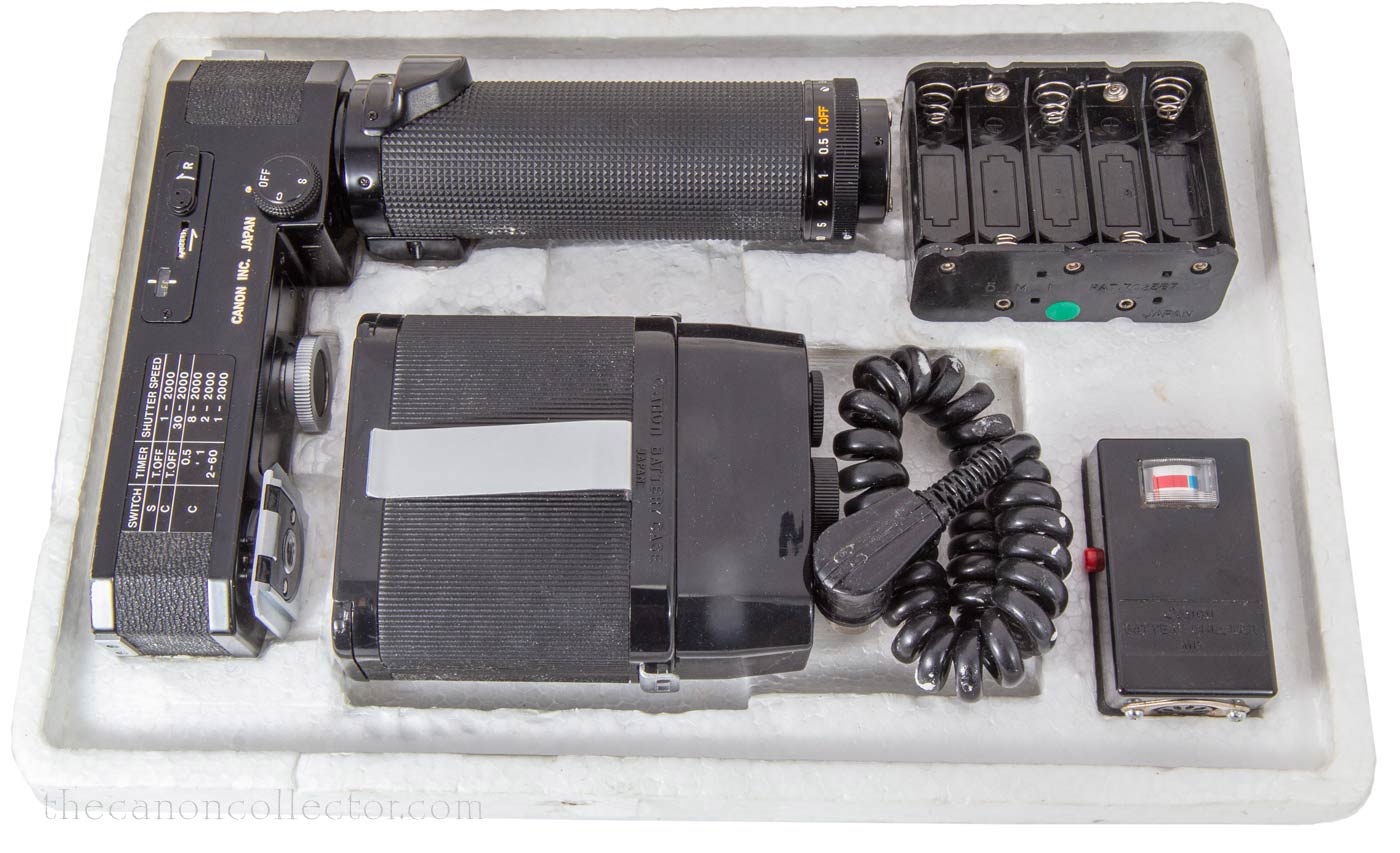
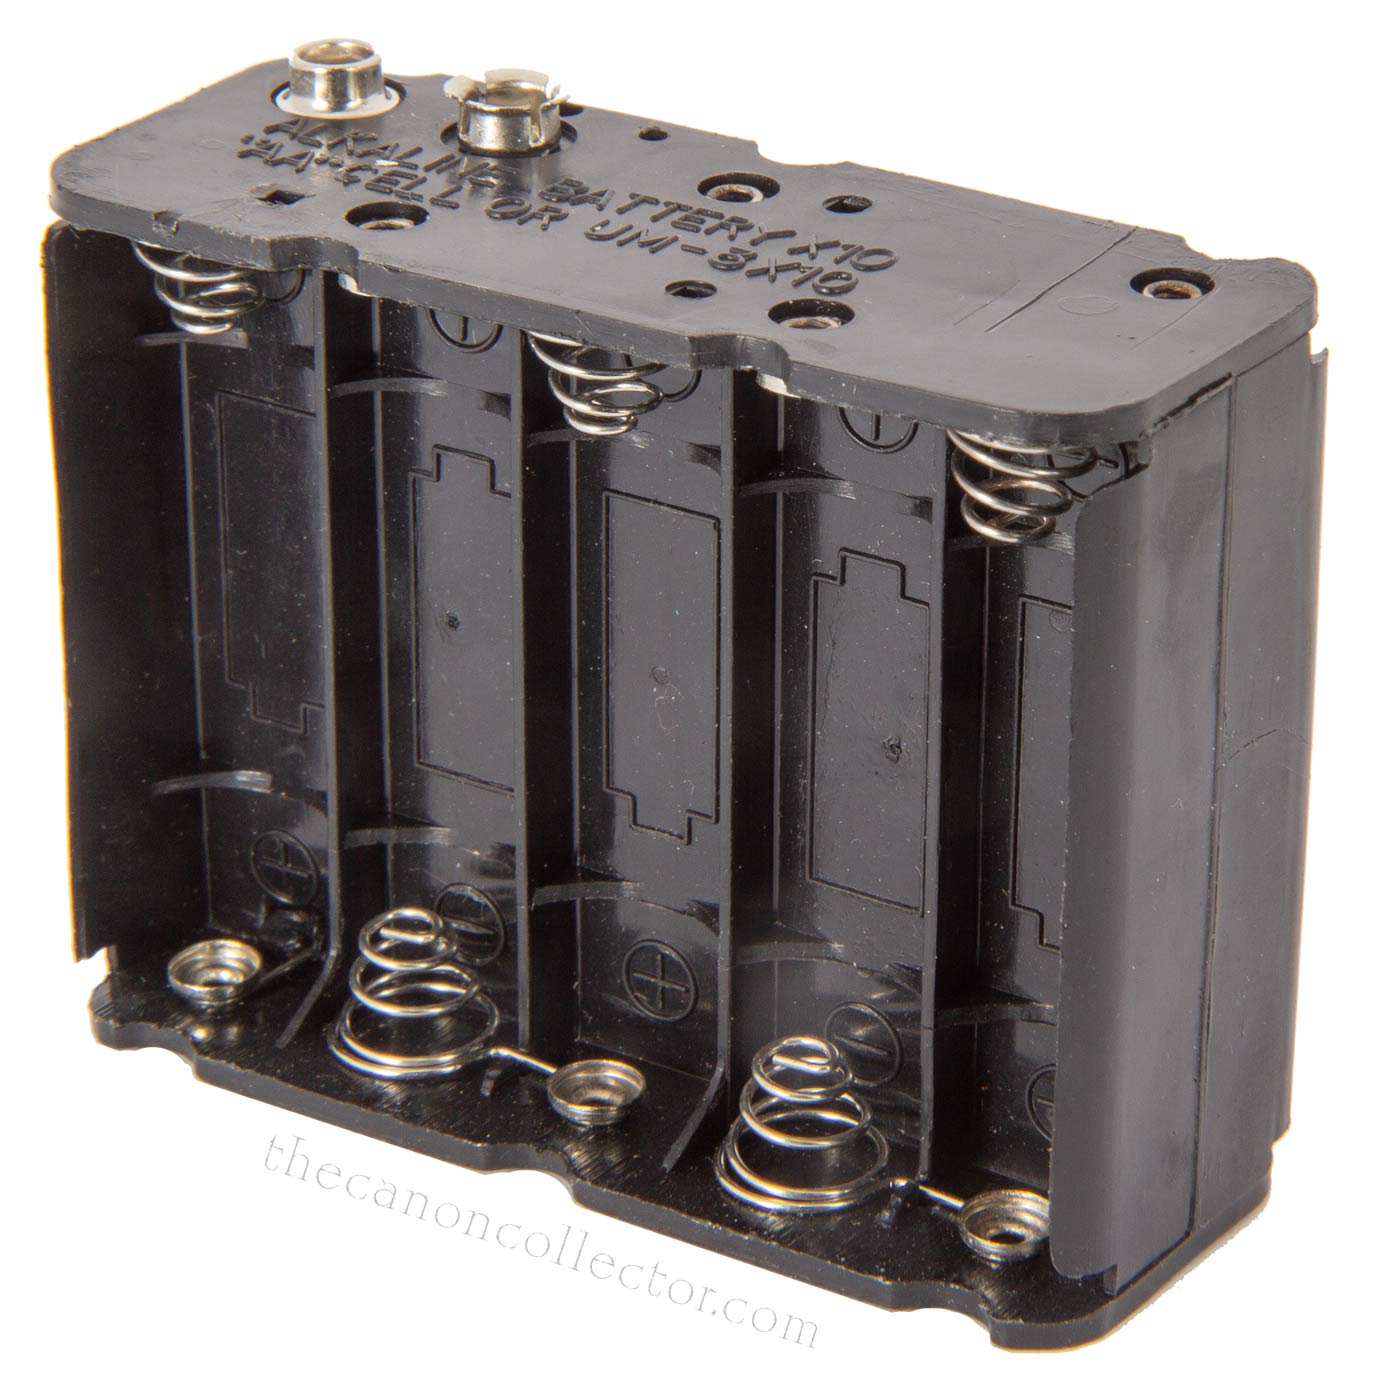
The Canon Motor Drive Unit on its styrofoam tray as it comes out of the box. The Unit includes the motor body and verticle hand grip, the battery pack, extra battery holder and a Battery Tester.
Canon Power Drives and Winders
It was in the 1970’s that cameras began to appear with motors to advance the film after each press of the shutter. This development was a boon to people shooting fast moving action for whom the time to wind the film with the thumb was just too long. A classic example of this type of user is the professional sports photographer who want ed to take rapid shots without removing the eye from the viewfinder.
In 1971 Canon introduced its flagship F-1 camera intended for professional use. It was for this camera that they created their first motorized drive, the Canon Motor Drive Unit.
Over the next 12 years they came out with several models of motorized drive for different cameras until the advent of the T50 camera in 1983. With the T50 and subsequent cameras the motorized film advance was built into the camera body. Accessory Power Drives and Winders were rendered obsolete.
Some powers units had an additional shutter button for using the camera in a vertical orientation. These were called Power or Motor Drives. If they had no extra shutter button they were called Power Winders.
The Motor Drive Unit
Canon’s first powered film advance unit, creatively named “Motor Drive Unit”, was designed for the F-1 camera and it also fits the F-1n. It should be noted that F-1’s with serial numbers below 200,000 require internal modification to work with this Unit. The changes consist of replacing some gears with stronger versions, filing some parts and beefing up some bearings to handle additional strains of high speed cycling. These modifications do not change the external appearance of the camera and so it may be difficult to tell if a particular camera has been modified.
As motor drives go, this was an awkward device. It was large and heavy and it
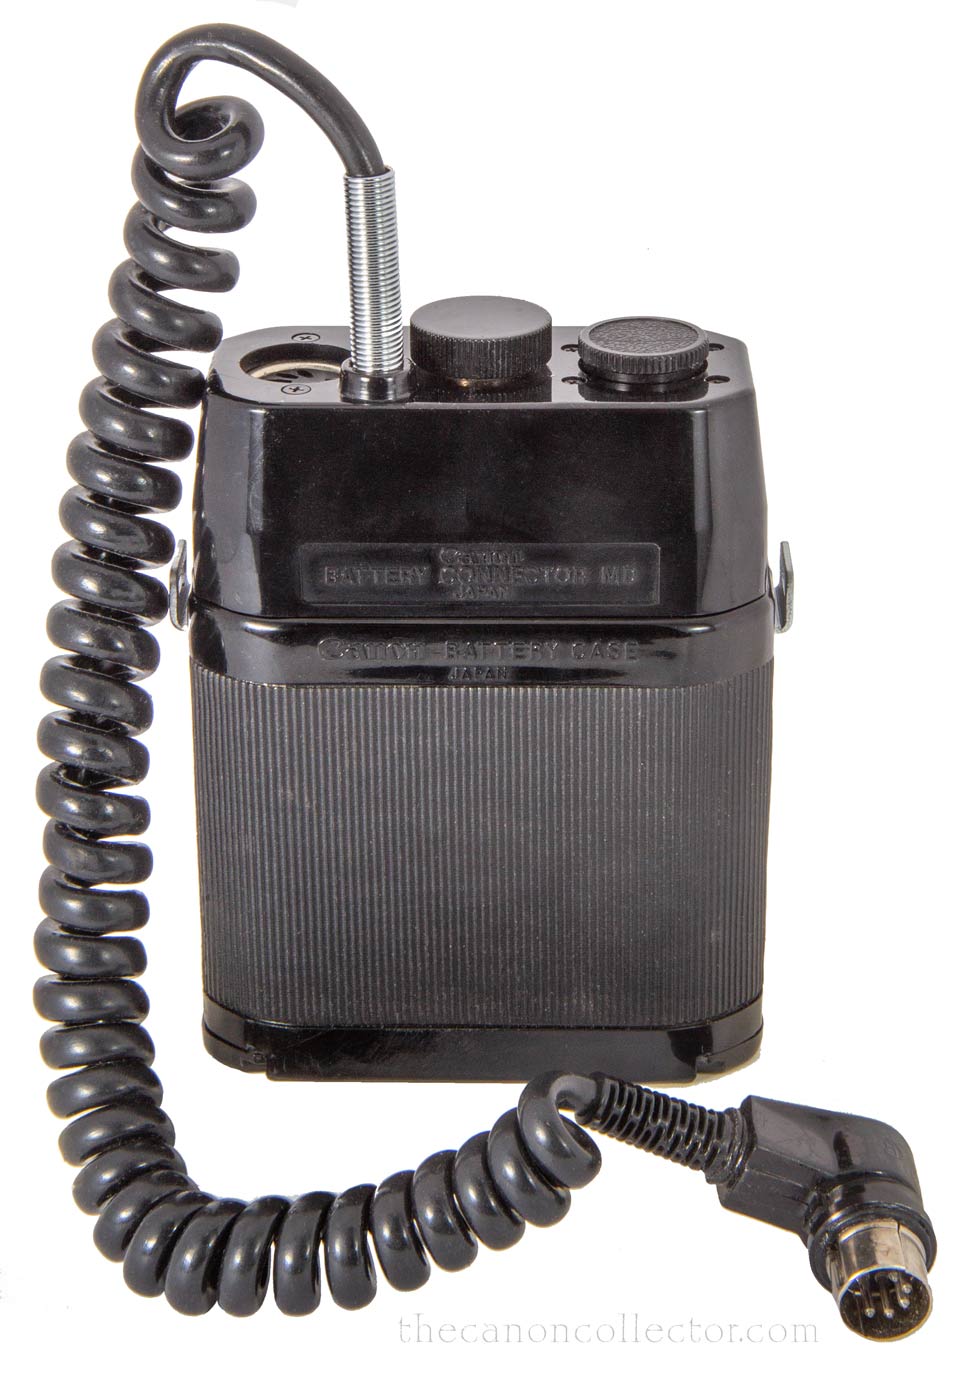
required an external battery pack which clips on the user’s belt. But on the plus side, it functioned with several other F-1 accessories to bring impressive flexibility to the F-1 System.
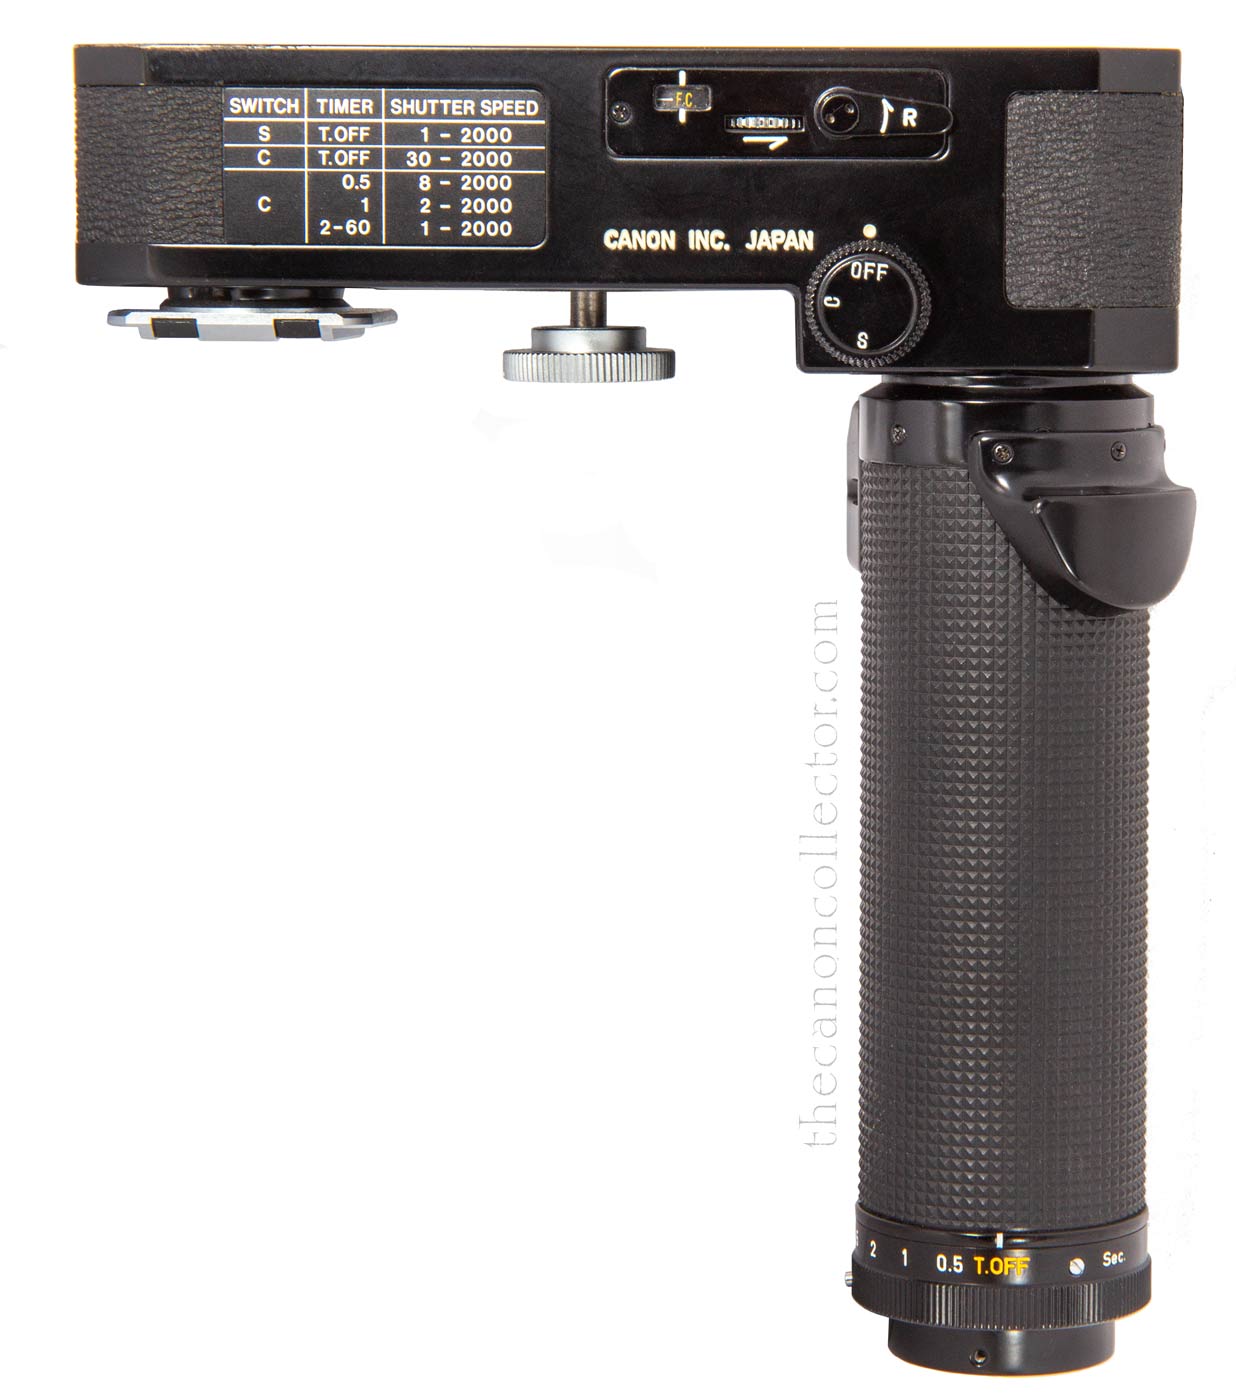
The shutter button is on the front of the handle and it has a threaded hole in the center for a cable release. The main switch is on the back. Setting it to “S” allows single exposures. “C” allows continuous shooting at 3 frames per second.
At the bottom of the handle is a rotating collar that sets the timer. With the main switch on “C” the timer can be set to take a picture every 0.5 to 60 seconds for as long as the shutter button is depressed. Use of a locking cable release allows the camera to function unattended for as long as film lasts. One could use a 36 exposure roll, set the interval to 60 seconds and the camera would take a picture every minute for 36 minutes.
When you load the camera you set the counter on the back of the Motor Drive to the number of exposures on the roll of film and when it counts down to zero as the exposures are made the unit stops working and the film must be rewound. There is no auto rewind and the manual film crank on the camera must be used.
The back of the Motor Drive Unit has the Main Switch which controls the basic functions of the Unit. “S” is for single shots and “C” is for continuous shooting. “Off” disconects the power to the Unit. Above the Main Switch is the Frame Counter and the Frame Counter Setting Gear. At the bottom of the handle is the Timer Ring for setting the timer intervals. The Battery Case cable plugs into the bottom of the handle. There are no batteries in the Motor Drive itself so the Battrey Case must be attached to the Unit.
The Battery Case plugs into the bottom of the Motor Drive Unit handle. On the top at the left is the plug for the Remote Switch MD.
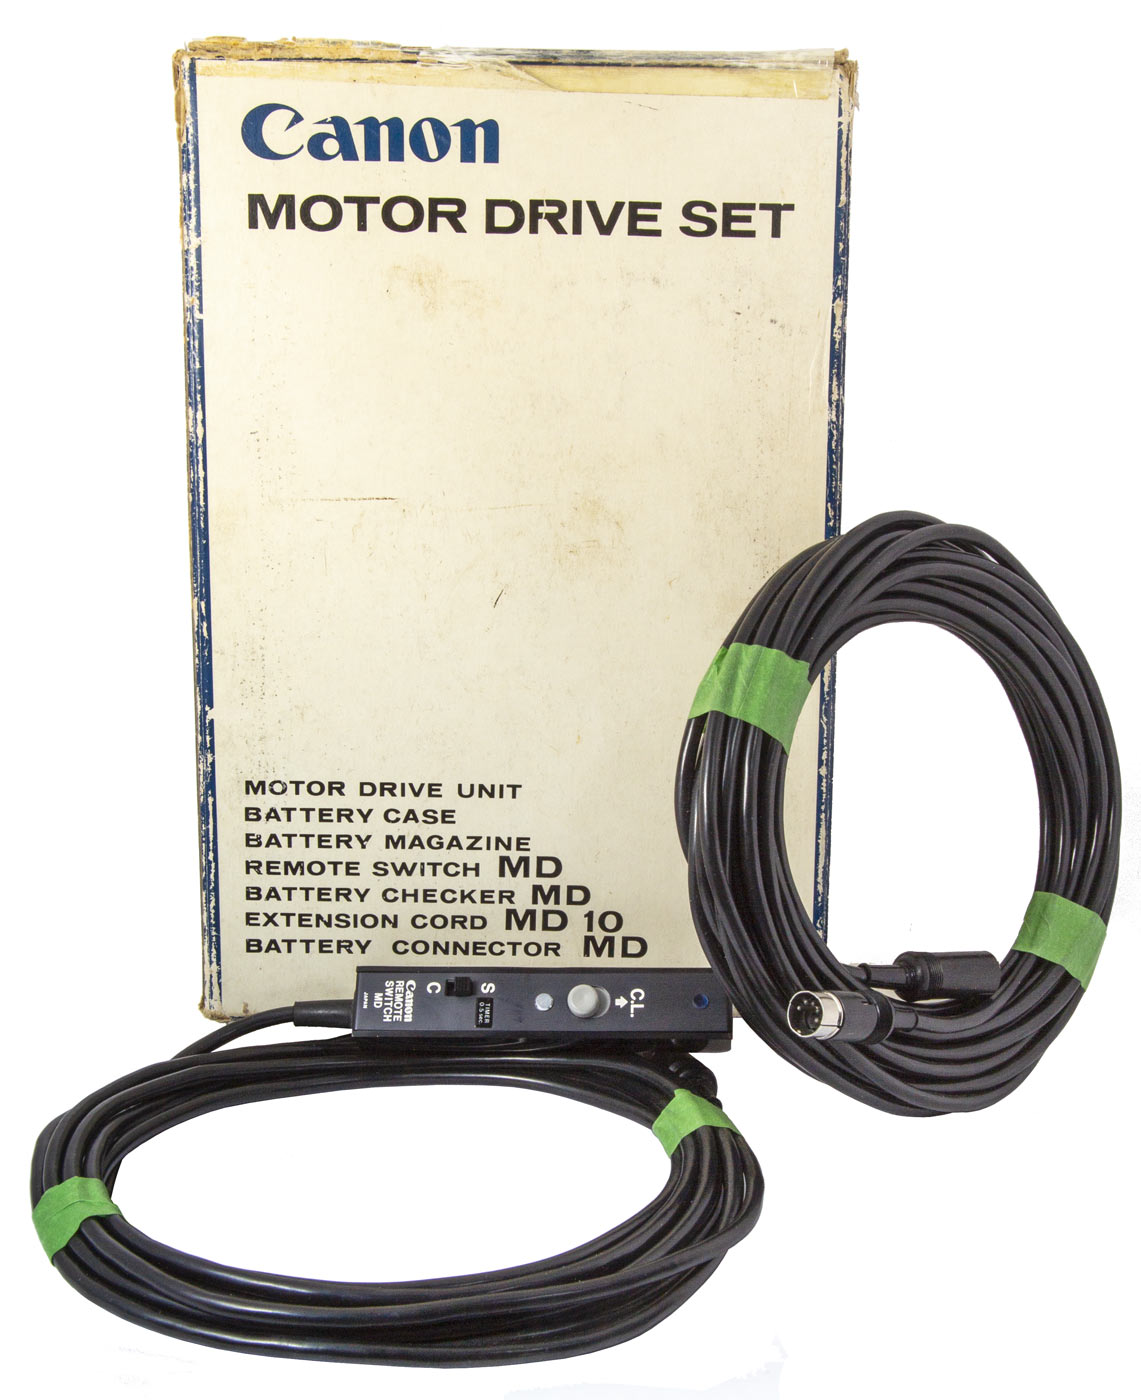
The Motor Drive Unit was sold as a set of items which you can see listed on the box. The set included a Remote Switch on a five meter cable and an Extension Cord which added a further 10 meters of cable to the Remote Switch.
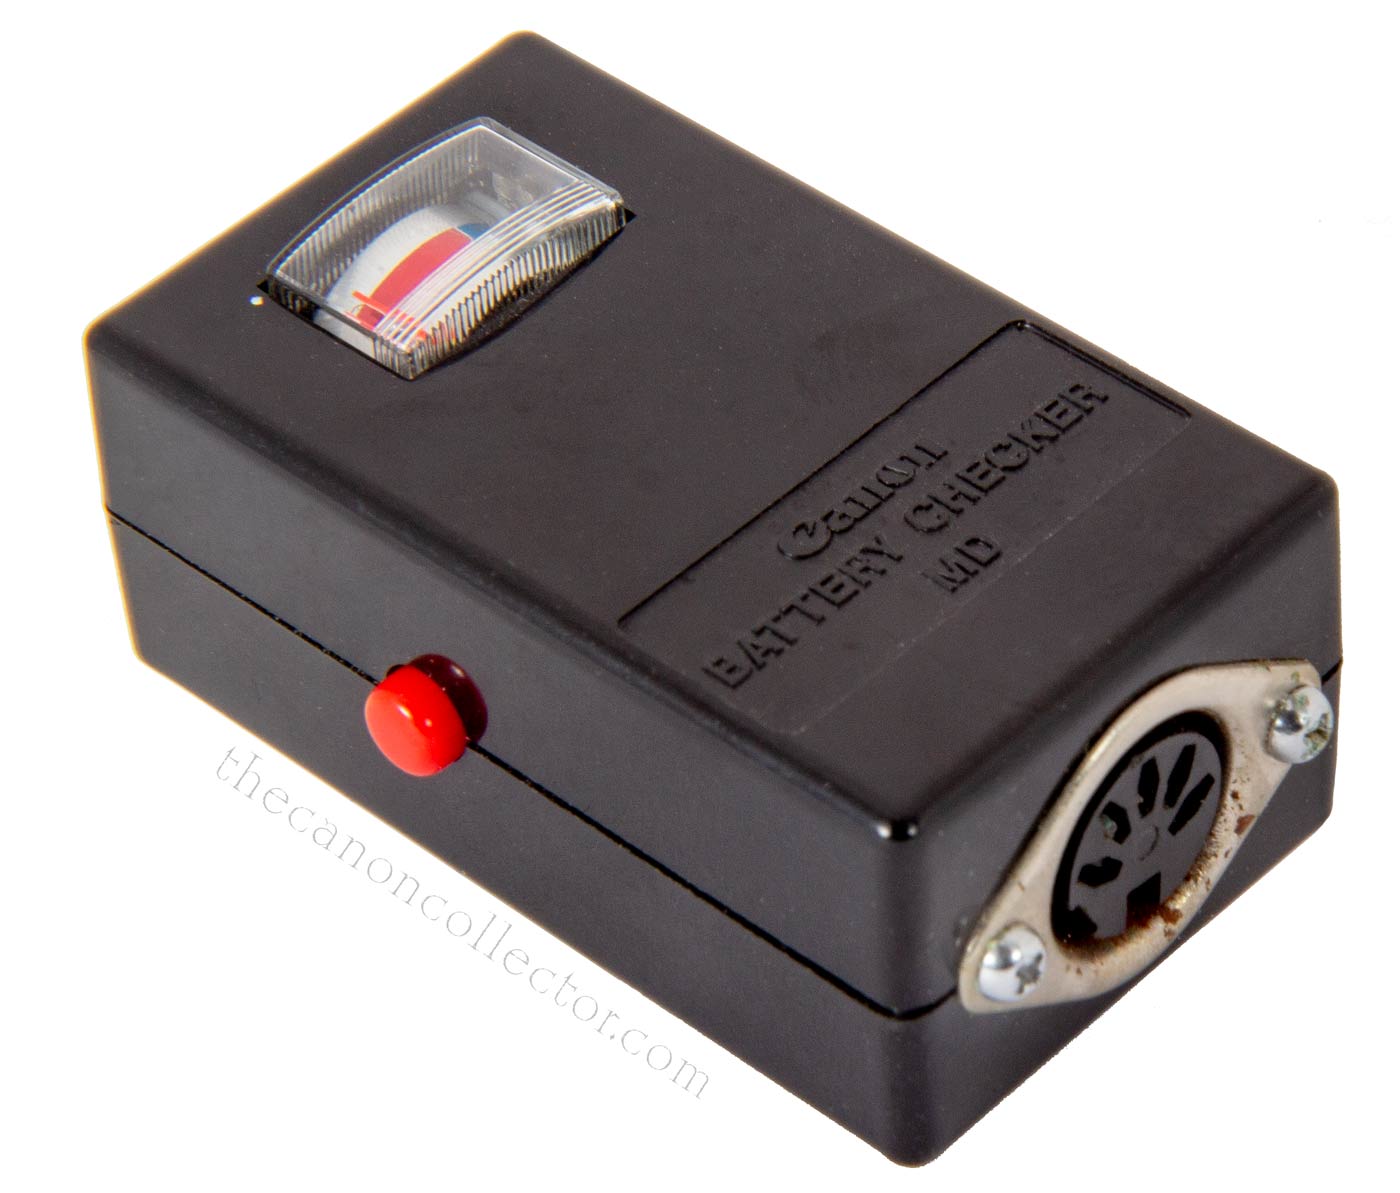
Because the Motor Drive Unit allows the camera to operate remotely and take multiple images over long periods Canon warns about using batteries with sufficient charge. To assist in this the Motor Drive Set includes the Battery Checker MD. This device connects to the Battery Case. When the red button is pressed the needle in the view window will indicate if the batteries have sufficient energy remaining. Good batteries will put the needle into the green area on the scale.
The Motor Drive Unit was created as part of a system aimed at professional users. It was not terribly portable but it integrated well with the F-1 suite of accessories. It would be an awkward unit to use at a football game or stalking game because of its size, weight and the necessary Battery Case. It would be more useful in a stationary arrangement requiring remote triggering.
Judging old equipment must always be done through the eyes of the people and technology of the time. It must be remembered that this was Canon’s first iteration of a truly professional system and it did have its rough edges. However, it was extremely well built and functioned reliably as advertised. And for the day, it was an advance in available functionality.
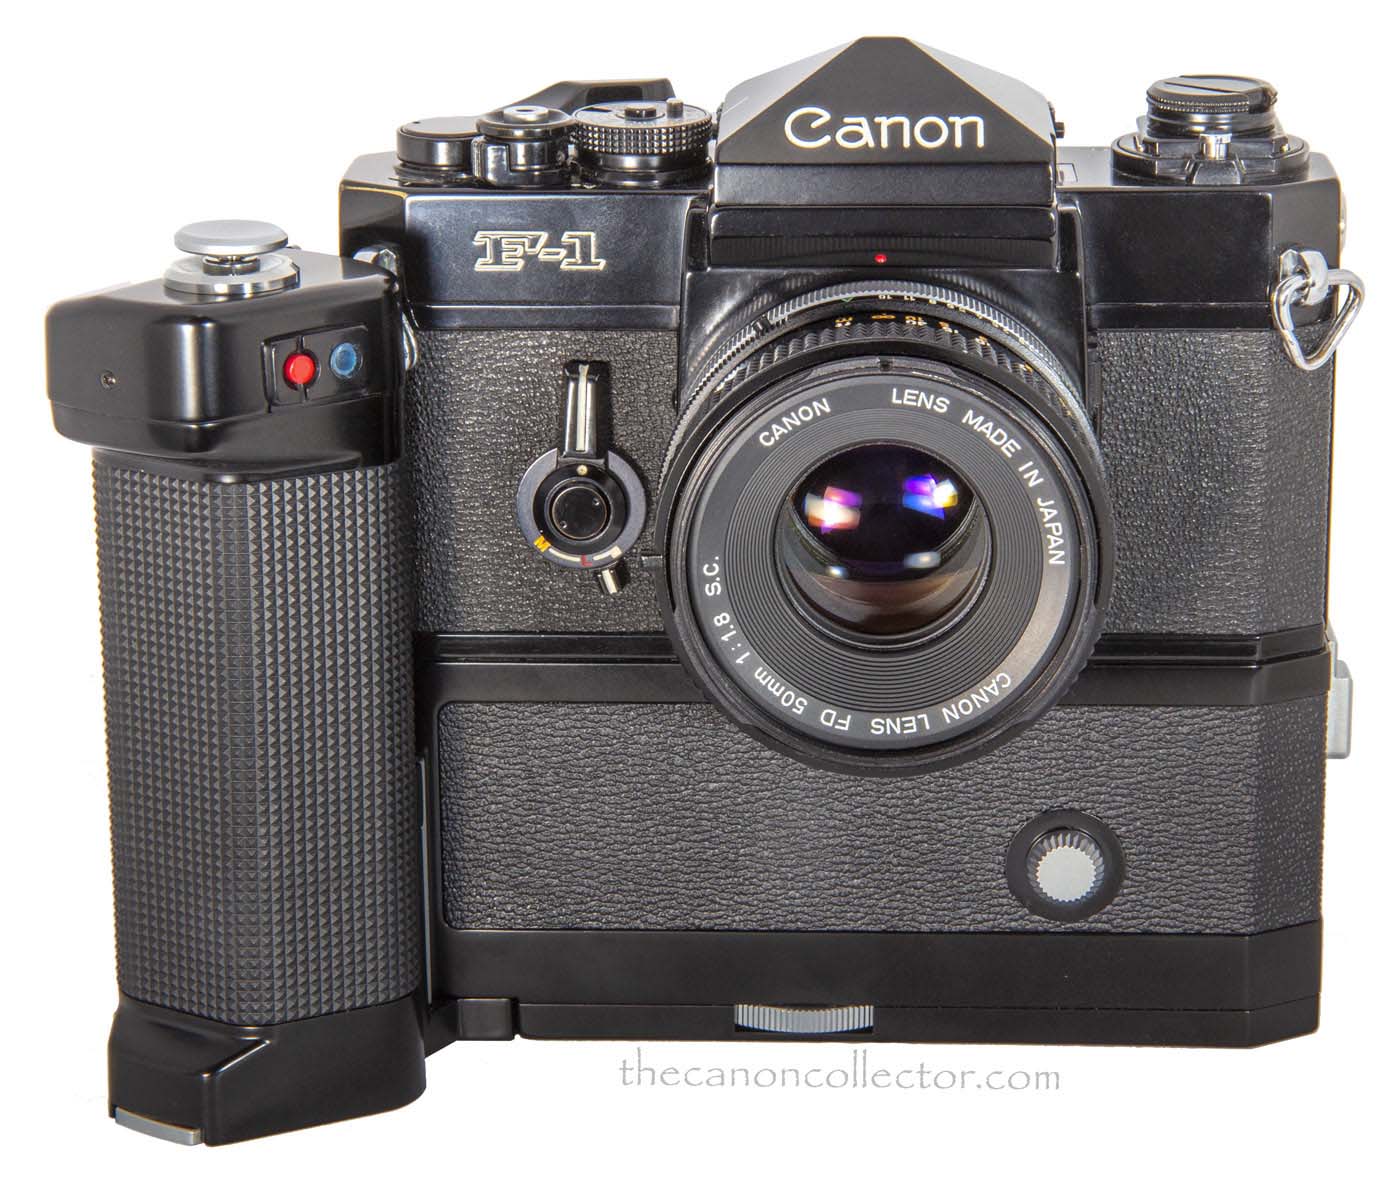
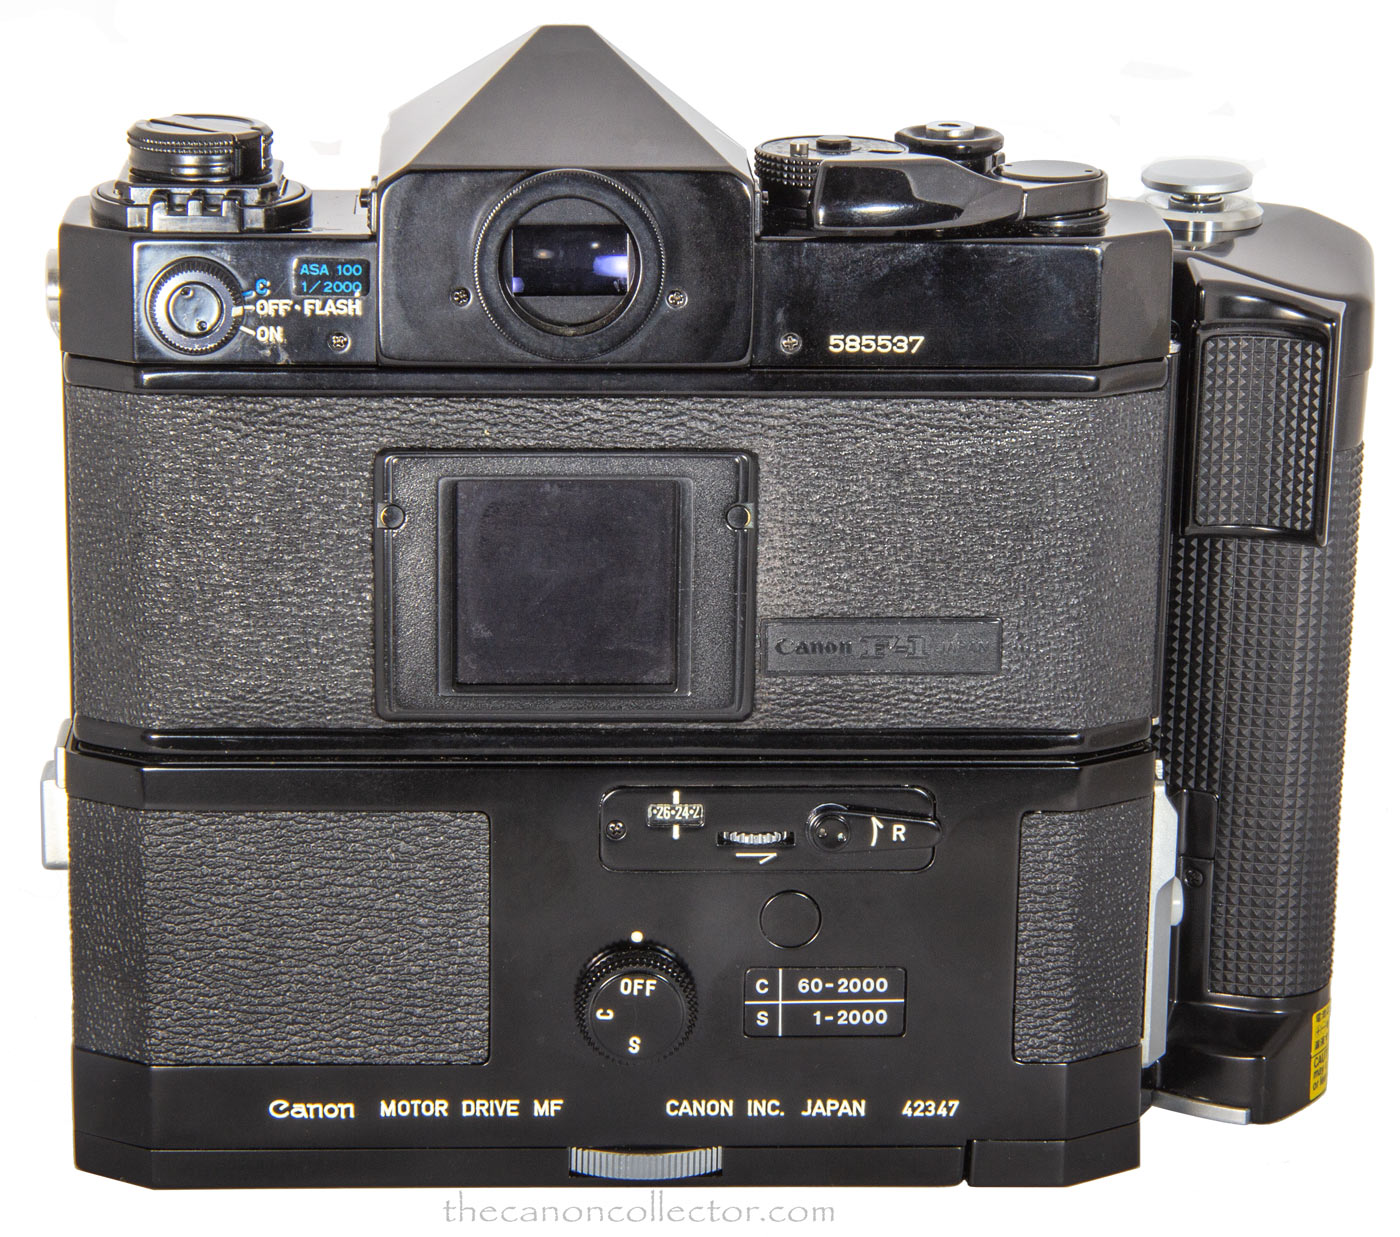
This is my Motor Drive MF (Ser. No. 42347) mounted on my F-1n. The Drive MF was designed for the F-1 and it fit the F-1n as well.
The controls on the back of the MF Unit are the same as for the Motor Drive Unit. The film counter works the same way and on the Main Switch “Off” is what it says, “S” is for single frames, and “C” is for continuous shooting at 3.5 frames per second.
The Motor Drive MF
As we discussed, Motor Drive Unit was an awkward feeling device and the separate Battery Case was annoying. To counter these criticizms Canon took the Motor Drive Unit’s handle and moved it up beside the camera body and they fitted the ten AA cells into that handle. And they put a shutter button on the top. And that was the Motor Drive MF.
In most other respects it was still the Motor Drive Unit. It would shoot single frames or continuously at 3.5 frames per second. It still worked with the Film Chamber 250 and other F-1 accessories.
The intervelometer function was removed to make the Drive more compact but there were attachments that provided that functionality and more. All of these are pictured and described in the Dealer Notes for F-1 Accessories.
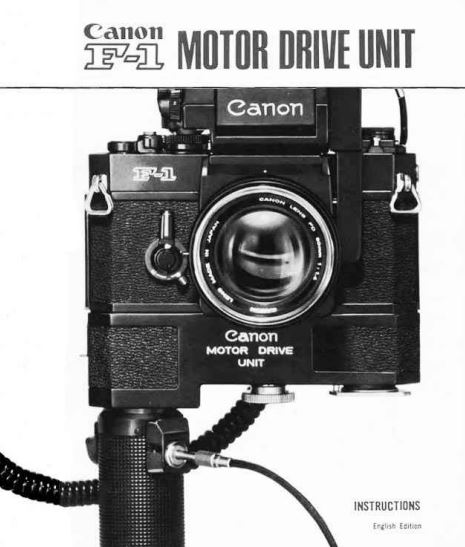
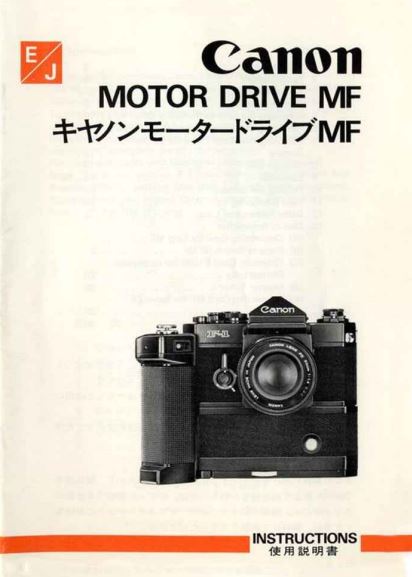
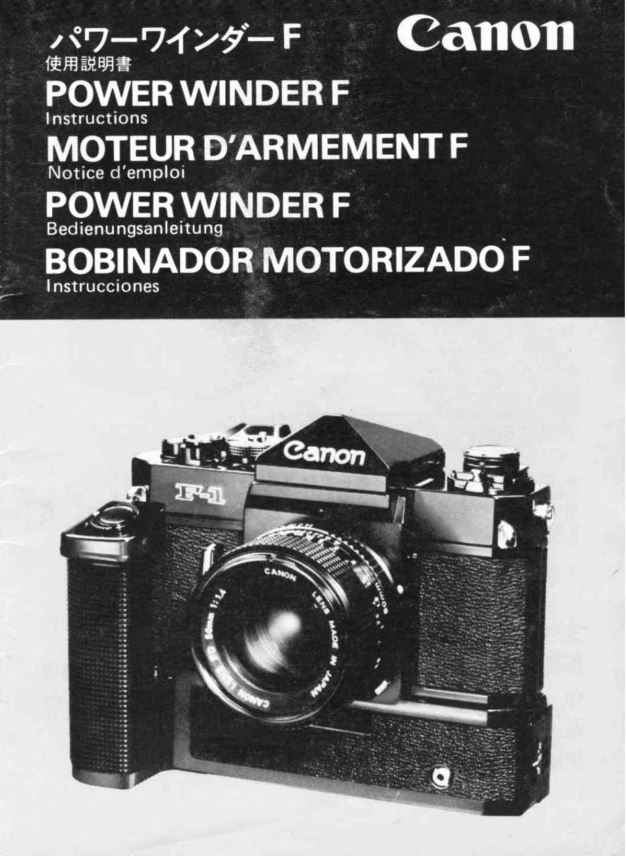
How to use the Motor Drive MF is best learned in the Instruction Manual above.
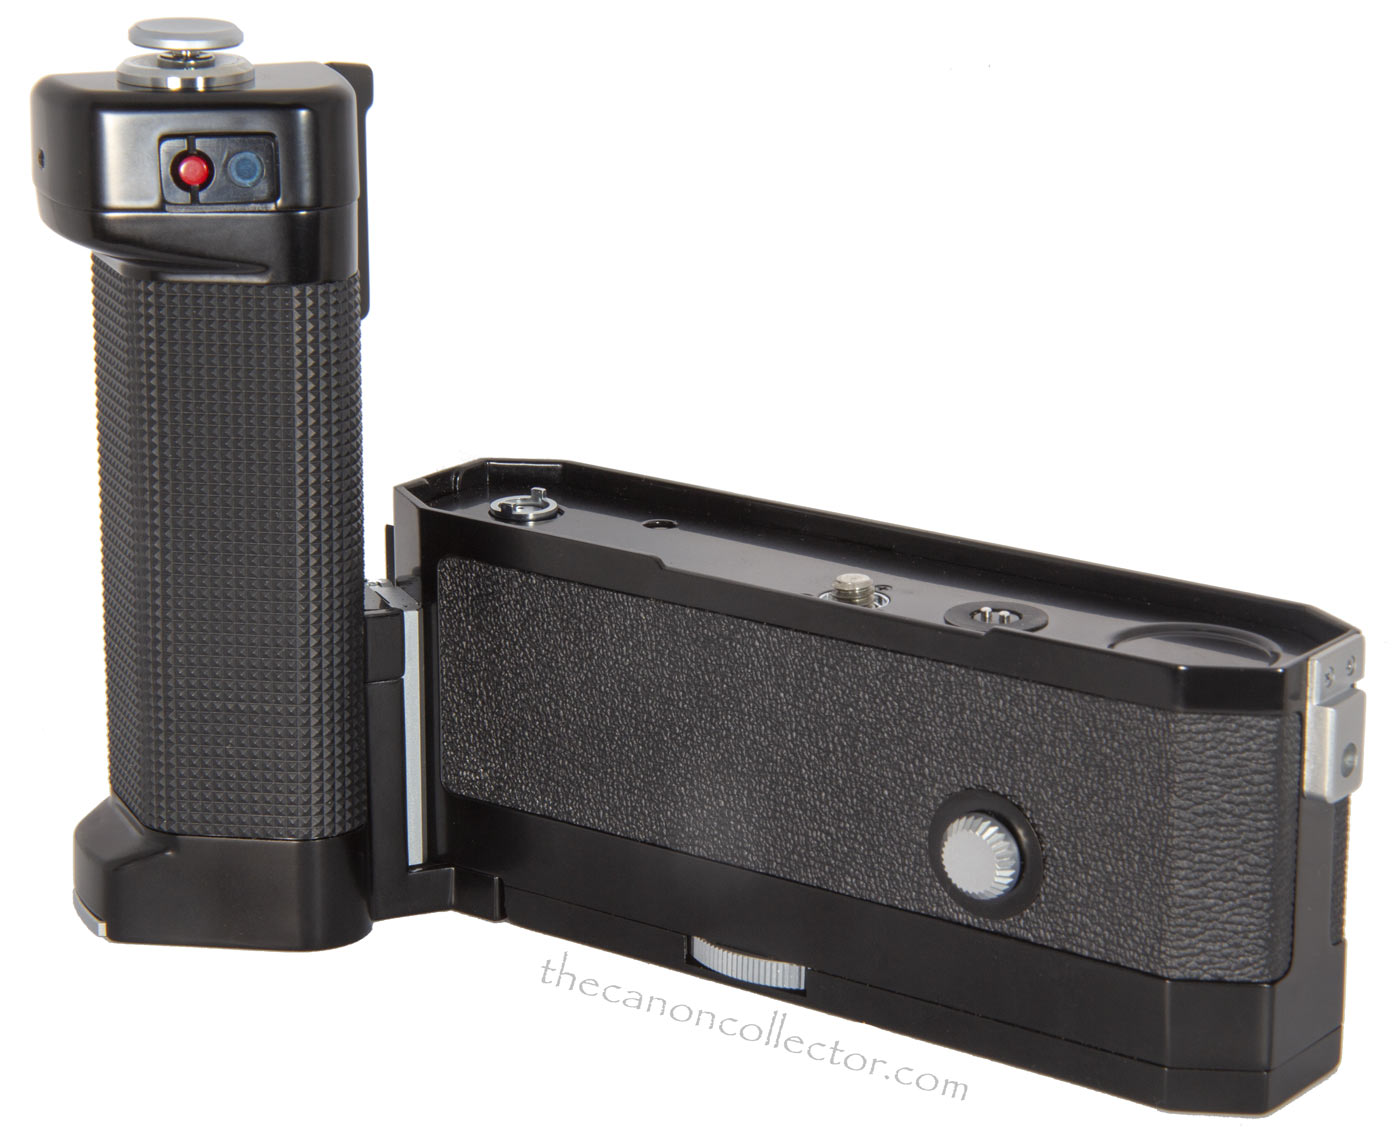
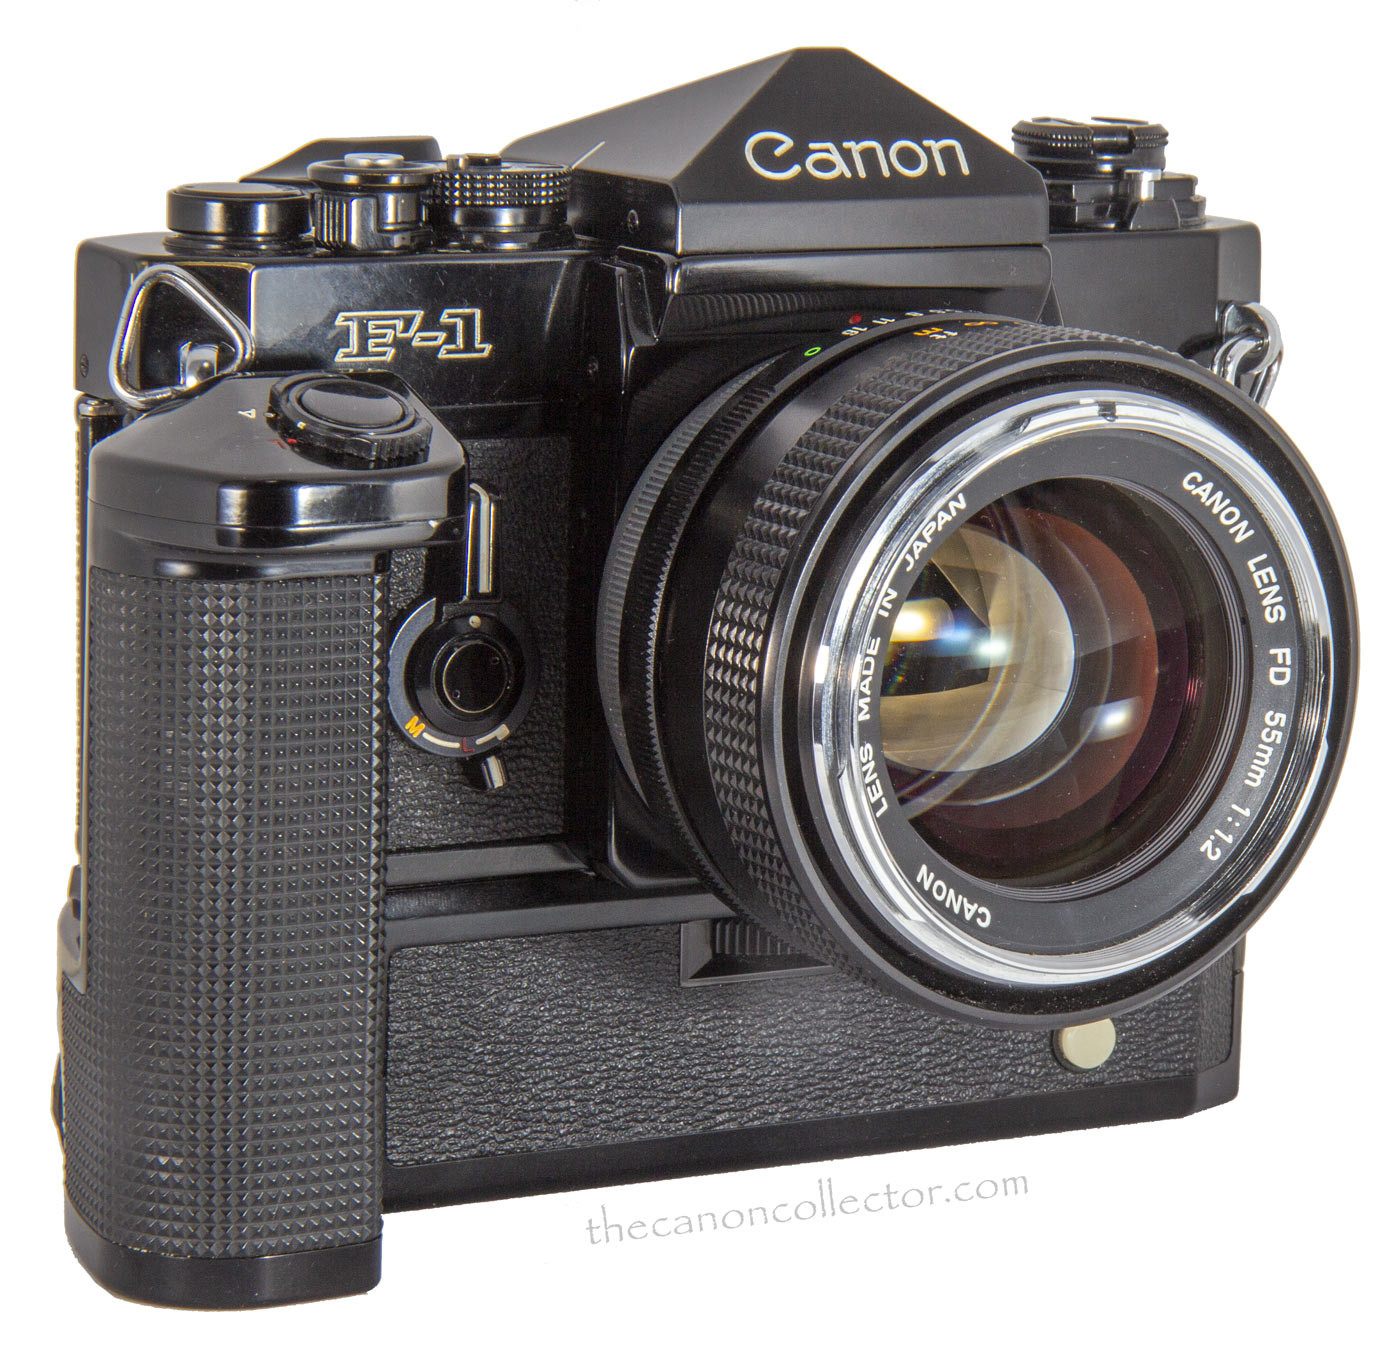
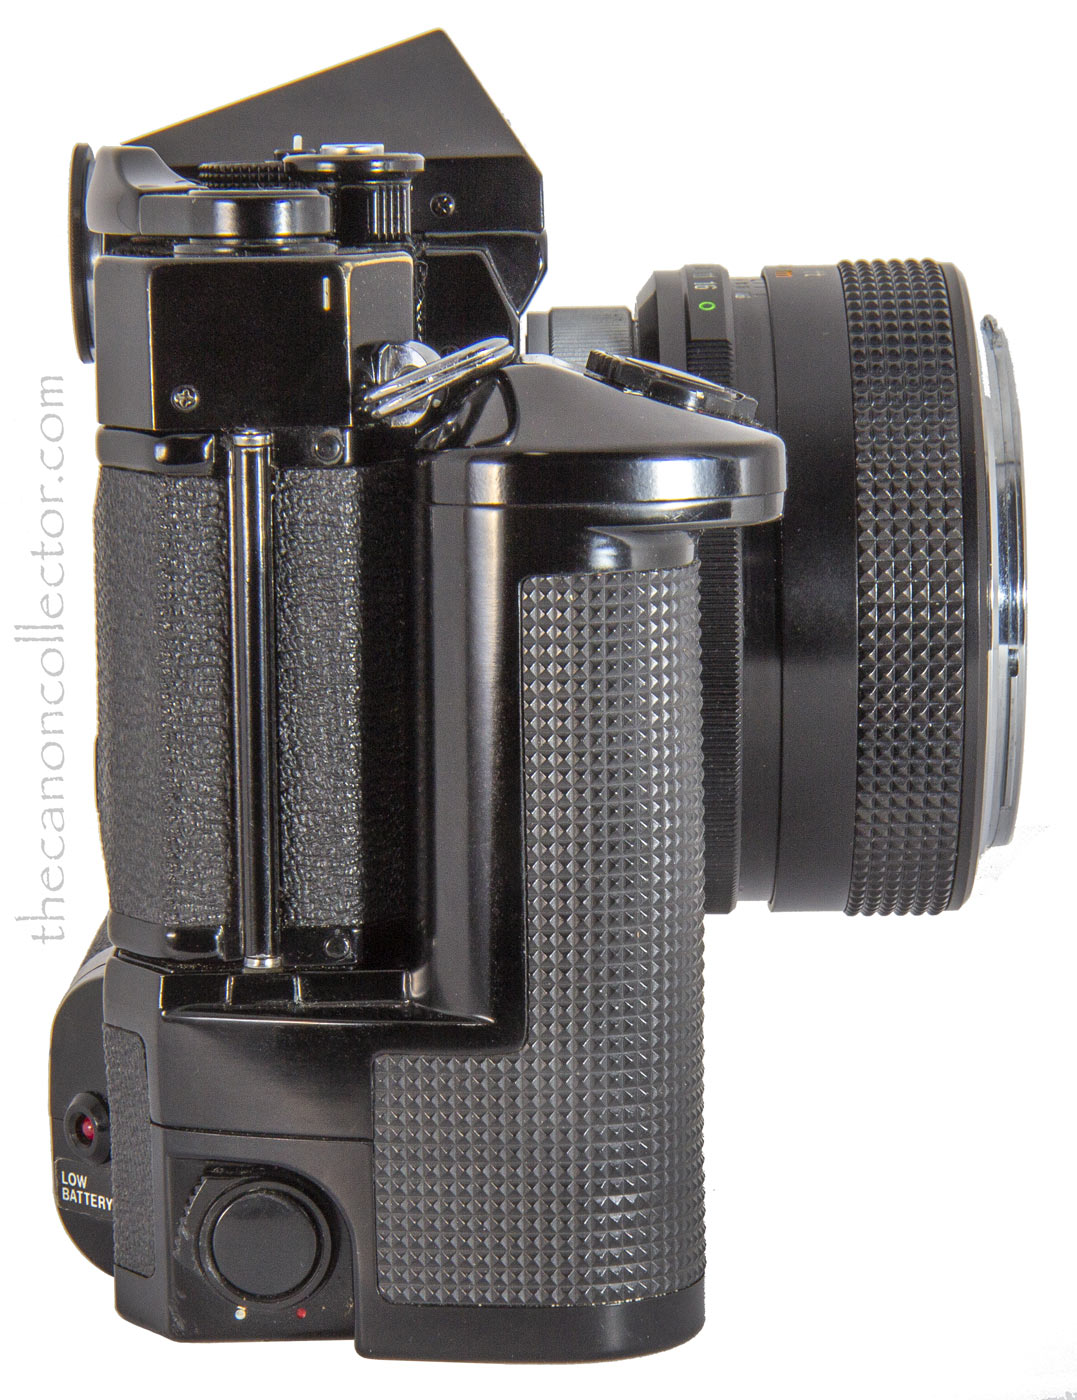
The Power Winder F (Ser. No. 103497) mounted on my Canon F-1 (Ser. No. 585537). Note the shutter button on the top of the finger grip. It has a switch for ‘A’ and ‘L’ as does to shutter button on the camera body.
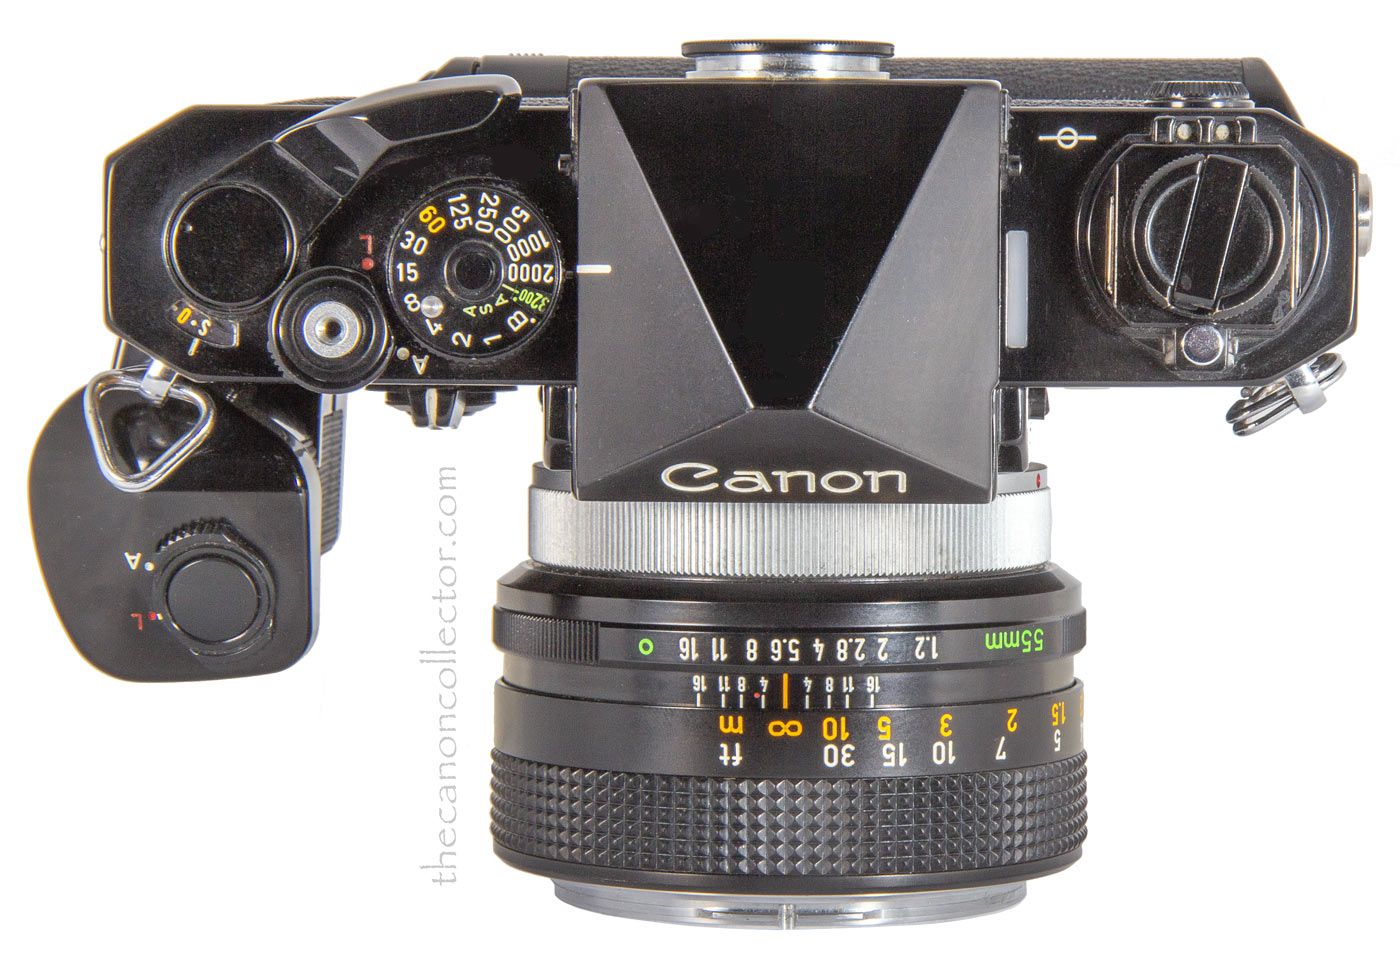
From the top the shutter button and its on-off switch are clearly visible. This grip is very convenient to use but the winder plus the camera and lens make a heavy package. Carrying them all day would be a chore.
The Power Winder F
The Motor Drive MF was still large and awkward if you were a sports or wildlife shooter. It was too heavy and too angular to be comfortable. And the ability to interface with the Film Chamber 250 or various timers did not really help them.
The third winder Canon created for the F-1 was the Power Winder F. This was a much more compact lightweight and comfortable winder and much more suited to sports and wildlife photography.
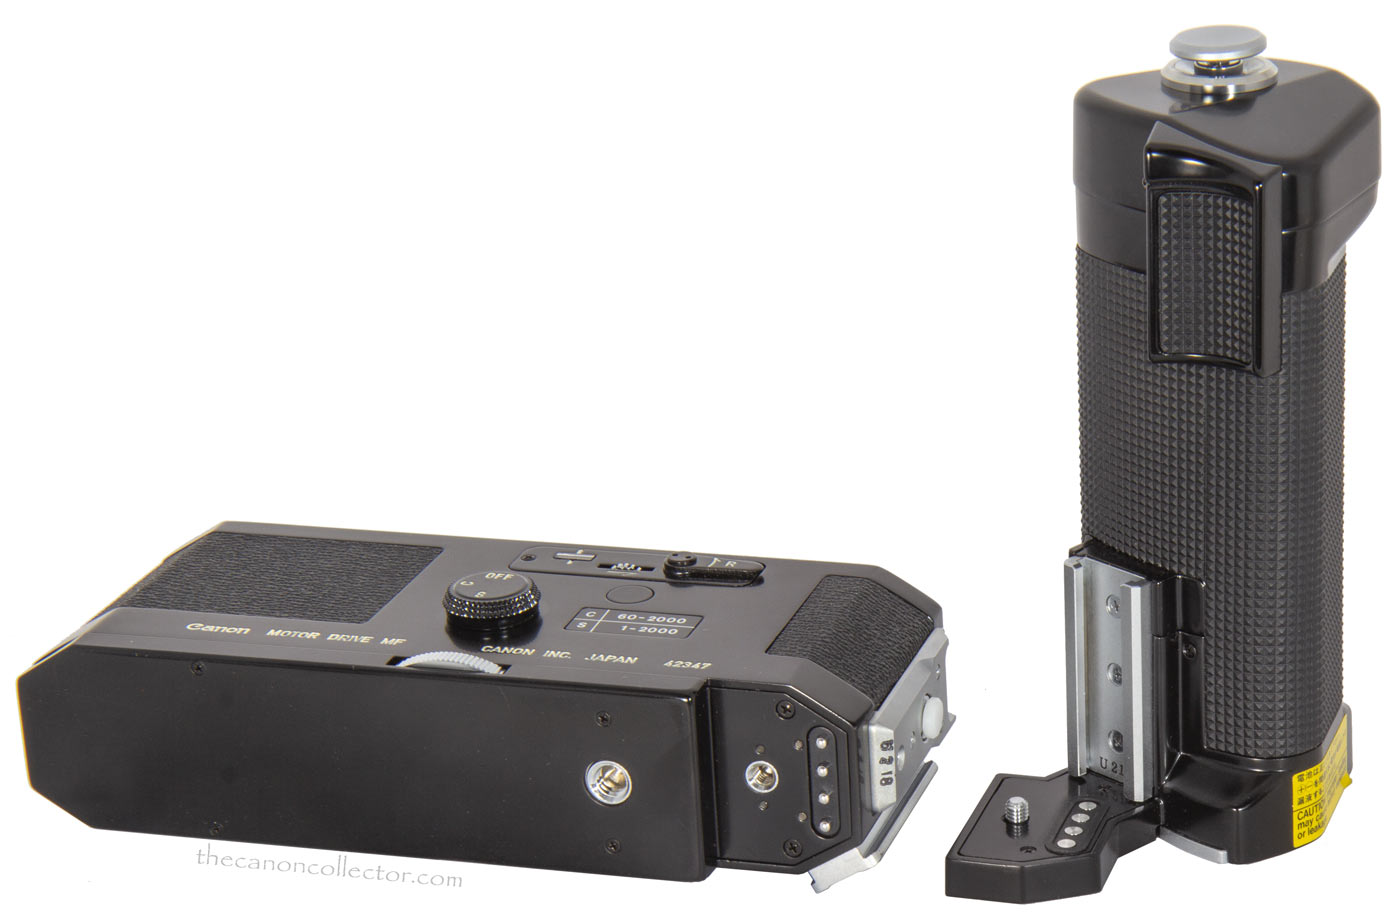
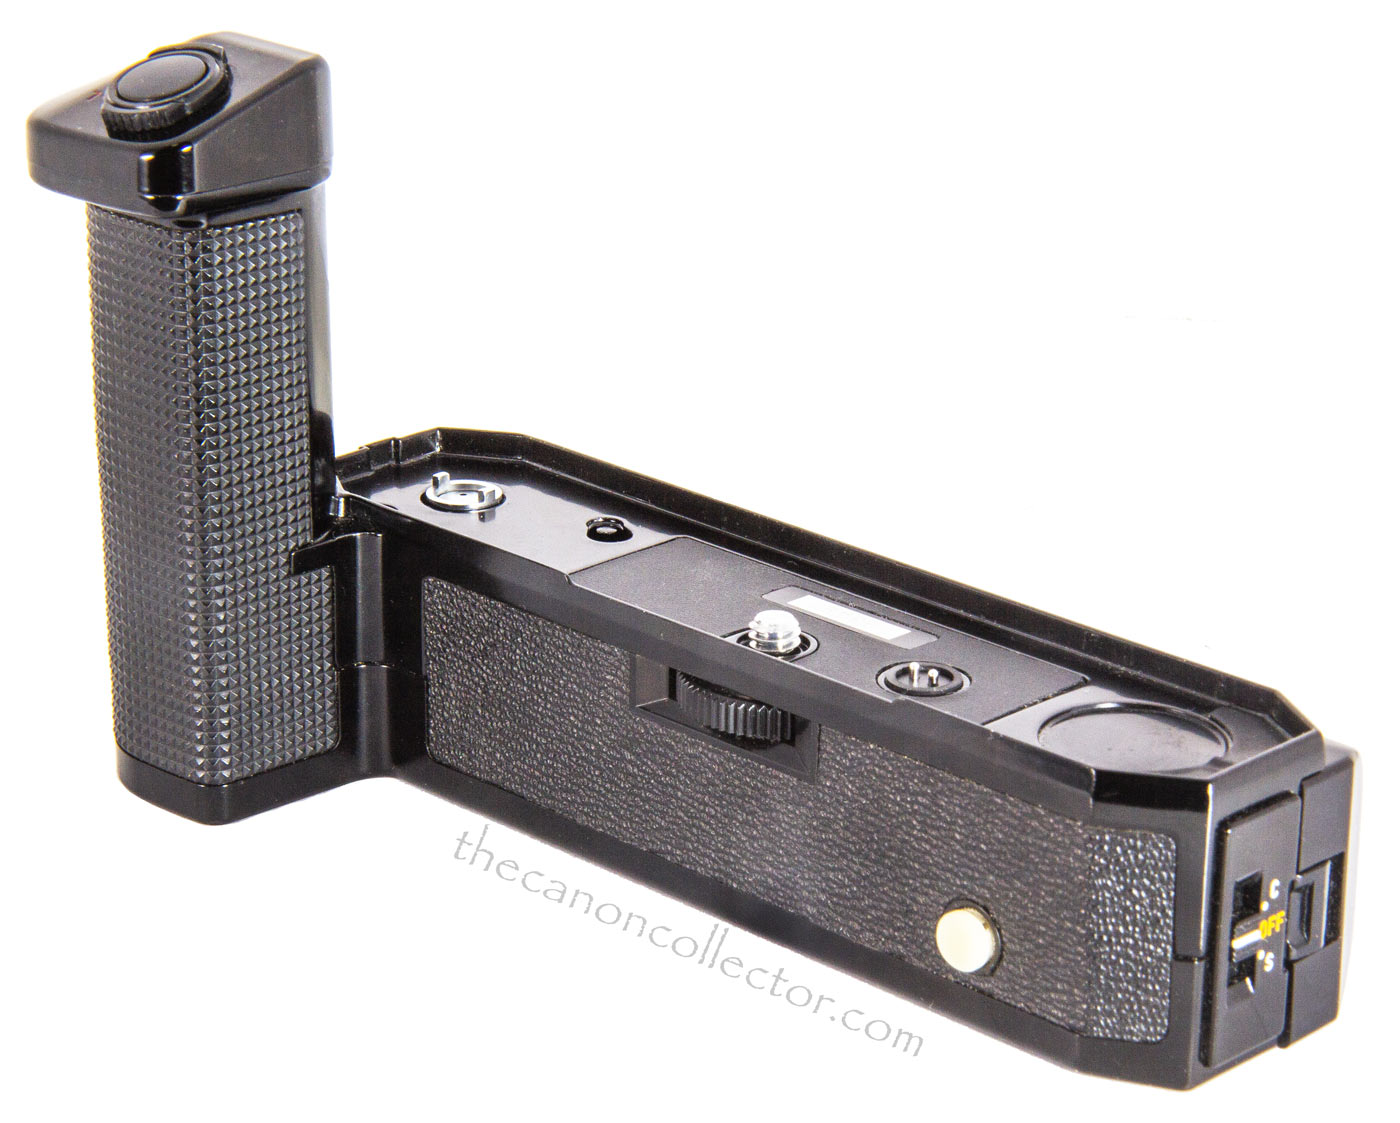
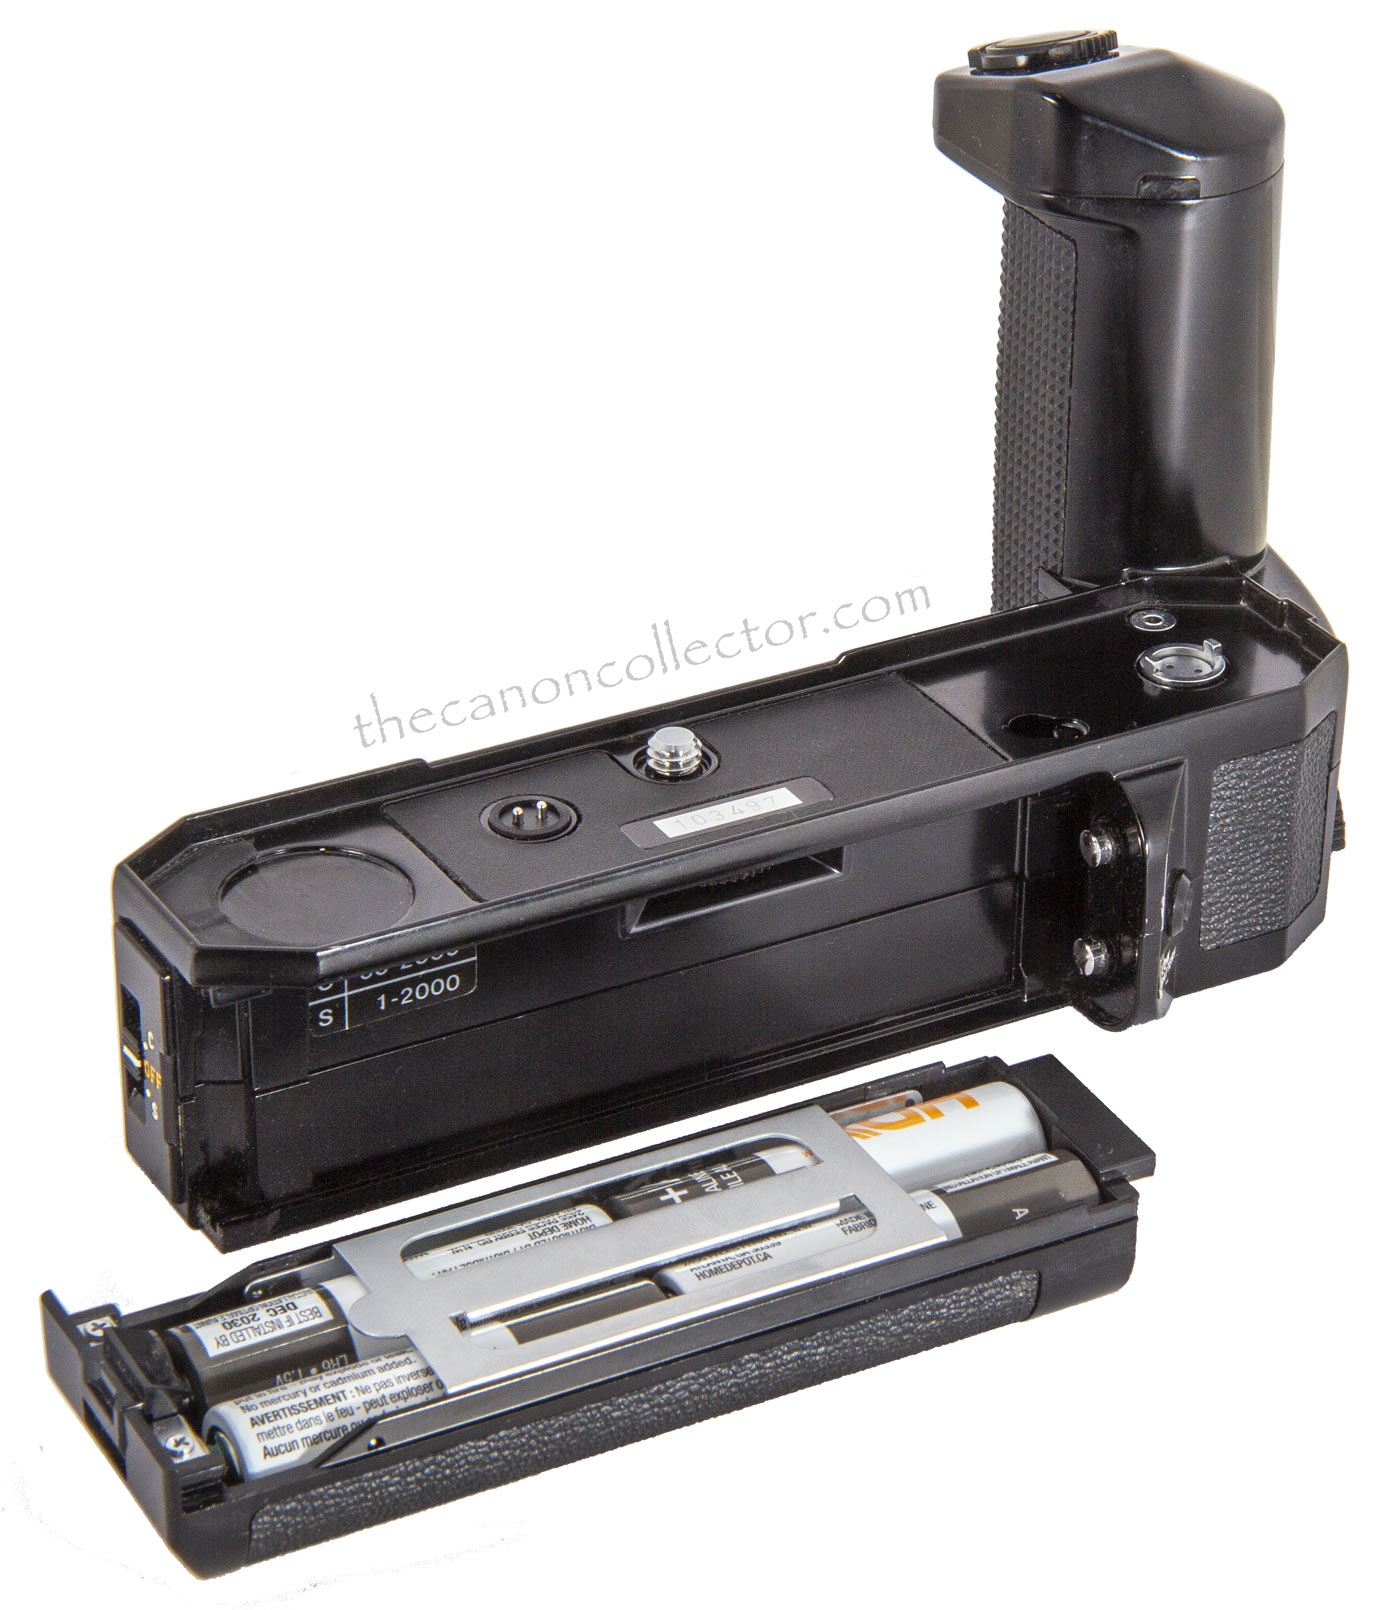
This unit had a shutter button on the top of the finger grip and also one on the battery housing to allow shooting in the vertical position. On the left end is a switch with three settings. One is “Off” to conserve battery when not in use. “S” allows single frame shooting. “C” allows multiple shots at two frames per second.
Batteries are housed in a detachable battery magazine (the same one used later in the Winder A) that takes 4 AA cell
The Power Winder F advances the film but it does not rewind it. It can use some remote switches connected through a plug on the front, but it is not compatible with the Film Chamber 250, the intervelometer or other attachments used on the earlier two winders.
Instruction Manual for the Power Winder F
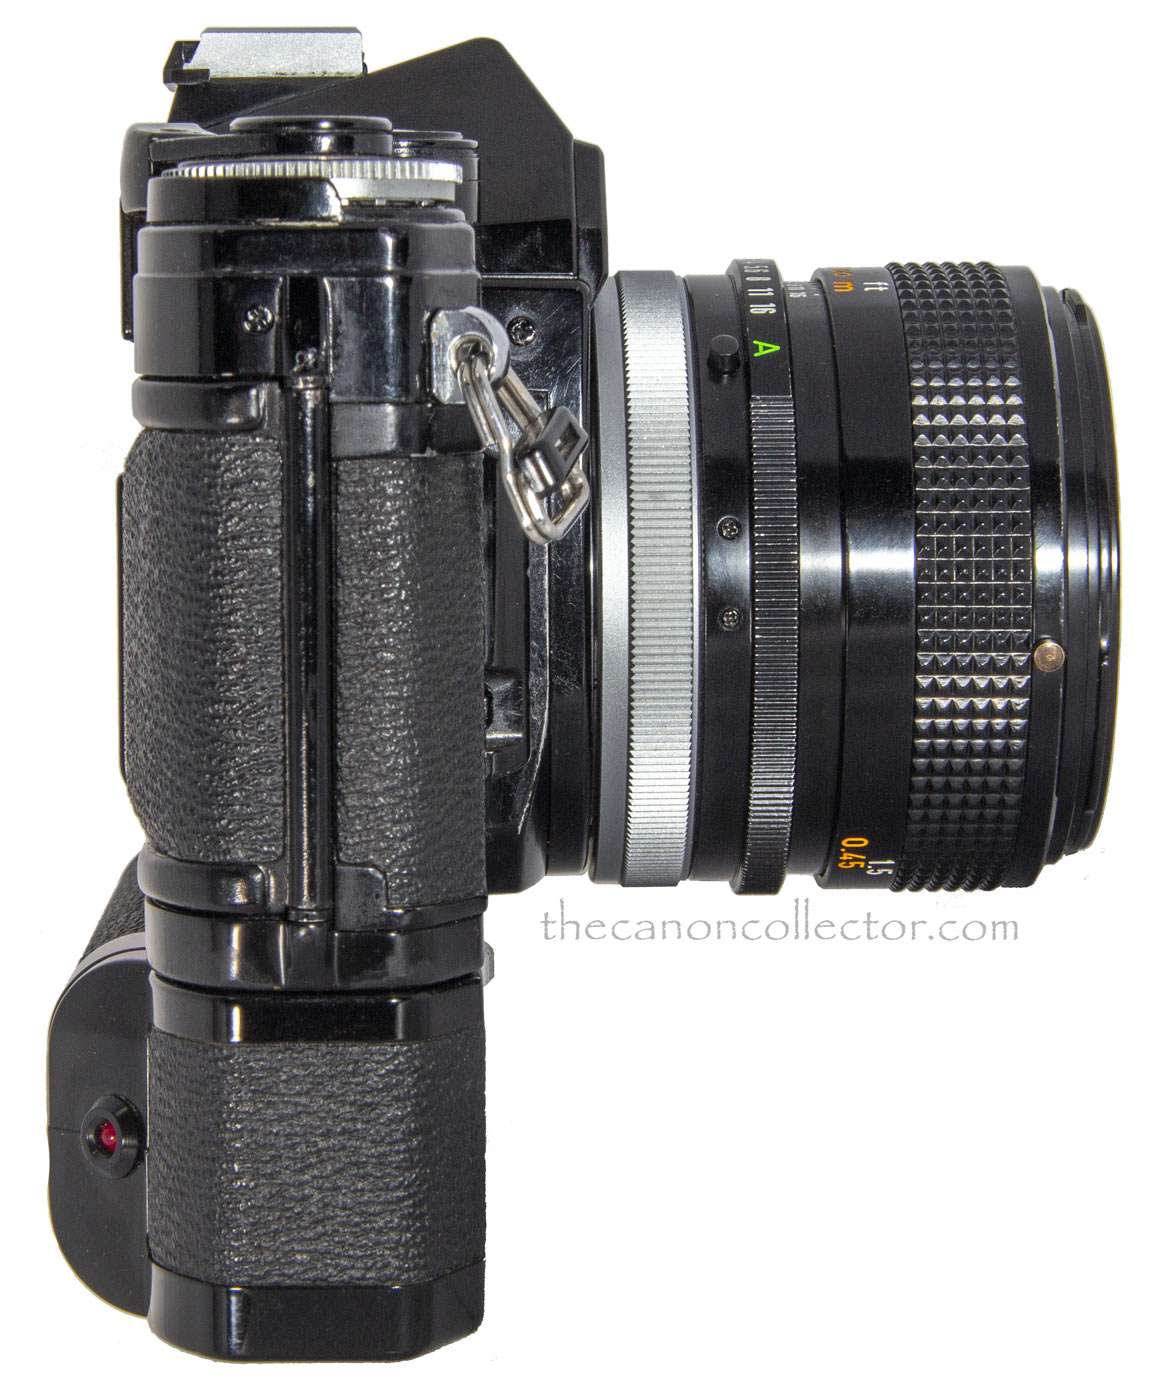
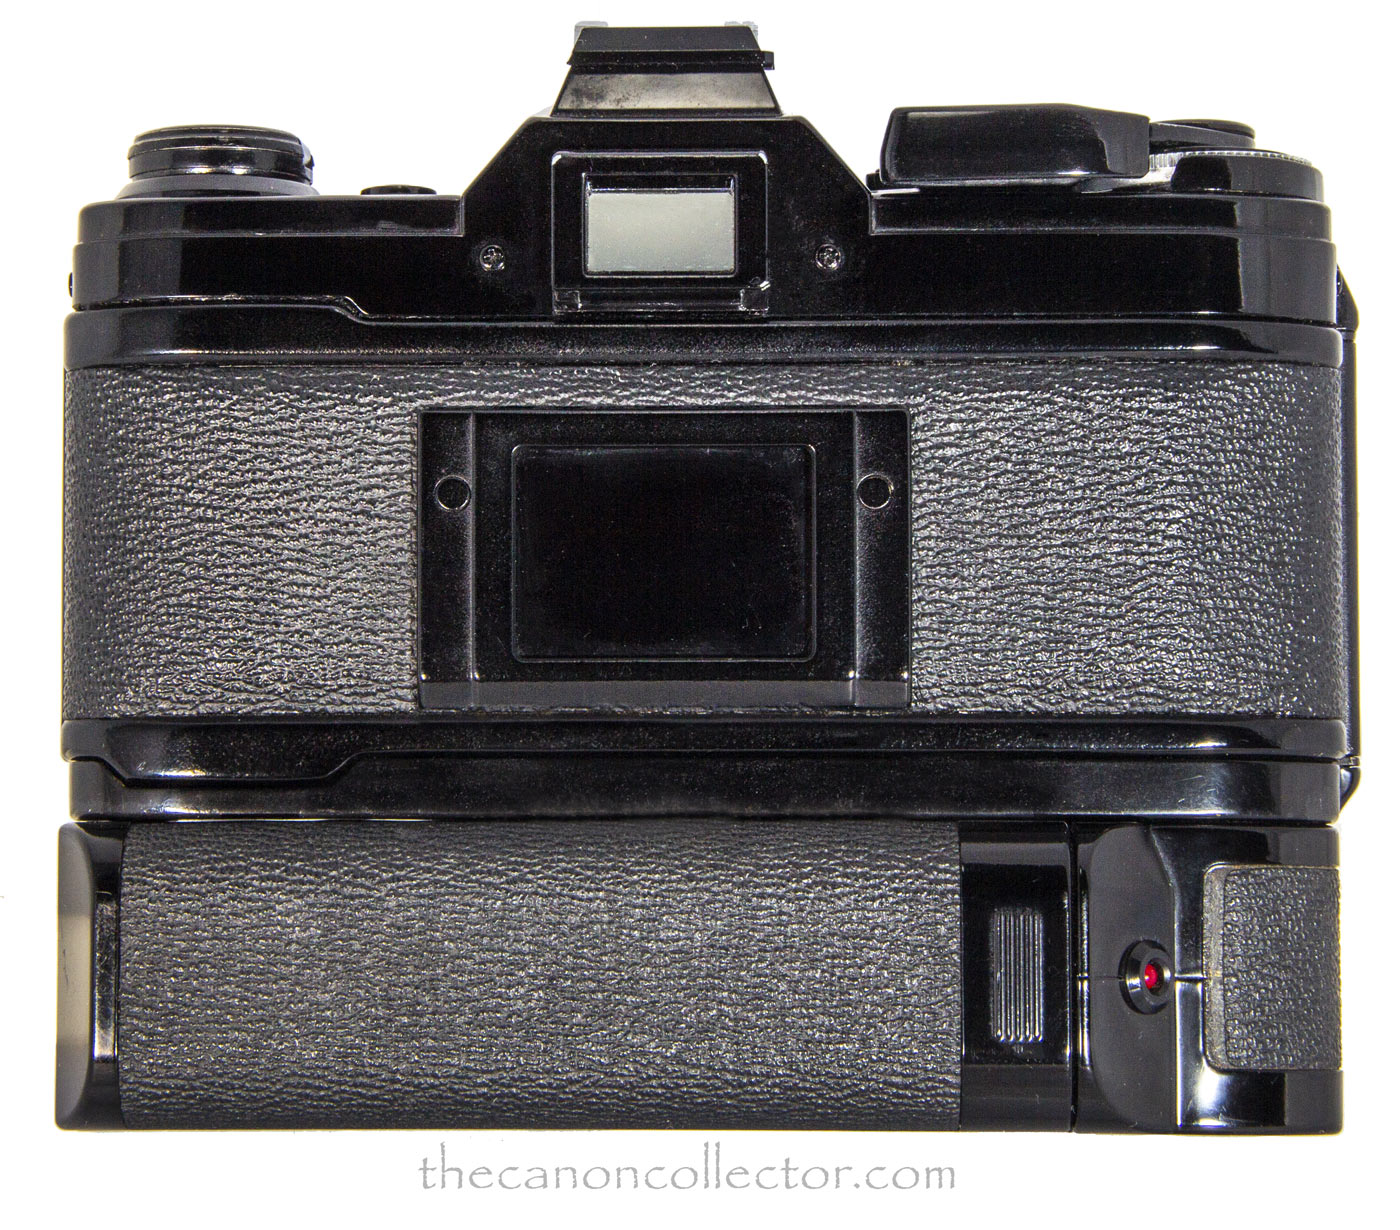
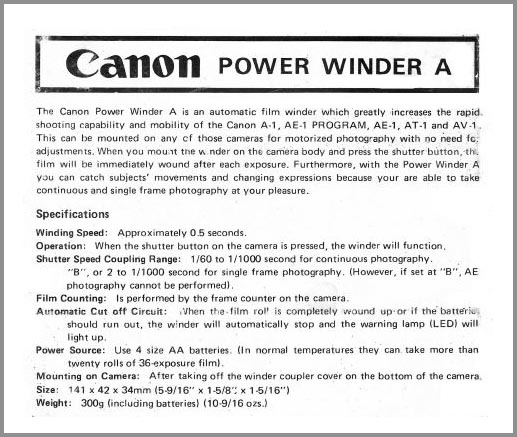
The Power Winder A (Ser. No. 741510) mounted on my Canon Black AE-1 (Ser. No. 1187071). This winder is the smallest and lightest we have looked at so far.
The Power Winder A
The Power Winder A was introduced by Canon in 1976 with the AE-1 camera according to Bob Shell however Eric Skopec says it was with the AT-1 in 1976. There seems to be some confusion on dates here but it is all academic. This winder will function just fine on all ‘A’ series cameras.
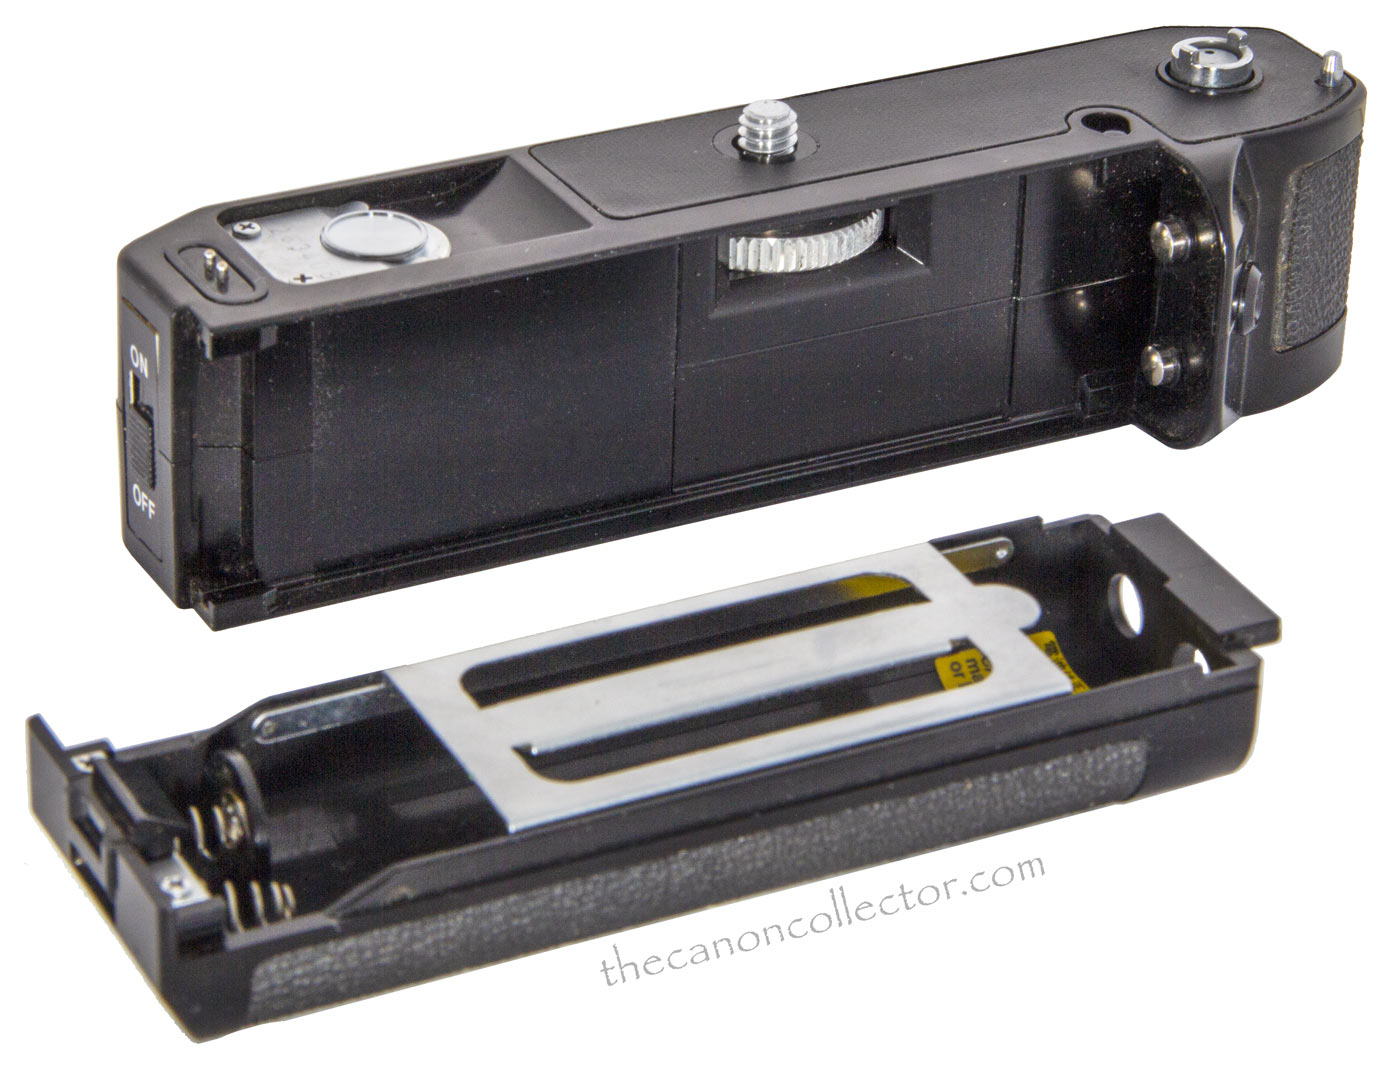
It is the height of simplicity: you attach it to the bottom of the camera and take pictures! First you remove the winder connector cover (and stow it under the clip on the top of the Winder) and then screw the Winder onto the camera. You may have to wind the camera manually to get it all to sync properly.
Then, whenever to press the shutter button the picture is taken and the film is advanced. Keep the shutter button depressed and it will keep taking pictures at about two frames per second. The camera does not draw power from the Winder so it must have its own battery installed to operate.
This is a small compact unit and very convenient to use.
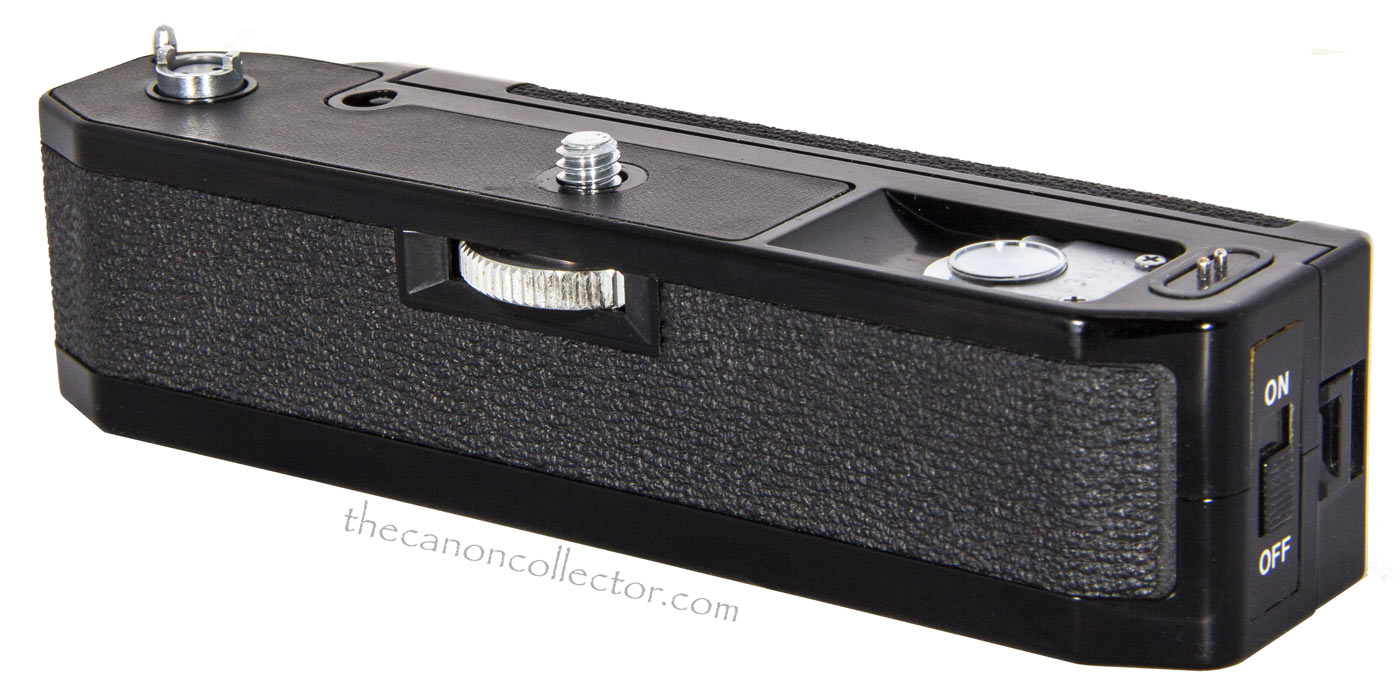
The top of the Winder, in the left image, is very simple. On the left is the Winder Coupler which powers the winding mechanism in the camera body. The middle threaded screw is attaches the winder to the body. On the right is a clip, which has the serial number on it, to hold the Winder Coupler Cover which must be removed to attach the Winder. On the end is the on-off switch. In the image on the right is the battery compartment that takes 4 AA cells.
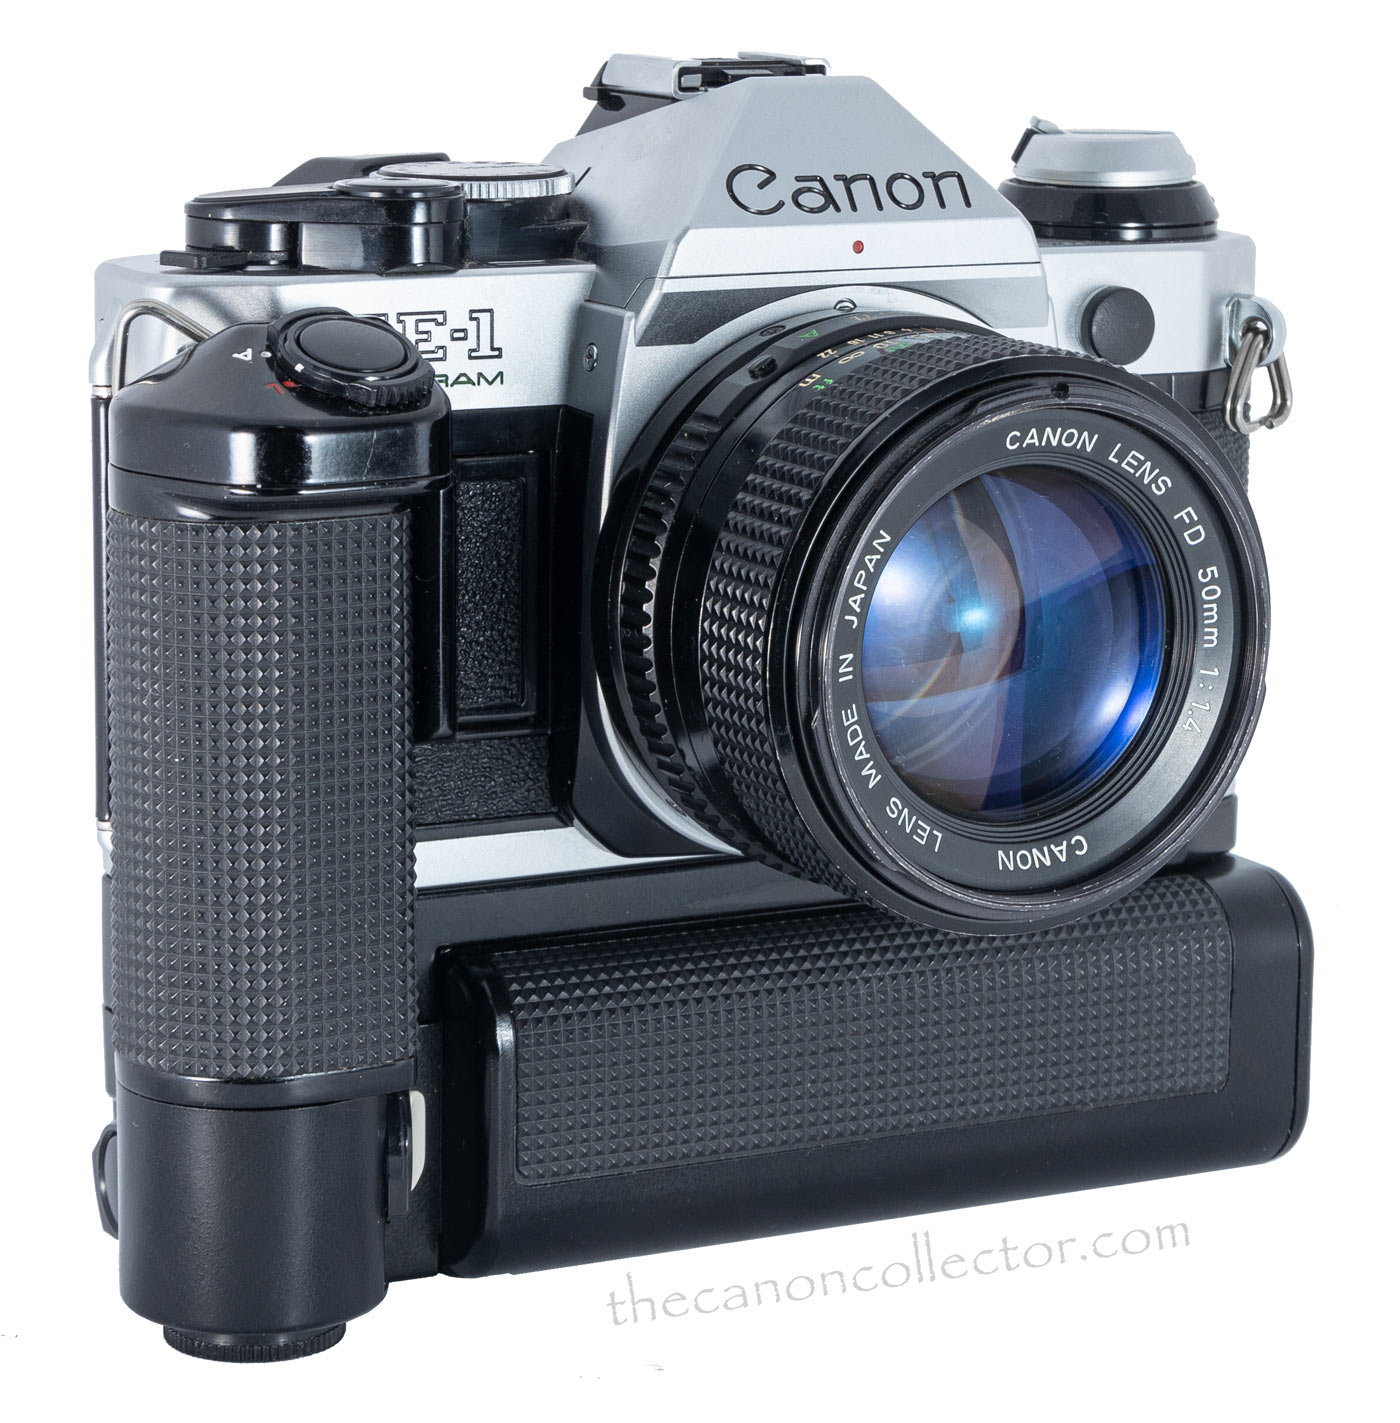
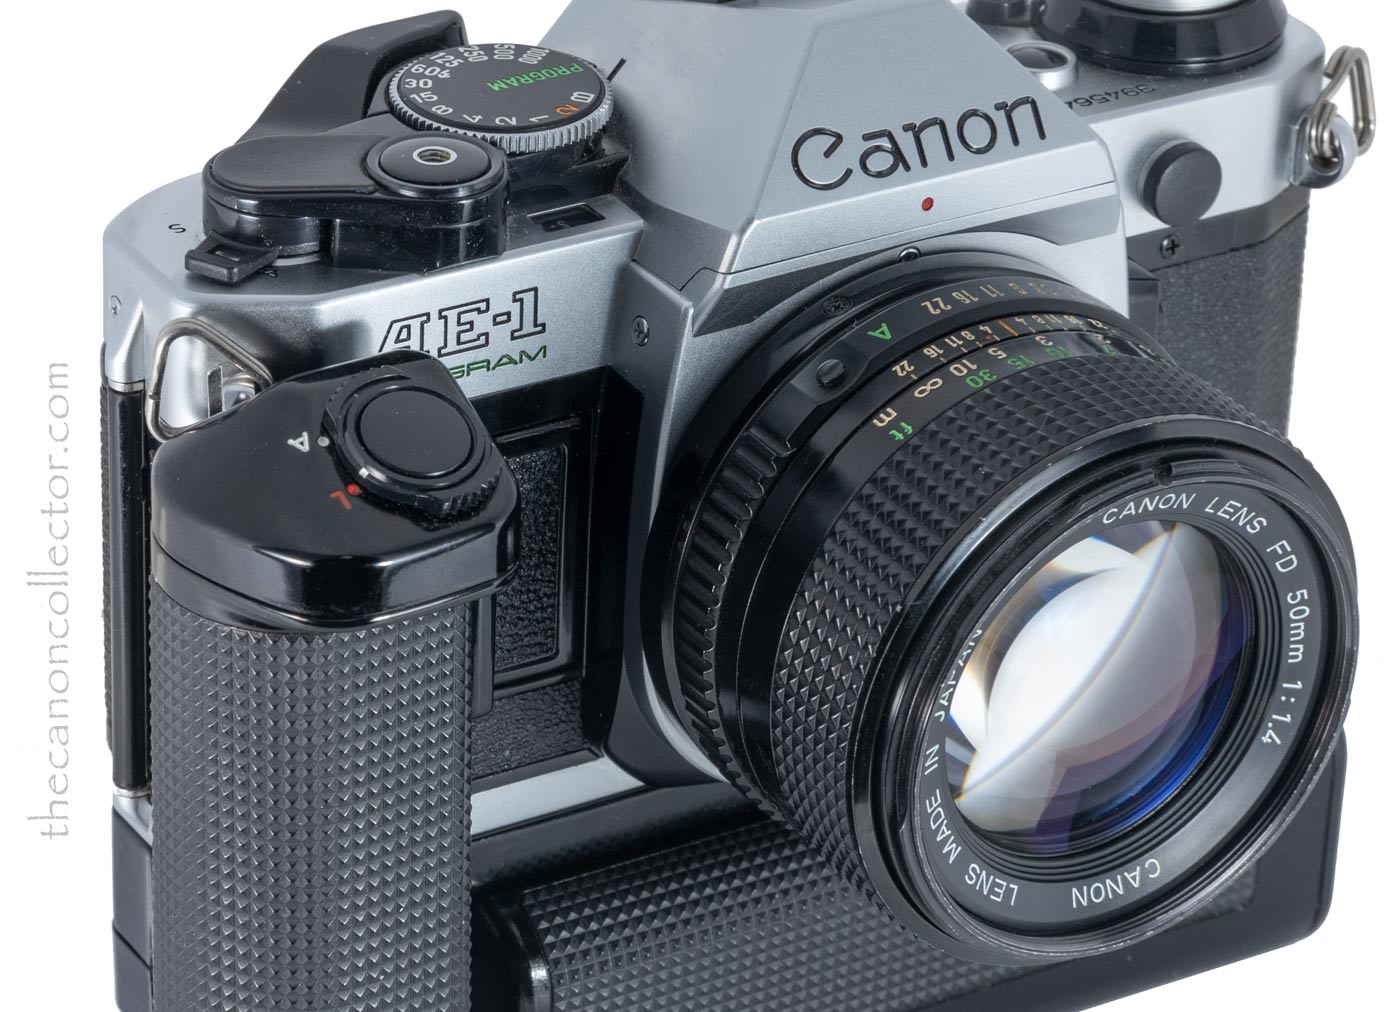
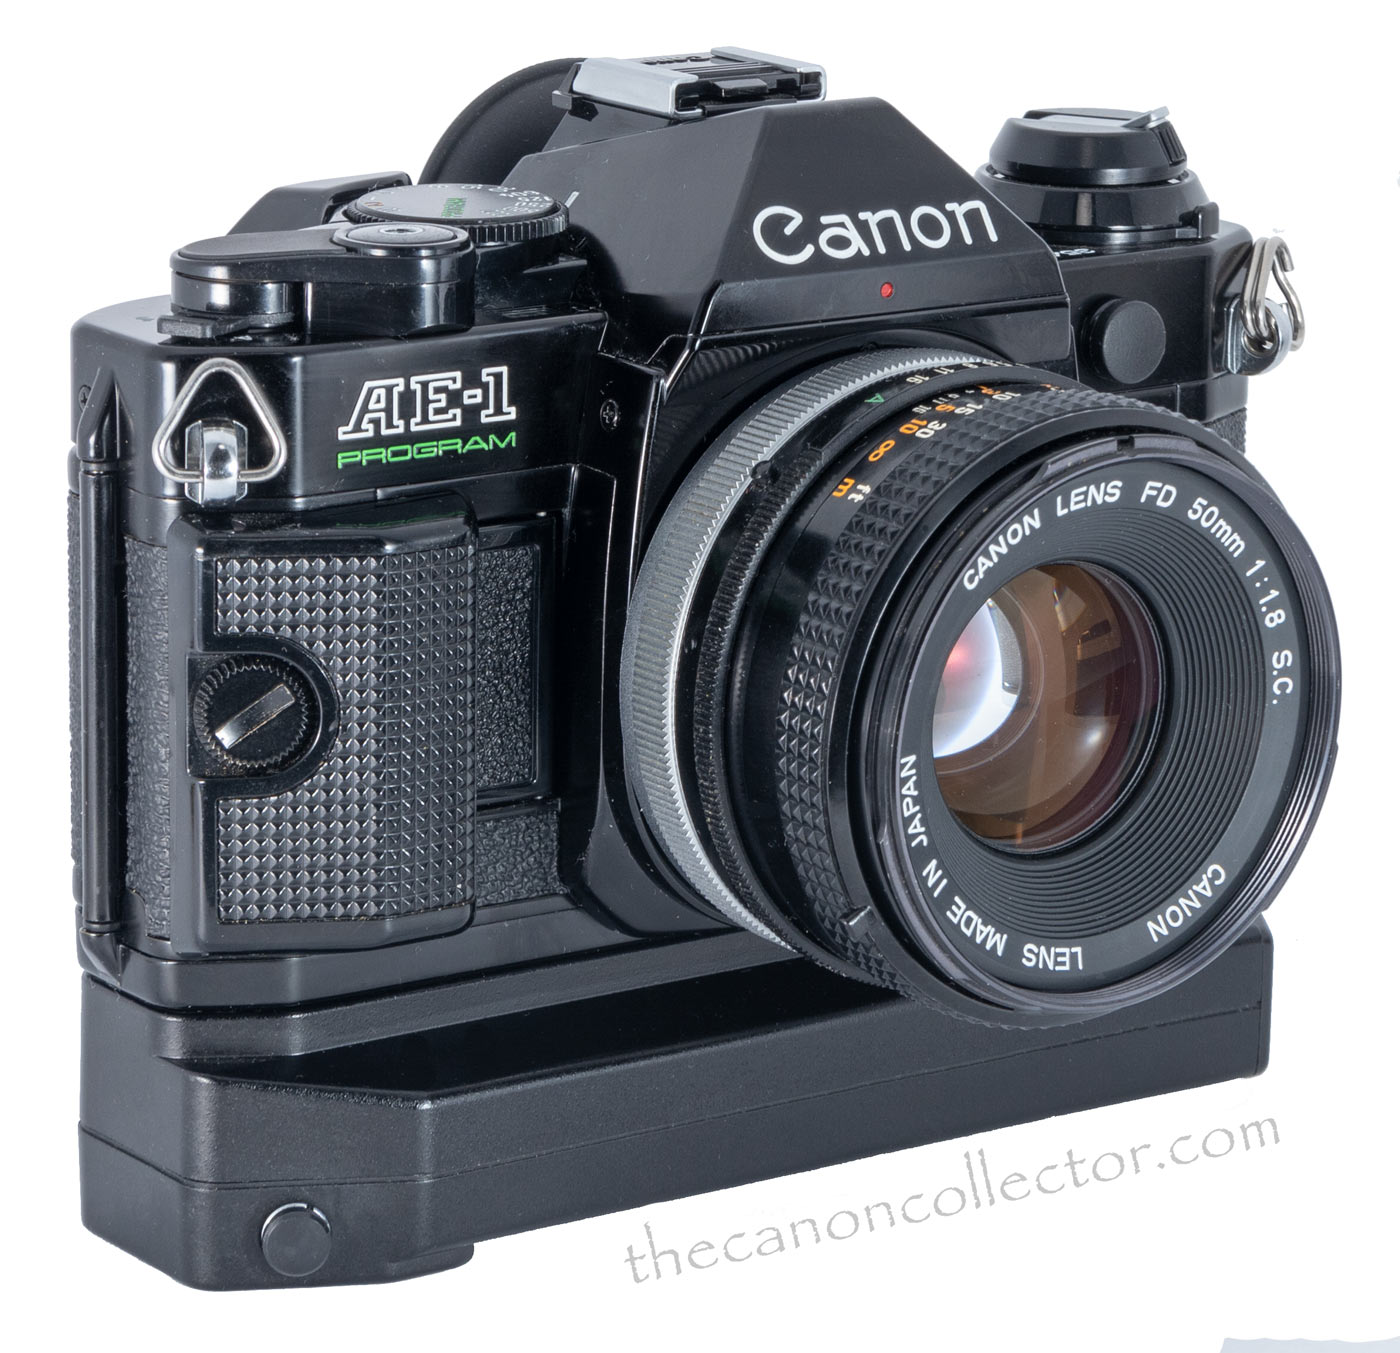
The Motor Drive MA is shown here on the Canon AE-1 Program. Only the A-1 and the AE-1 Program were able to use all of it’s features.
The Motor Drive MA
The Motor Drive MA was introduced in 1978 and was intended for the Canon A-1. It will, however, work perfectly well on the AE-1 Program as well.
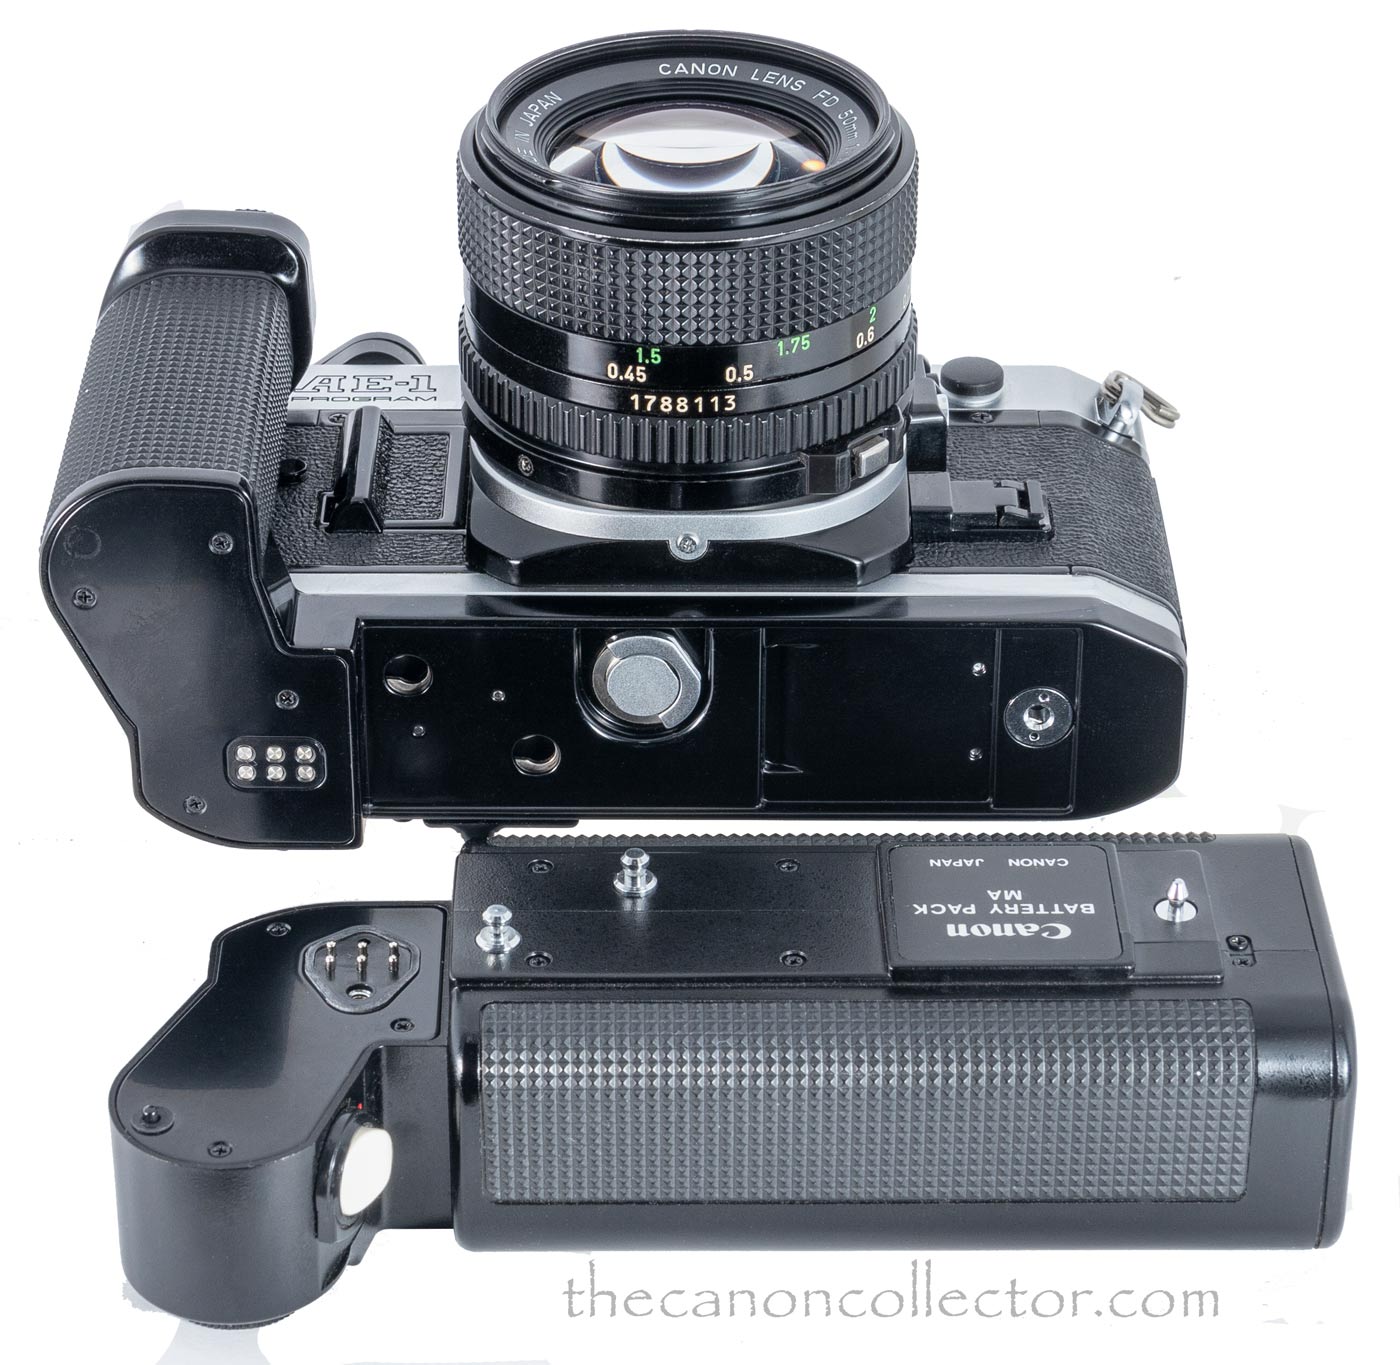
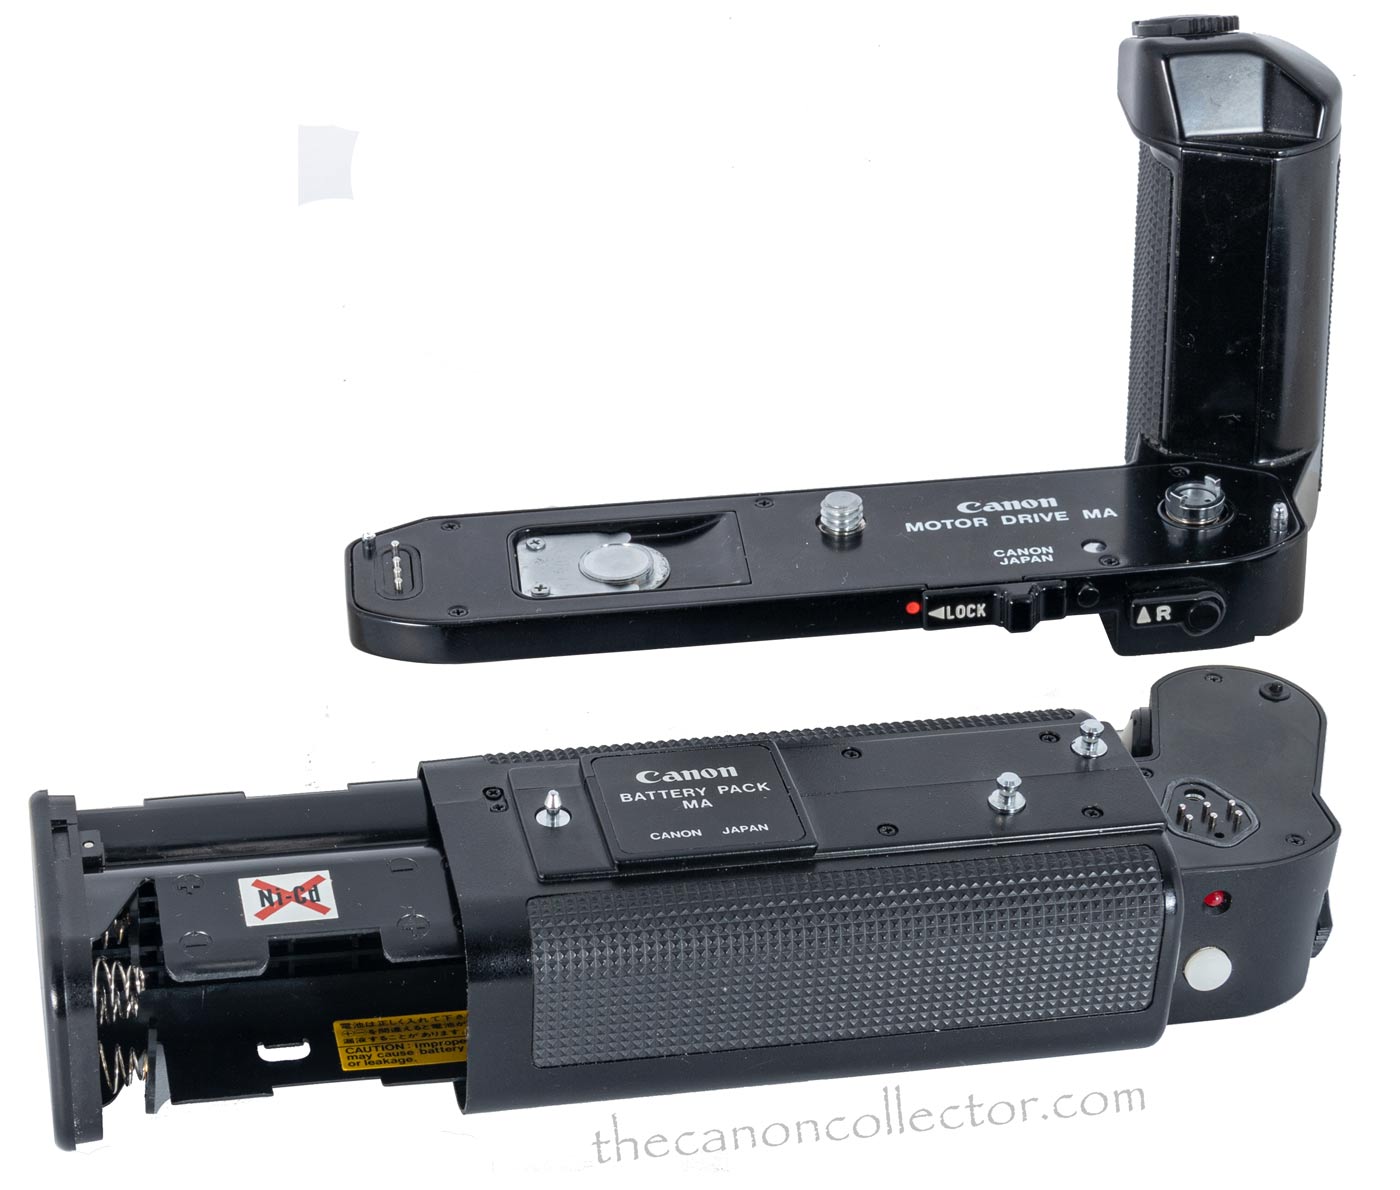
This Motor Drive is actually composed of three pieces. The first is a bottom plate that screws onto the base of the camera. It has the handle attached to it and the actual motor that powers the device is inside.
Power comes from the Battery Pack MA which conains a bettery holder that holds 12 AA alkaline batteries. The battery pack clips firmly onto the bottom plate forming what appears to be a single device.
In addition to the battery pack there is a Ni-Cd Battery Pack MA which is rechargeable. It is unlikely that you will find one of these that will still hold any charge.
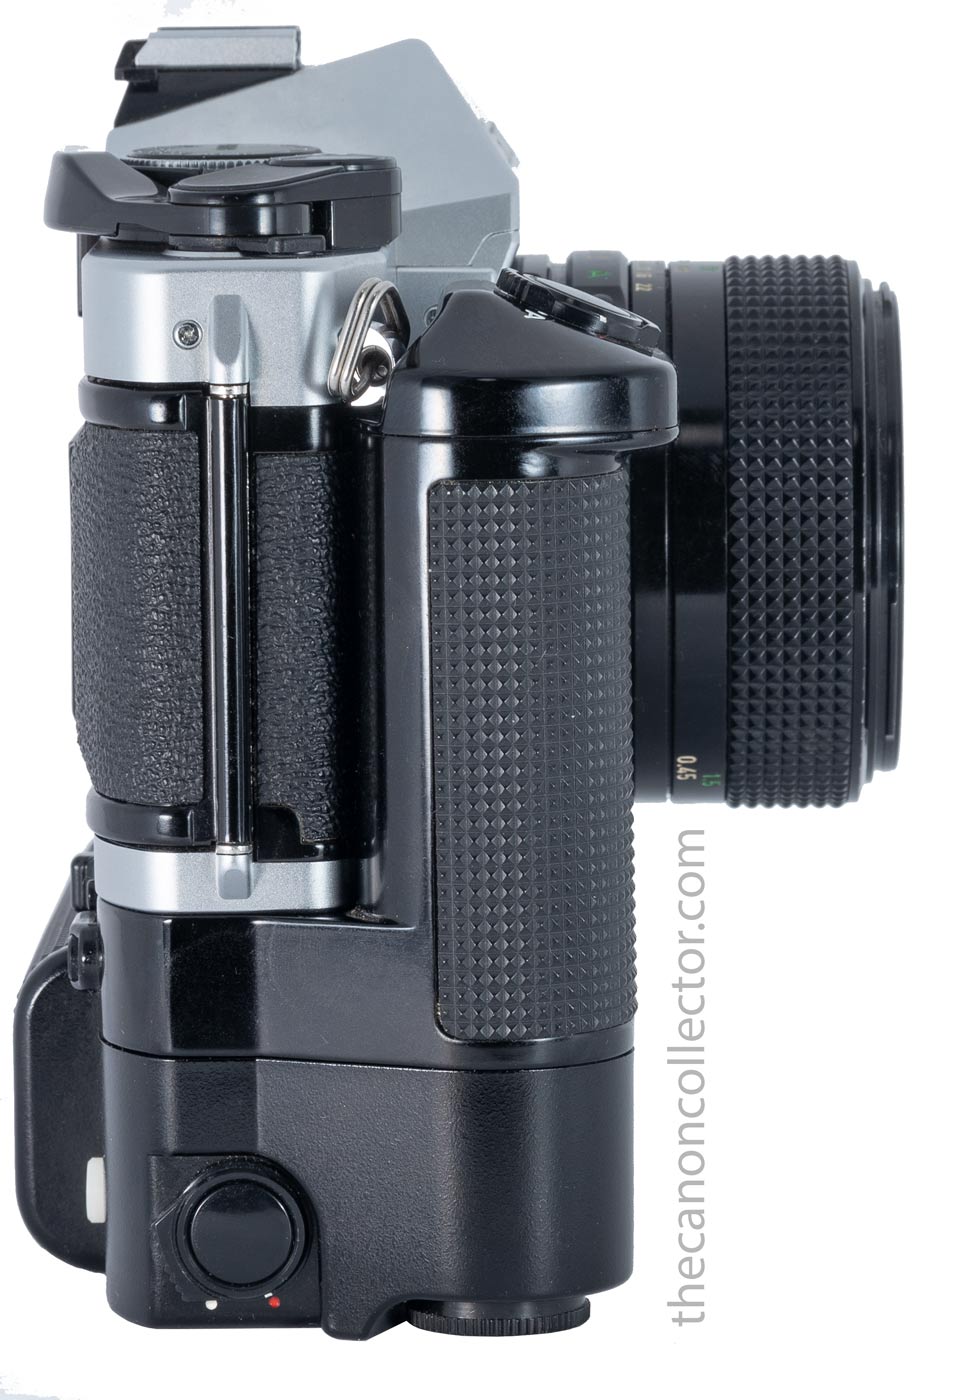
The handle provides a solid grip on the camera and would make handling a long lens much easier. A selector on the bottom of the unit allows the user to select “S” for taking single shots with each press of the shutter button. Position “L” lets the unit shoot around 3.5 frames per second as long as the shutter button is pressed and setting “H” increases that to 5 frames per second.
At the right end of the Power Winder MA, at the bottom in the picture, is the shutter button for shooting vertical.
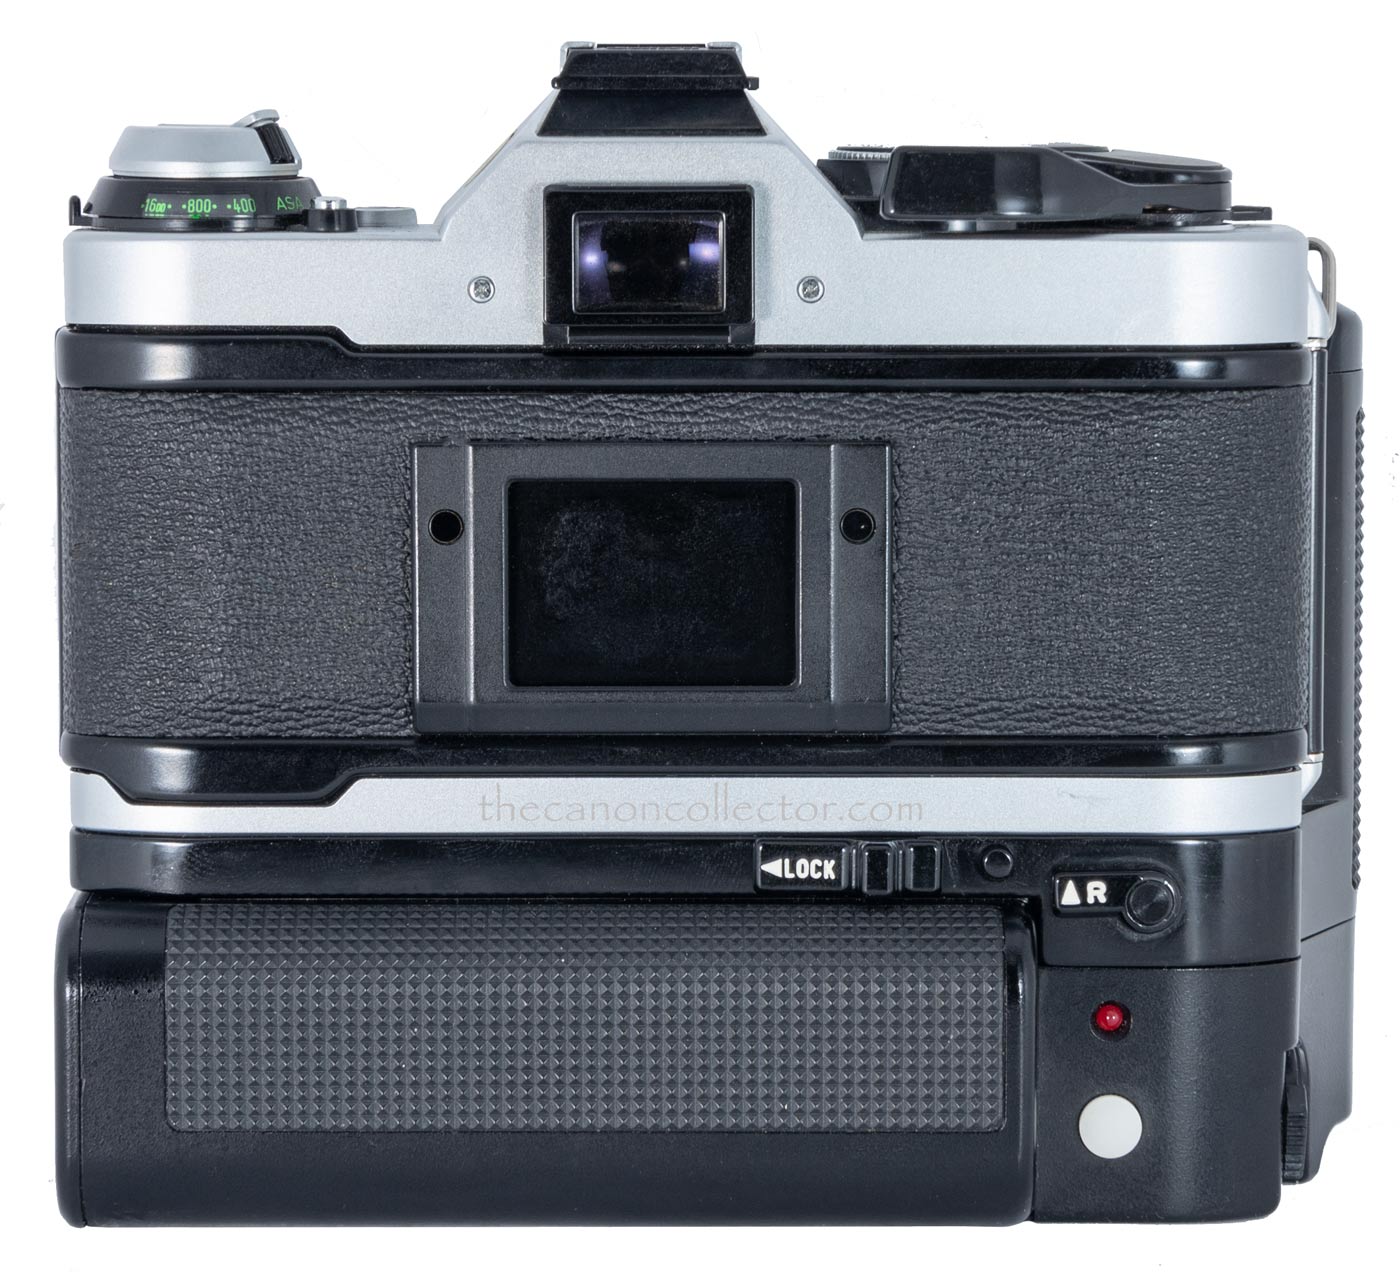
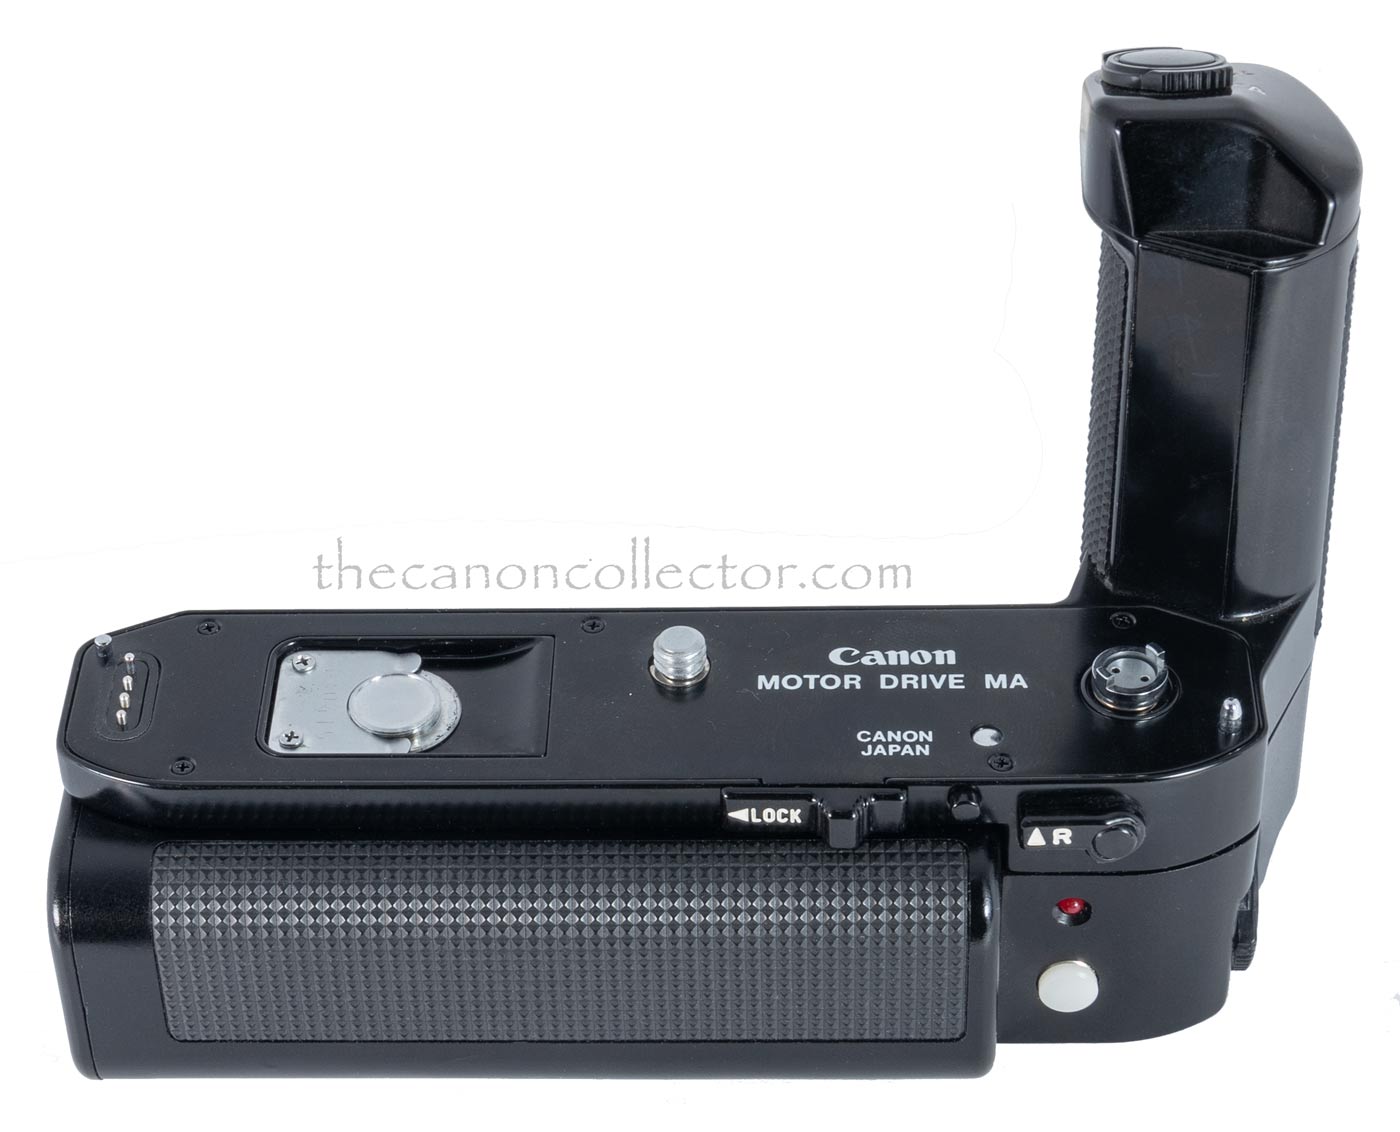
On the back is the Lock that releases the Battery Pack MA from the unit. The red light signals the end of the film and under the white cover is the plug for a remote or wireless trigger.
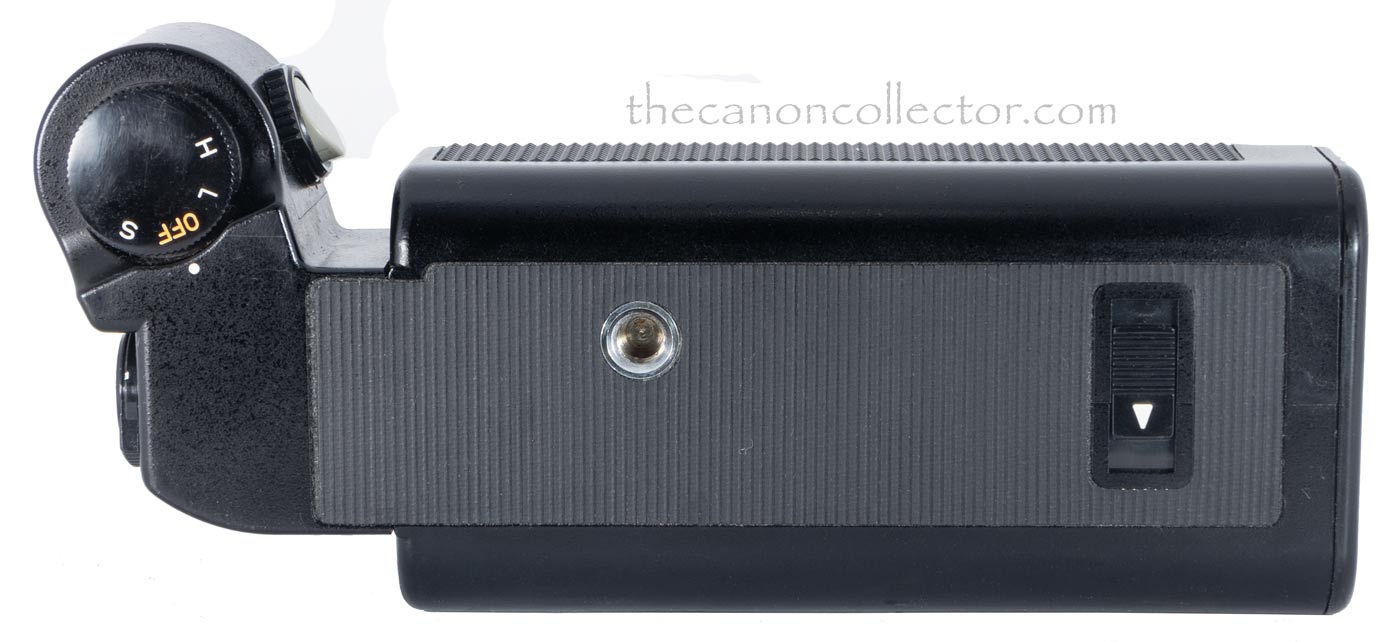
The Battery Pack detaches from the baseplate revealing the threaded key that screws into the tripod socket firmly attaching the MA to the camera.
There is a shutter button on the top of the handle and there is also one on the right end of the Battery Pack which is convenient for shooting a vertical format. Both shutter buttons have locks that prevent them from being used accidently.
On the back of the battery Pack is a jack for attaching a remote triggering
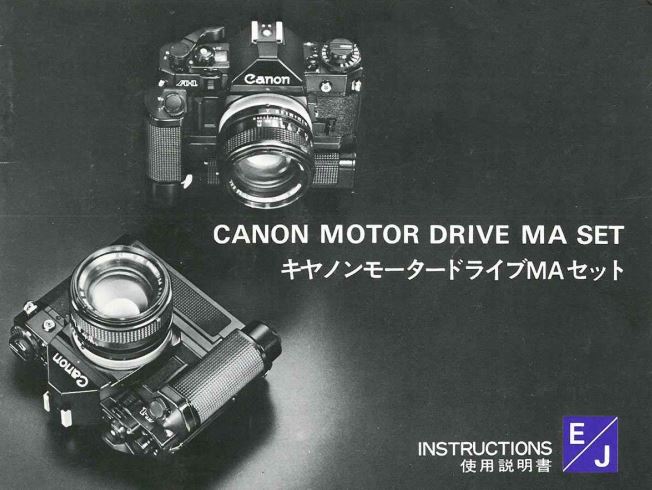
device. Details of the operation, the names of the parts and the available accessories can be found in the Instructions below.
User Instructions for the Motor Drive MA Set
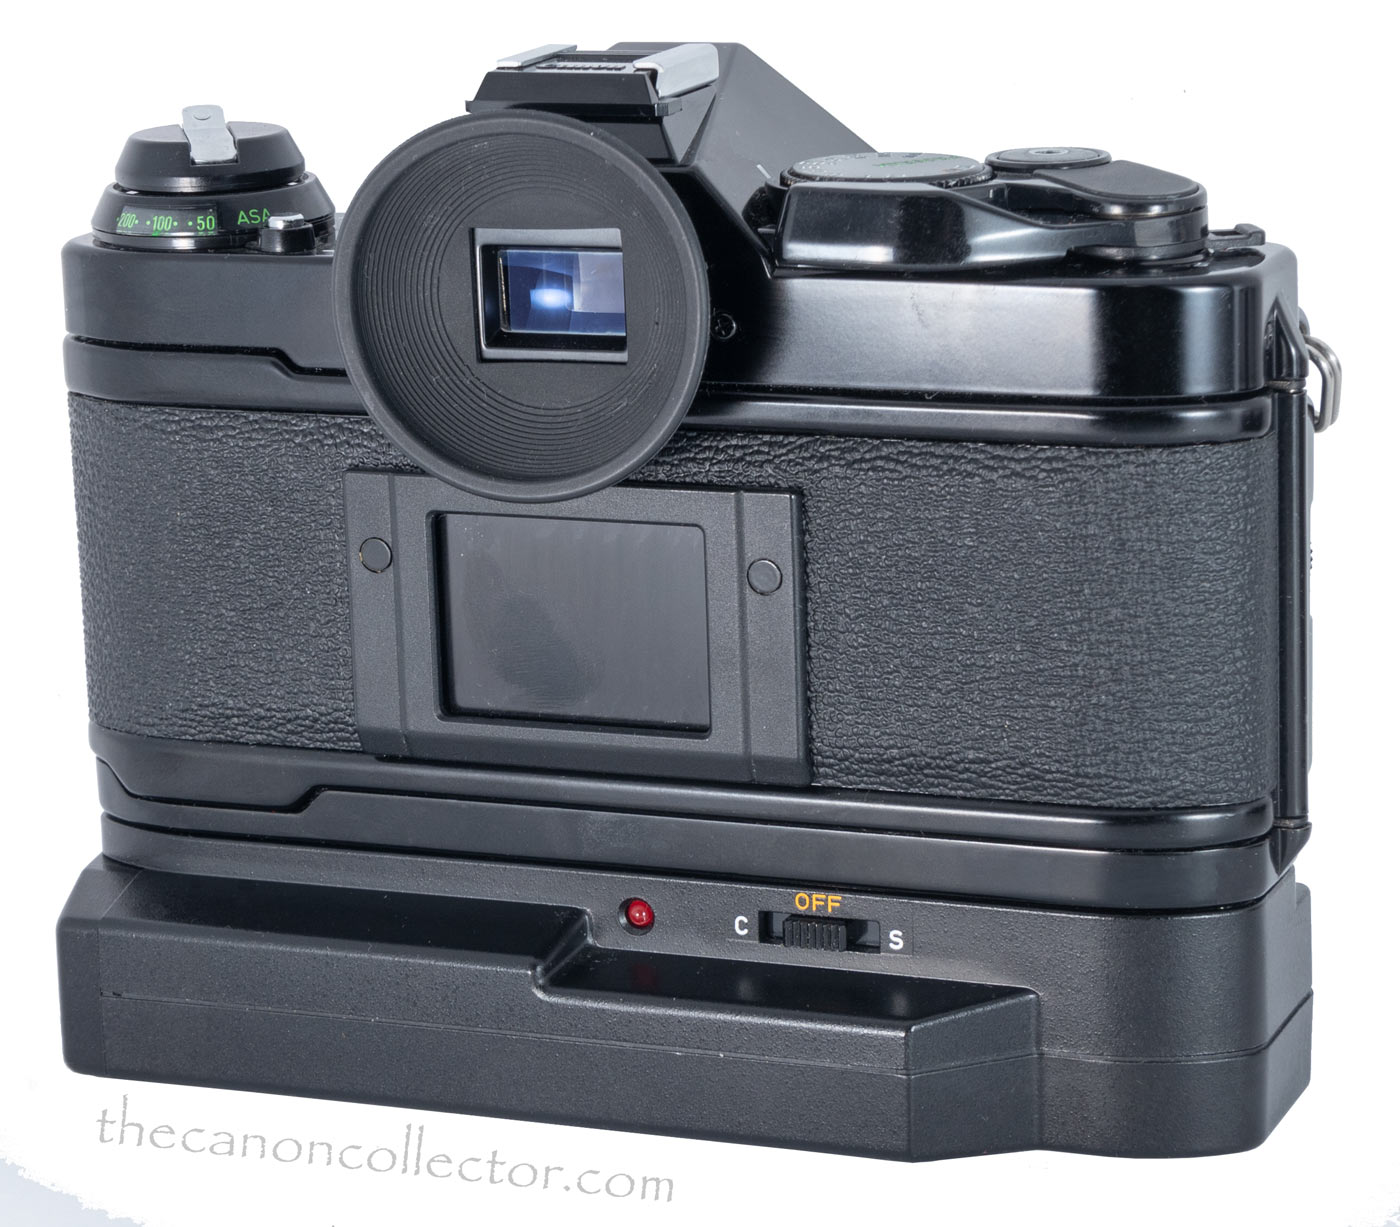
Thi is the Motor Winder MA fully assembled. To mount on the A-1 or AE-1 Program the Battery Holder must be removed to access the tripod socket screw.
The bottom of the assembled unit clearly shows the Selector Switch for Single Shot “S”, or multiple shots Low Speed “L” and High Speed “H”. The Battery Holder release is on the right.
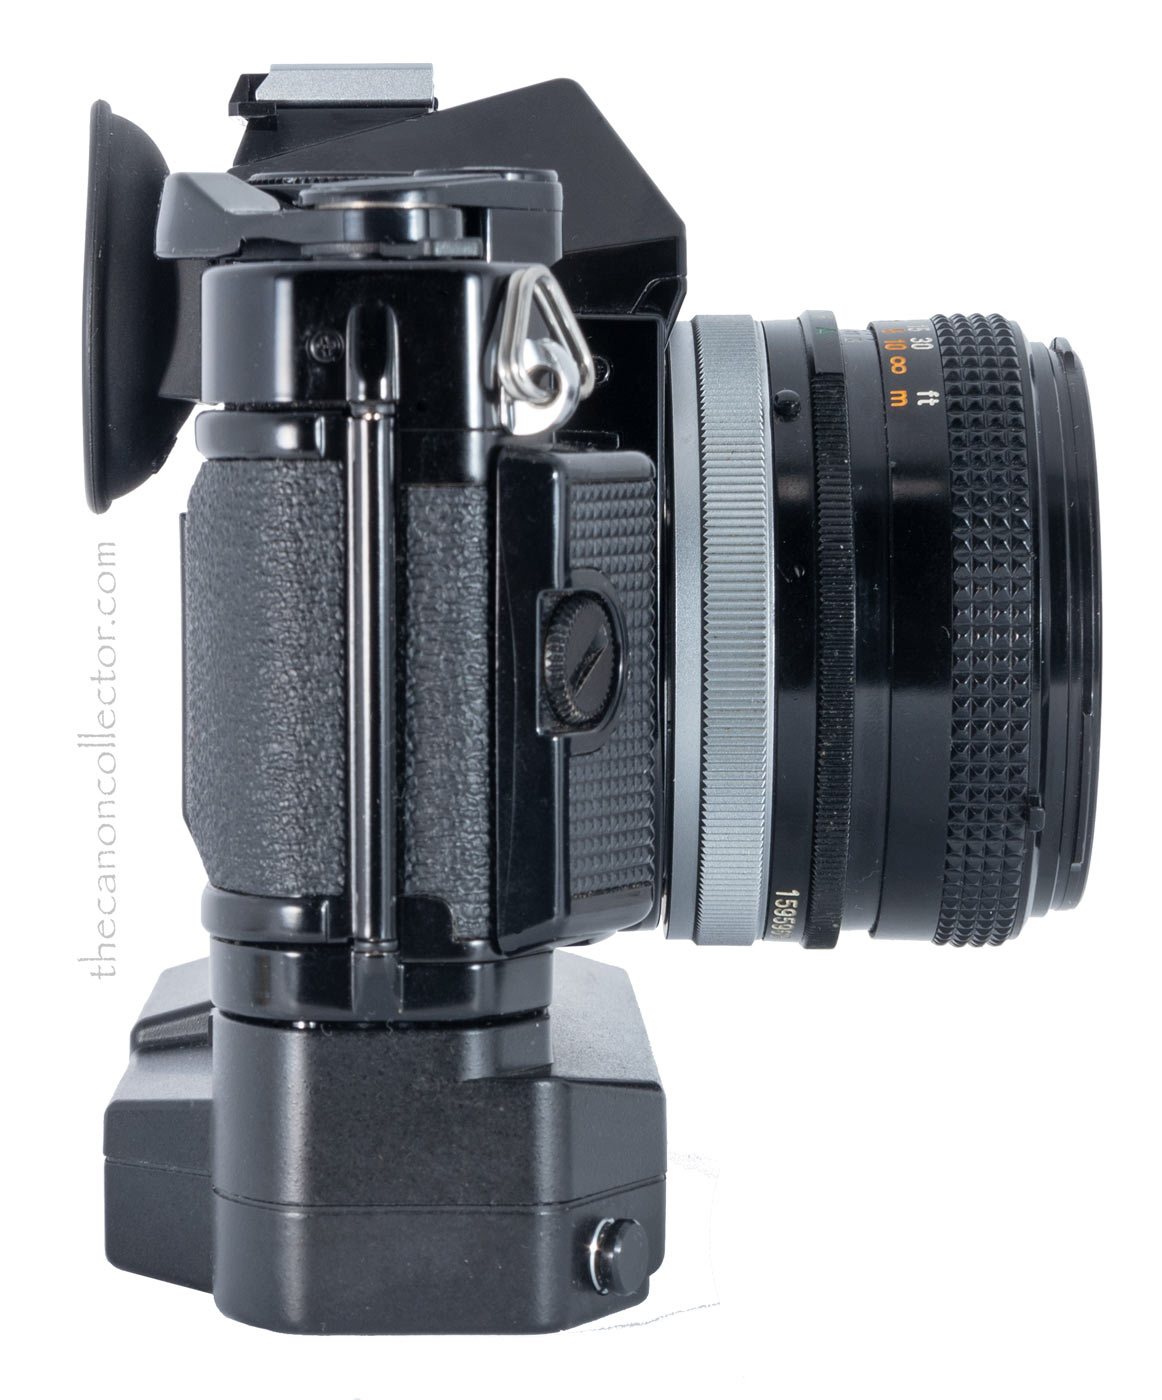
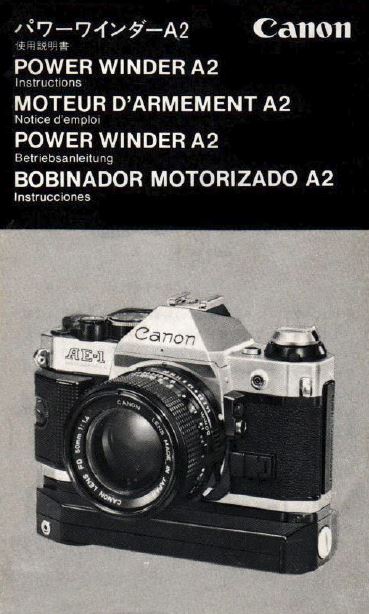
The Power Winder A2 is shown here mounted on one of my AE-1 Program cameras. On the left side of the picture is the cover over the connection port for remote triggerng devices available for the A2.
The Power Winder A2
The Power Winder A2 was introduced in 1981 with the AE-1 Program camera. Unlike the Winder A the A2 when paired with the AE-1 Program or A-1 cameras can fire the shutter remotely. There is a plug on the front of the Winder that accepts the Canon Remote Switch 3, the Remote Switch 60, the Wireless Controller LC-1 or the Interval Timer TM-1 Quartz.
The Winder A2 can be used on all “A” Series cameras but it is only with the AE-1 Program and the A-1 that the remote triggering is available. These two cameras have four electrical contacts on the bottom of the cameras while other “A” Series cameras only have two. The two contacts allow the camera to signal the Winder to advance the film. However the second set of two contacts allows the Winder to signal the camera to fire the shutter.
Power is supplied by four AA Batteries which are easy to come by and are inexpensive. The camera still requires its own six volt battery to operate. If the Winder is turned off the camera will still operate normally but film will have to be advanced by the operator.
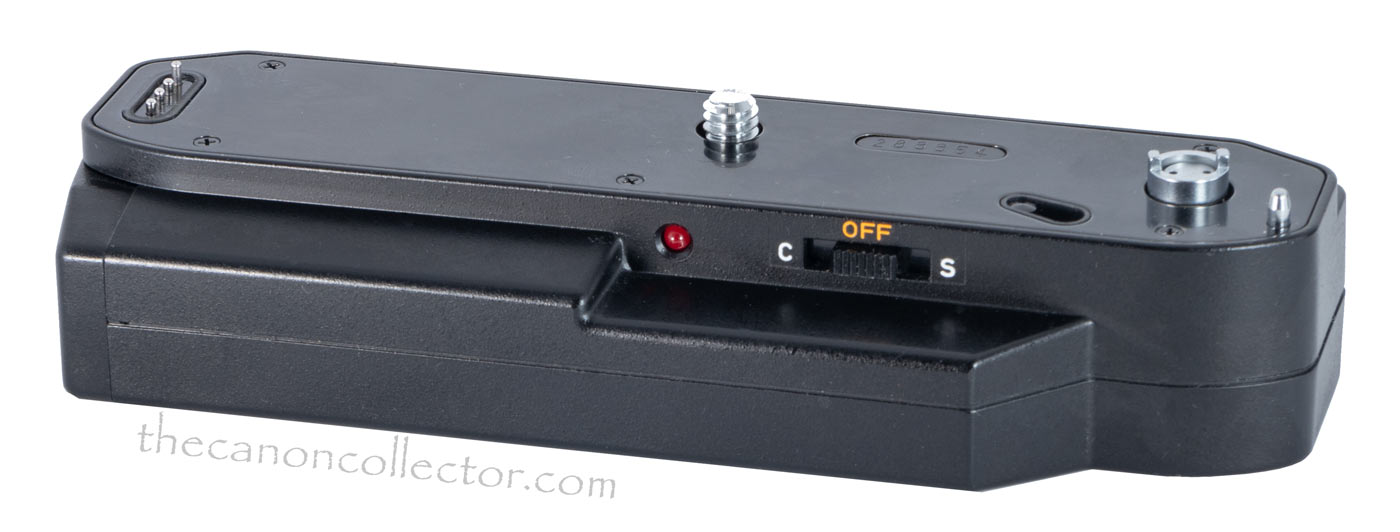
On the back of the Power Winder A2 is the Power Switch. Setting “S” is for one shot when you press the trigger. Position “C” is for continuous shooting. The camera will conntinue to fire at 2 frames per second for as long as you press the shutter button and you have film. The red light indicates when you have come to the end of your film.
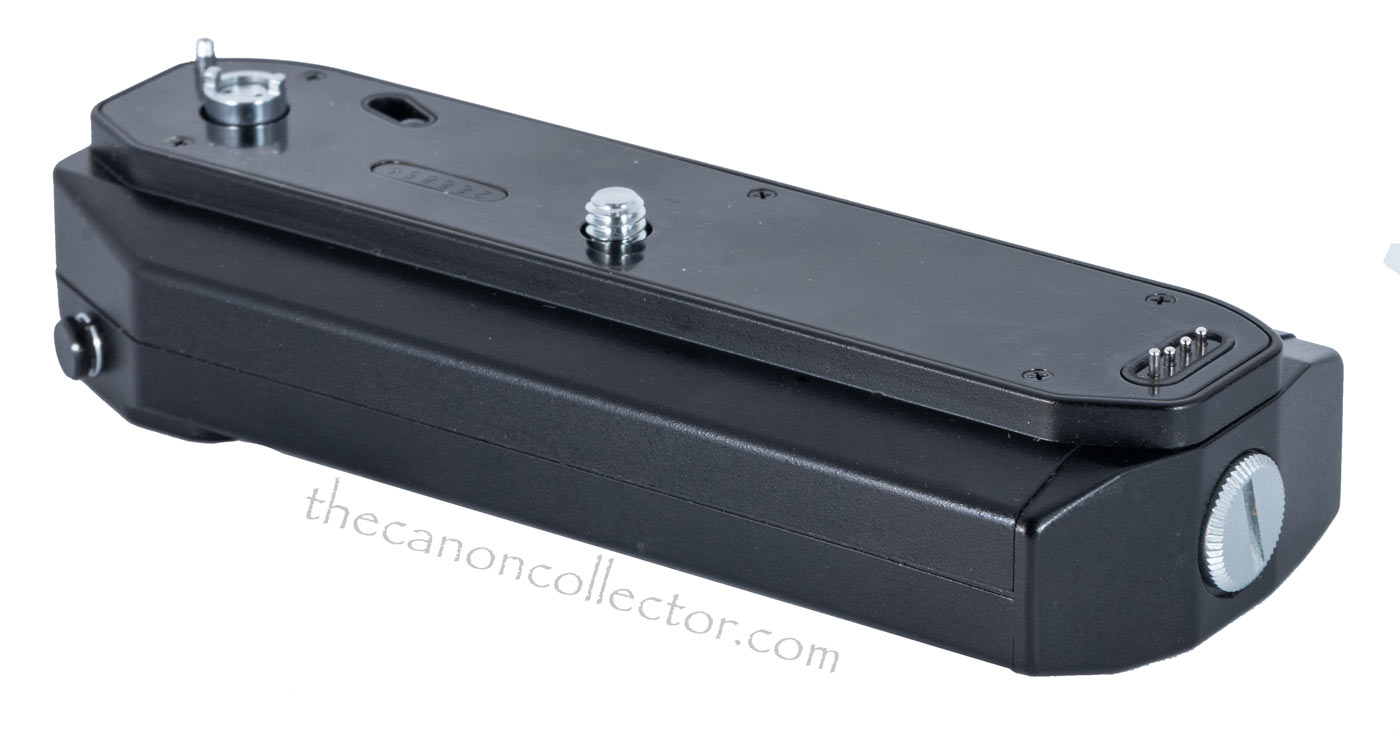
On the top of the Power Winder A2, left side in the picture, is the winder coupler that engages with the drive coupling on the bottom of the camera.
On the back of the Winder A2 is a power switch that can be set to “C” for continuous shooting or “S” for single shots. The red light comes on at the end of the film.
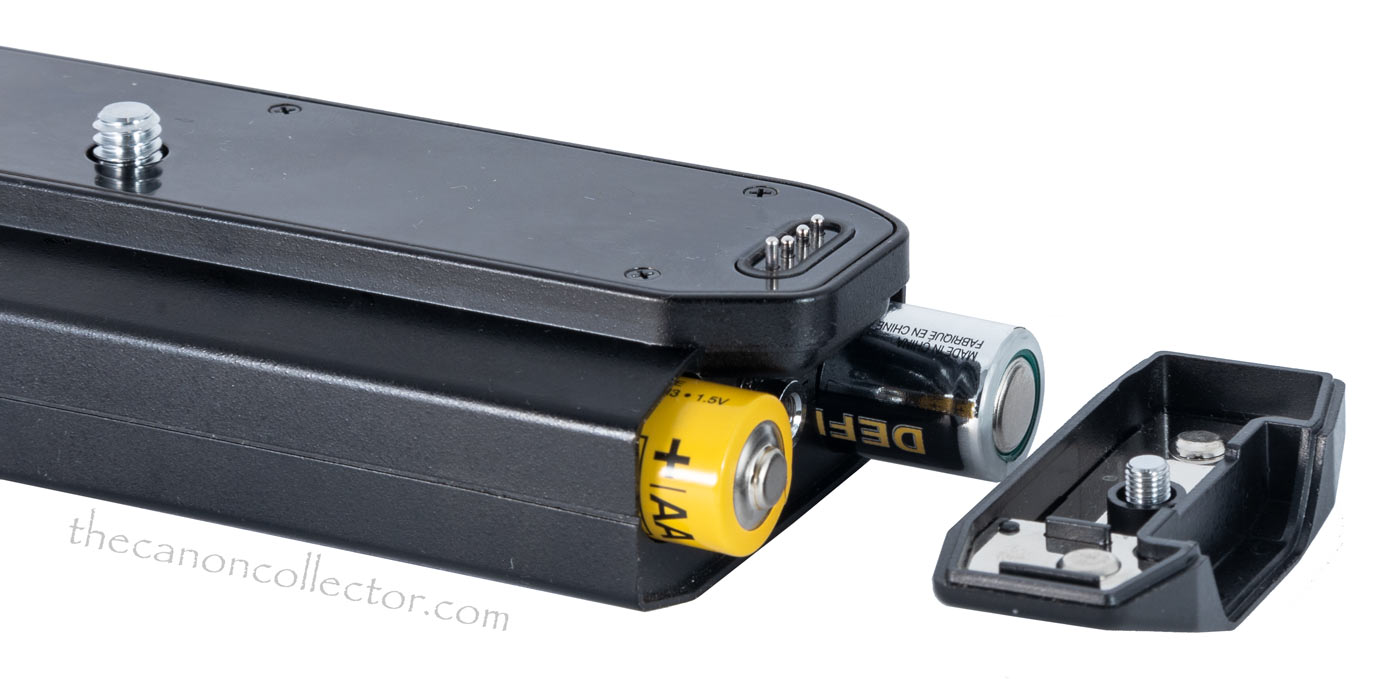
The end of the Winder A2 comes off allowing you to load 4 x AA Batteries. Above the batteries are the four electrical contacts that provide electrical connection to the camera.
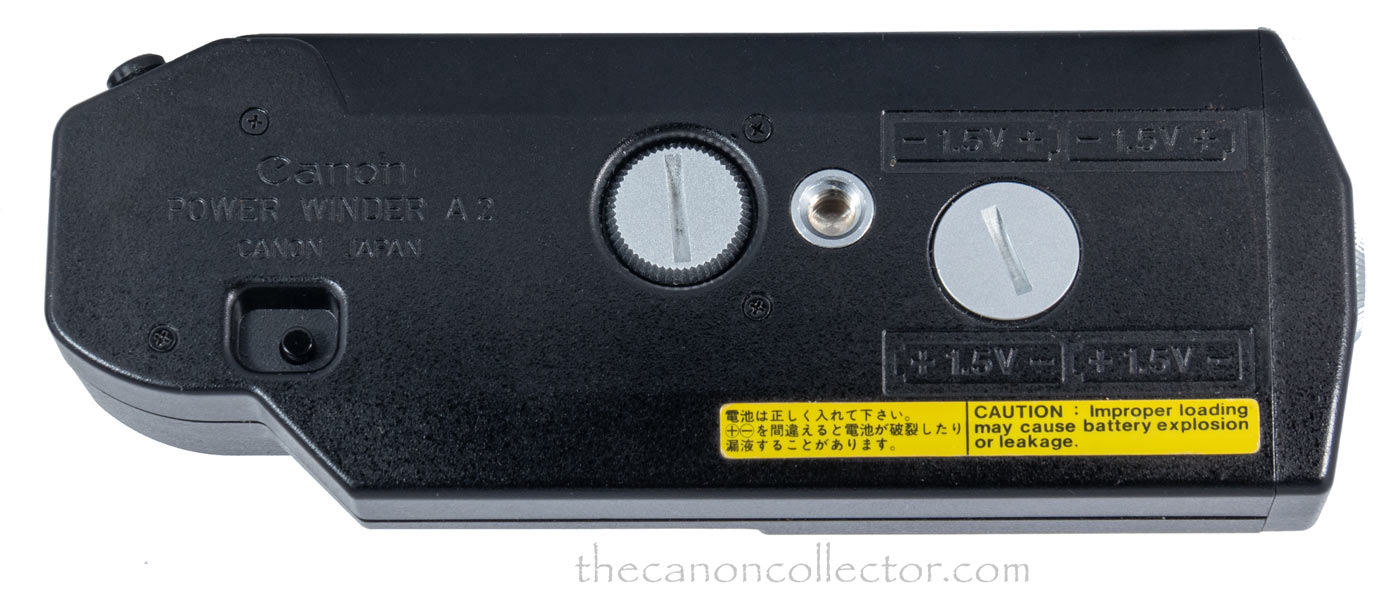
The Power Winder A2 attaches to the camera via the screw in the middle. It is slotted for a coin to turn it. The cap on the right is simply a holder for the cap from the camera.
This website is the work of R. Flynn Marr who is solely responsible for its contents which are subject to his claim of copyright. User Manuals, Brochures and Advertising Materials of Canon and other manufacturers available on this site are subject to the copyright claims and are the property of Canon and other manufacturers and they are offered here for personal use only.

