
The Canon-Meter R and its fitted leather case.
This clip-on meter was designed for the Canon Canonflex camera.
Canon Clip-On Light Meters
When light meters became small enough to attach to cameras, but were still too big to be in the cameras, the obvious solution was to mount them on the outside. Many manufacturers did this.
Canon Clip-On Lightmeters were an arrangement to eliminate a separate hand held light meter by combining it with the camera. This worked sometimes but it could also be an awkward arrangement.
At first the light meters were just attached to the camera but very quickly they were coupled to the shutter dial so that they indicated the actual exposure for the set shutter speed.
Canon followed the market and produced several versions of clip on light meters. When the light meters were first built right into the cameras they were not really sensitive in low light and Canon also produced a couple of Booster Meters to increase the sensitivity.
We are going to look at these meters, or at least the ones of which I have examples. This article is not complete yet as I am missing one or two but I am working to overcome that deficiency.
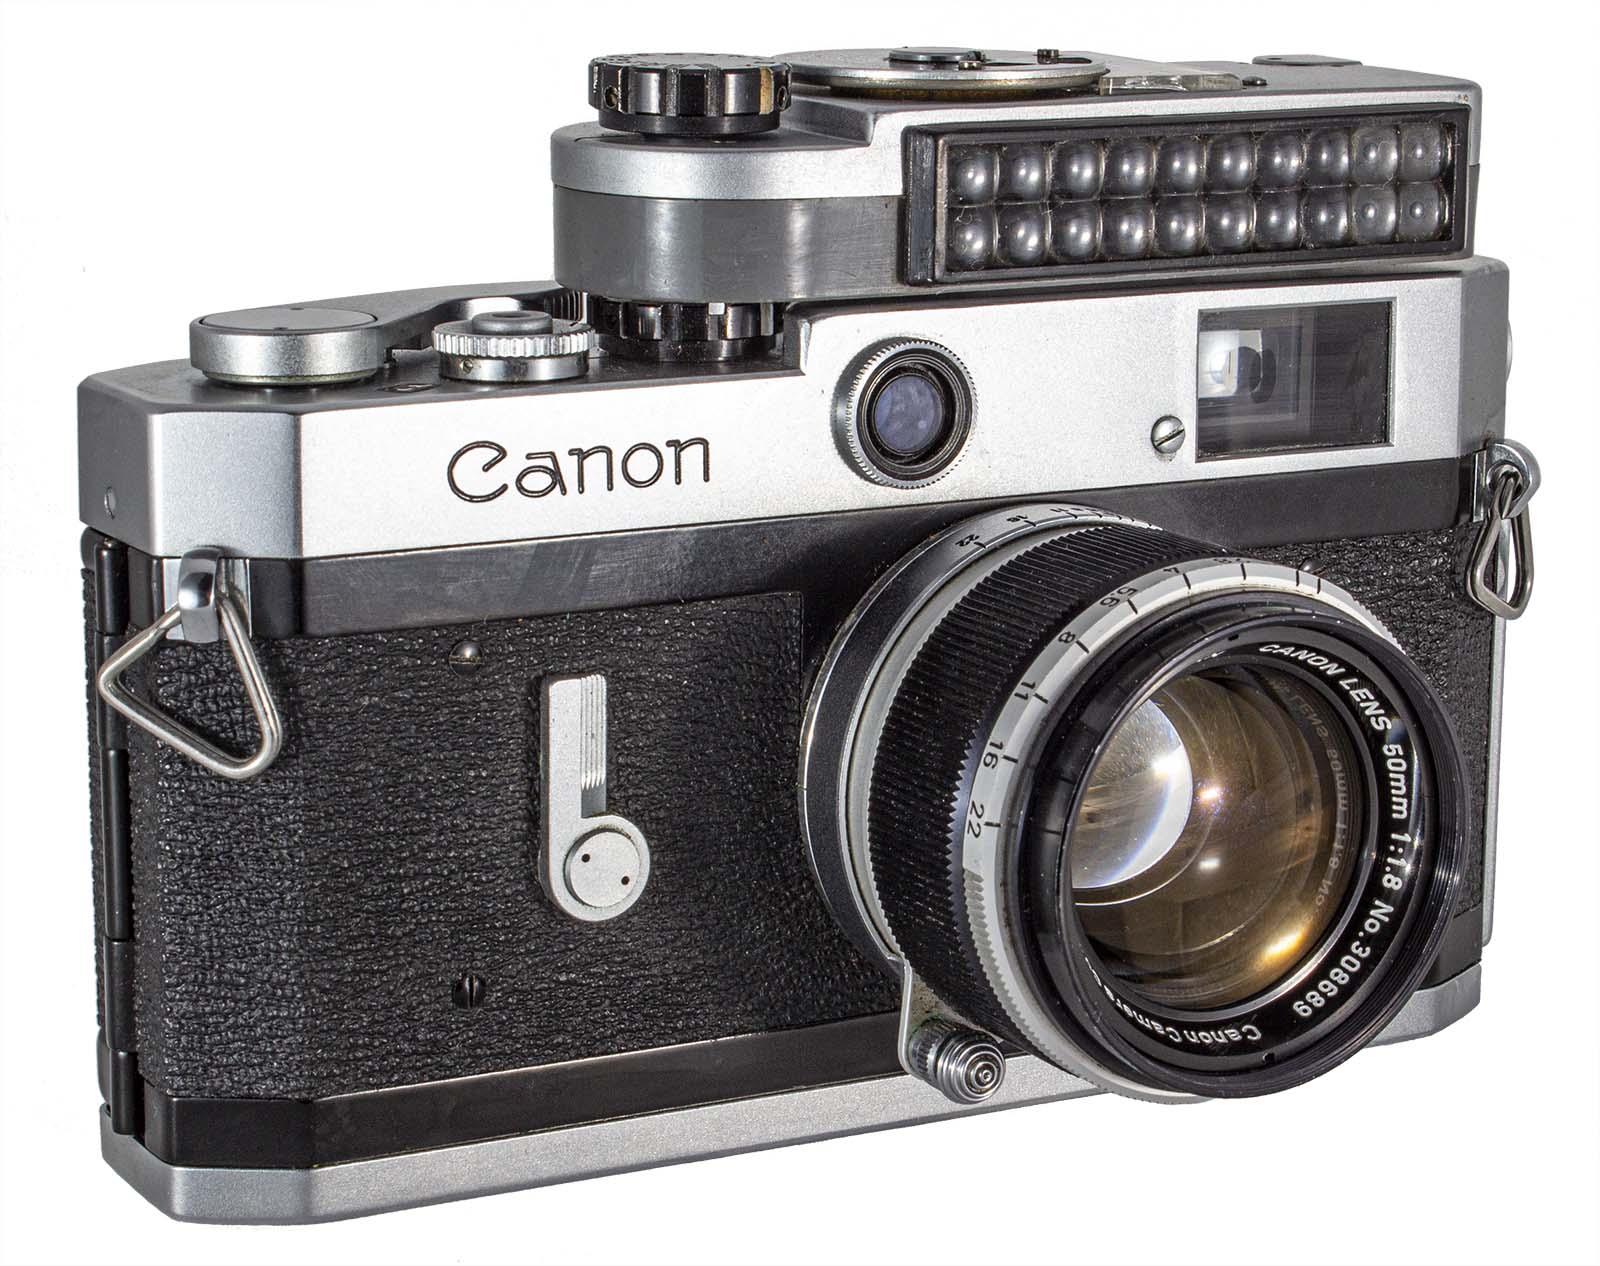
The Canon Model P with the Canon-Meter 2 mounted on it.
Canon introduced the the VI-L and VI-T in June of 1958 followed by the Model P in December of 1958.
One of the innovations on the Model VI cameras was a single shutter speed dial with all shutter speeds on it. The split dial system was done away with. This made way for an equipment shoe mounted light meter that coupled with the shutter speed dial similar in concept to the Leicameter M that had been available since 1954.

Instructions for using the Canon-Meter may be found at page 22 of the VI-T/VI-L User Manual.
The meter that Canon developed, the Canon-Meter, looked very much like the Leicameter M and functioned in a similar way. The meter mounted in the equipment shoe and a dial on the left end extended out over the shutter speed dial and connected to it with four prongs that extended down to engage the groves on the side of the shutter speed dial. When the dial on the meter turned it changed the shutter speed. It also changed the scale on the meter so that the needle in the window pointed to the correct f/stop for that film and shutter speed.
The Canon-Meter would also fit on the Model P and function in the same manner. I do not have one of these (yet) but I understand that it shipped with a second selenium cell that would attach over the regular one which increased sensitivity by two stops.

This is my Canon-Meter 2 mounted on a Model P.
The Canon-Meter had one serious flaw: it was firmly attached to the foot that was inserted into the equipment shoe which held it secure but it prevented the user from rewinding the film. In the result, when you wanted to remove your film you first had to remove the light meter from the camera.
Canon quickly came up with a work-around for this problem by putting a pivot on the foot so that the meter could be rotated 90 degrees without removing the meter from the camera. This allowed the film to be rewound. This was the Canon-Meter 2. This I do have and the photographs here are of my copy.
Unfortunately this introduced a wobble into the mount and the meter seems loose on the camera even though it is attached firmly.


These images show the Canon-Meter 2 mounted on a Model P as seen from the back (left) right side (center) and the top (right). You can see what I mean when I say that the meter seems to become part of the camera and when you use the camera the meter is conveniently located and does not get in the way.


On the right is the meter with its leather case. The incident light meter screen is attached. Center is the meter without the screen and on the right is the bottom of the Canon-Meter 2. Notice the foot has only a single attach point allowing it to rotate. On the first model the foot is attached with four screws and cannot rotate.

The meter works well and when mounted on the camera seems to become part of it. But it was short lived. June 1960 saw the introduction of the very popular Model 7 with its built in selenium meter.
My copy of the Canon-Meter 2 did not come with the booster meter. There is no provision for it. The instructions for use of the meter, which can be found on page 18 of the Canon Model P User Manual and which can be had by clicking the image of the manual on the left, make no mention of a booster cell. It seems to me, so far, that the Canon-Meter 2 does not have one.
This is the Canonflex R2000 with the second model of the Canon-Meter R attached. The second version has a 1/2000th shutter speed on the speed dial to match the 1/2000th speed on the R2000.

On the front right side of the camera body (upper left in the above picture) there were two clips for mounting the light meter. They are visible on the chrome upper deck just above the shinny black metallic finish.
When Canon introduced the Canonflex camera it also released the Canon-Meter R. This meter clipped into the top right front of the Canonflex and coupled to the shutter speed dial via a toothed gear that fit into a gear track on the camera’s shutter speed dial.
The Canonflex, Canonflex RP and Canonflex R2000 had two tabs on the front of the camera into which the light meter attached. Of course the Canonflex RM did not have these clips because it had a built in light meter.
Once installed the exposure scale moved as the shutter speeds were changed so that the light meter needle always indicated the correct exposure.
Film speed was set on the light meter on the top dial. Speeds between ASA 6 and 3200 were available.

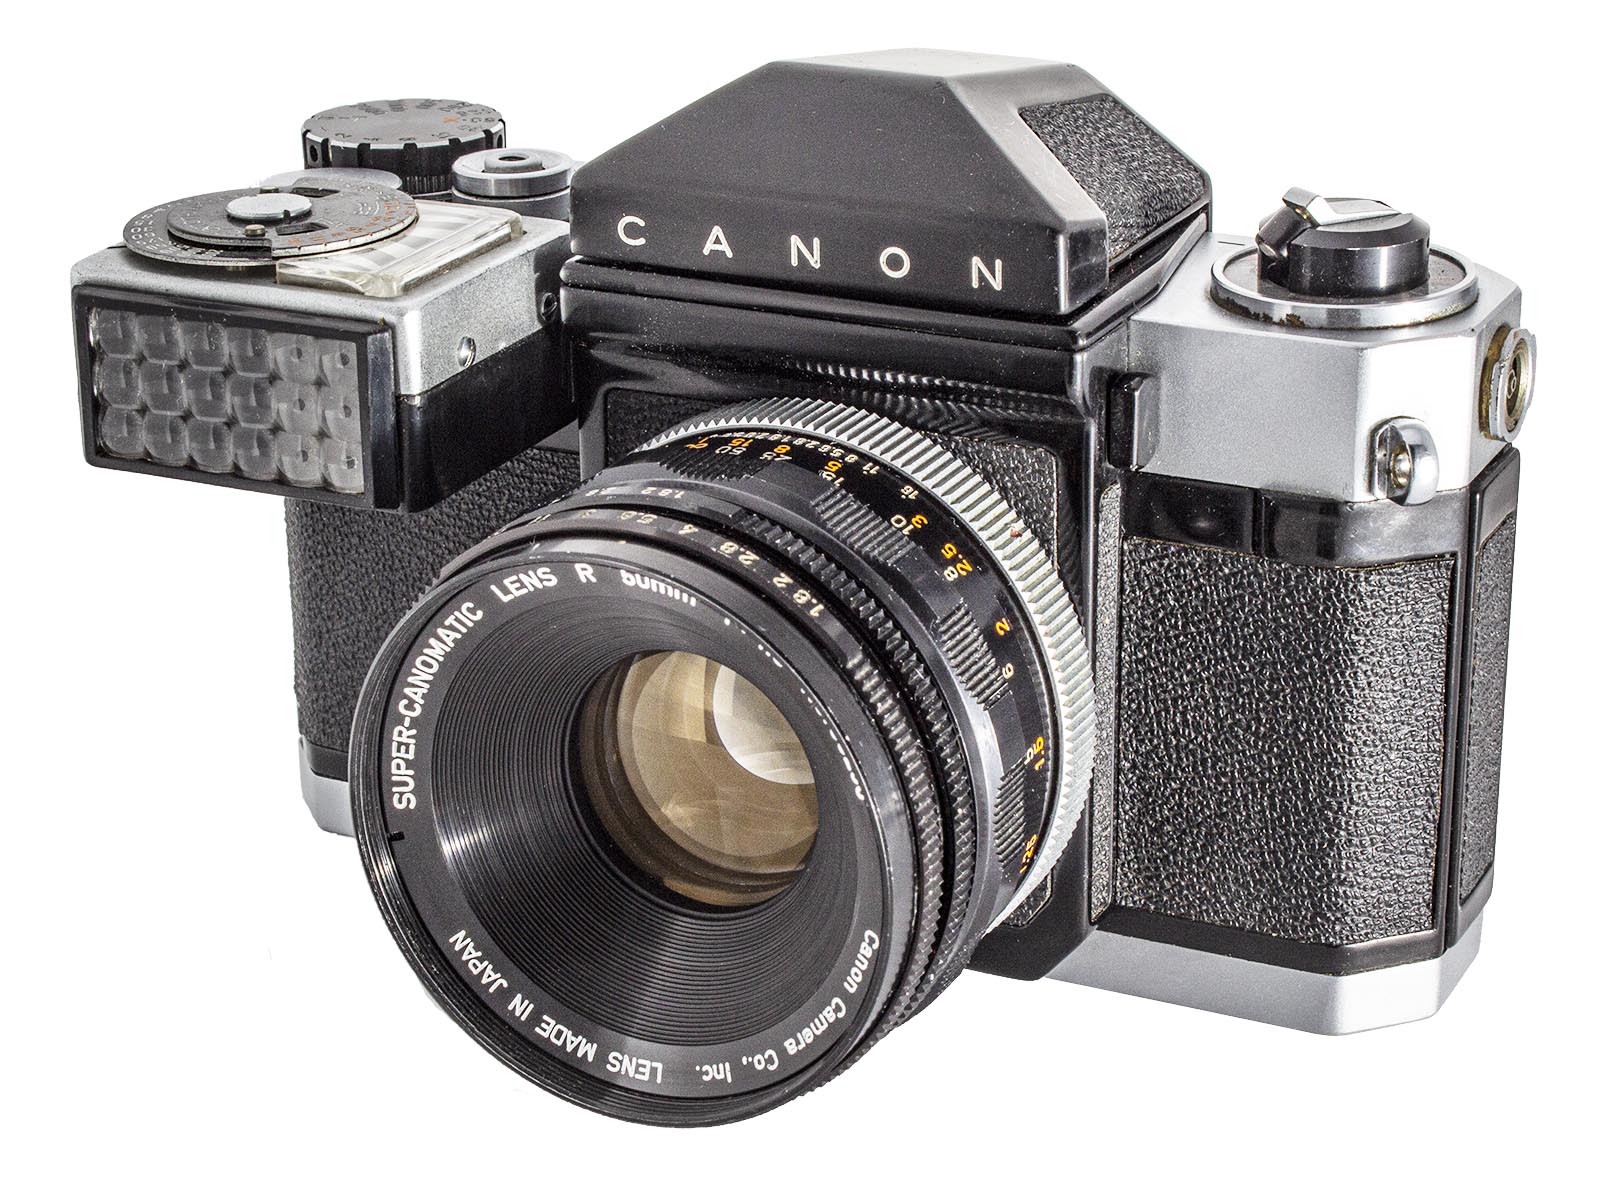
Here the light meter and the standard Super-Canomatic 50mm f/1.8 lens are attached to the camera. This appears to be a good arrangement but in reality the placement of the light meter is a problem.
Being a selenium cell light meter this unit did not require its own battery. To couple it to the camera, the camera shutter speed and the light meter shutter speed were set to the same value and then the unit was mounted. Once done the shutter speeds were synchronized and the meter read out directly in f/stop values which had to be set by hand.
The top speed of all the Canonflex cameras was 1/1000th except for the Canonflex R2000 which had a setting of 1/2000th. As a result you will find two versions of the light meter: one has a top speed of 1/1000th and the other of 1/2000th. However, either version of the meter works correctly on any Canonflex that accepts the meter.

On the back of the Meter R is the attachment clip (bottom) and the toothed wheel that engages the shutter dial (top).

From the top you can see that the meter shutter speed is synchronized to the camera’s shutter speed. Turning the speed dial on the camera moves the meter’s dial as well.

Between the Meter speed dial and the Camera speed dial is a grear that keeps the settings on the dials in step.

The speed dial on the camera has a toothed gear that engages with the Light Meter and keeps the speed settings synchronized.

The white cover that shipped with the light meter slips over the photo cell allowing it to be used as an incident light meter.

As a useful device I feel that this meter fails. Located in the position it occupies it makes it almost impossible to hand hold the camera. The usual grip of the right hand on the right side of the body is blocked and the shutter button almost unreachable. The whole purpose of an attachable light meter is to make the camera more convenient. This device does the opposite.
I can find no serial number on my copy. Mine is the version designed for the R2000 with the 1/2000th shutter speed. It is in working condition although a little scuffed up from use.
Canon’s instructions for the use of this meter can be found on Page 24 of the User Manual for the Canonflex RP. It is pretty intuitive and the pictures here really tell you all you need to know. To download the manual you can click on the manual on the left.

This is the Canon FP with the Canon FP Meter mounted on it.
Canon began the march to market dominance from the lows of the Canonflex days with introduction of the Canon FX in April of 1964. This camera introduced the FL lens mount to the world. It incorporated a CdS light sensor on the left side of the camera under the rewind knob.
Then, six months later, Canon introduced a less expensive version of the FX, the FP, which had no light meter. It was a purely manual camera that required the use of an external light meter.
With the exception of the eliminated light meter and a modification to the latch holding the back shut this camera was identical to the FX.
It seems strange now, but Canon then offered a clip on light meter for the FP. Why one would buy an FP with clip on meter when they could simply buy the FX seems a mystery.


The FP Meter is arguably the best designed clip on meter created by Canon. It attaches to the equipment shoe and sits low over the pentaprism case. It almost appears as if it is part of the camera or part of a removable pentaprism as found on later F-1 cameras.
The speed dial on the meter mates with a projection on the top of the camera’s speed dial to synchronize the two. There is a provision for setting the film speed on the meter speed dial so that film speed is taken into account.
Turning the speed dial moves the scale in the window so that the meter needle indicates the required aperture setting. The aperture must then be set manually.
On the right side of the meter is a dial to turn the meter on or off and to select low or high sensitivity.
On the left side is a cover where the mercury battery is loaded. Being a CdS meter it requires a separate battery to power the cell.
Full instructions for the Canon FP Meter’s use can be found on page 33 of the User Manual which may be found below.


