
The Pellix externally is almost identical to the Canon FX, the first of the F series. This is my copy (Serial No. 119051) which I acquired from my friend Edwin in July of 2016.

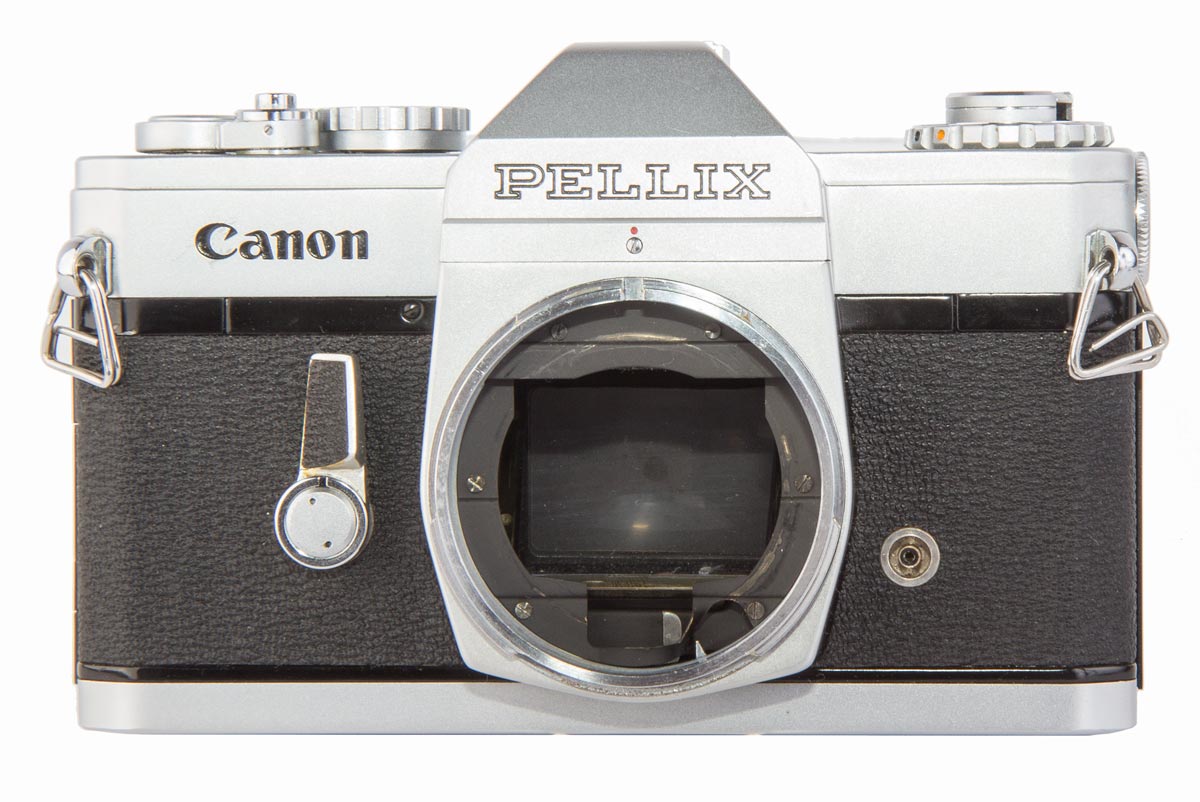
The lever on the left is a dual function control. Pushed to the left, away from the lens, it winds the self timer. Pushed to the right it raises the light meter CdS cell up in front of the film plane.
The Canon Pellix
A Unique and Innovative Detour
The Canon Pellix was an innovative imaginative camera when introduced in April of 1965.
It was considered revolutionary
and contained concepts that seemed
very advanced. But it was not to last.
The “F” Series began in 1964 with the
Model “FX” and “FP”. It is not surprising
then that the next in the series, the Pellix, resembled the first two, at least externally.
This was the first Canon camera with TTL metering. The “FX” had a CdS meter on the outside of the body but the reading then
had to be set manually. On the Pellix,
however, that CdS cell was behind the lens
in front of the film plane.
It was also the first production SLR to use
a thin film mirror and not a movable
mirror.
Light Metering
Looking at the front of the camera there
is a lever to the left (in the photo) of the
lens mount. By pressing this lever towards
the lens it caused the lens to stop down
and a CdS cell to rise up in front of the
shutter very near the film plane.
This cell gathered light from a rectangle of about 12% of the image area in the
center of the image. Because the sensor
was behind the pellicle mirror the light
diverted away from the film was accounted
for automatically. The sensor area
corresponded roughly to the rectangle
visible on the ground focusing glass.
When the lever was released, the lens
opened again to full aperture and the
photo cell retracted out of the light beam.
The shutter and aperture were connected into the meter circuit. To set the exposure one kept the lever pressed while adjusting the aperture or shutter or both until a meter needle on the right

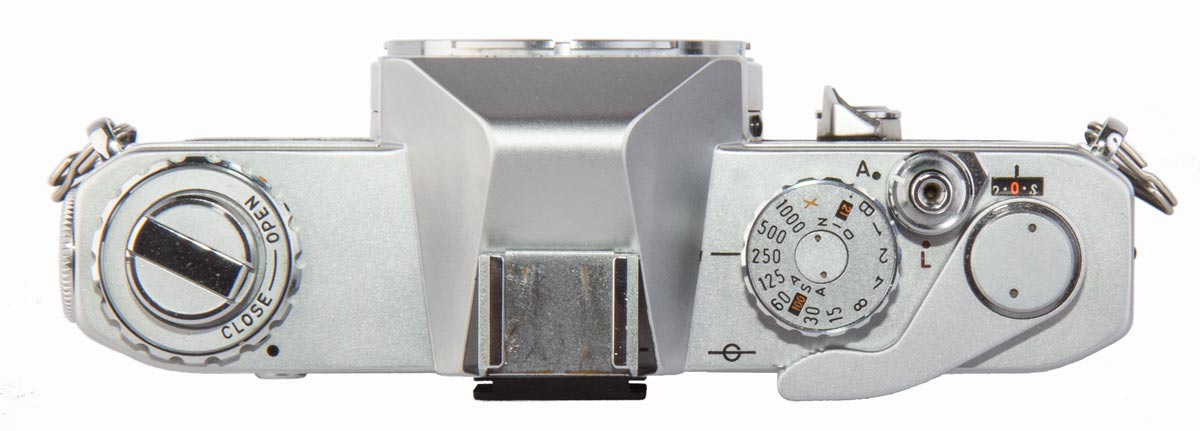
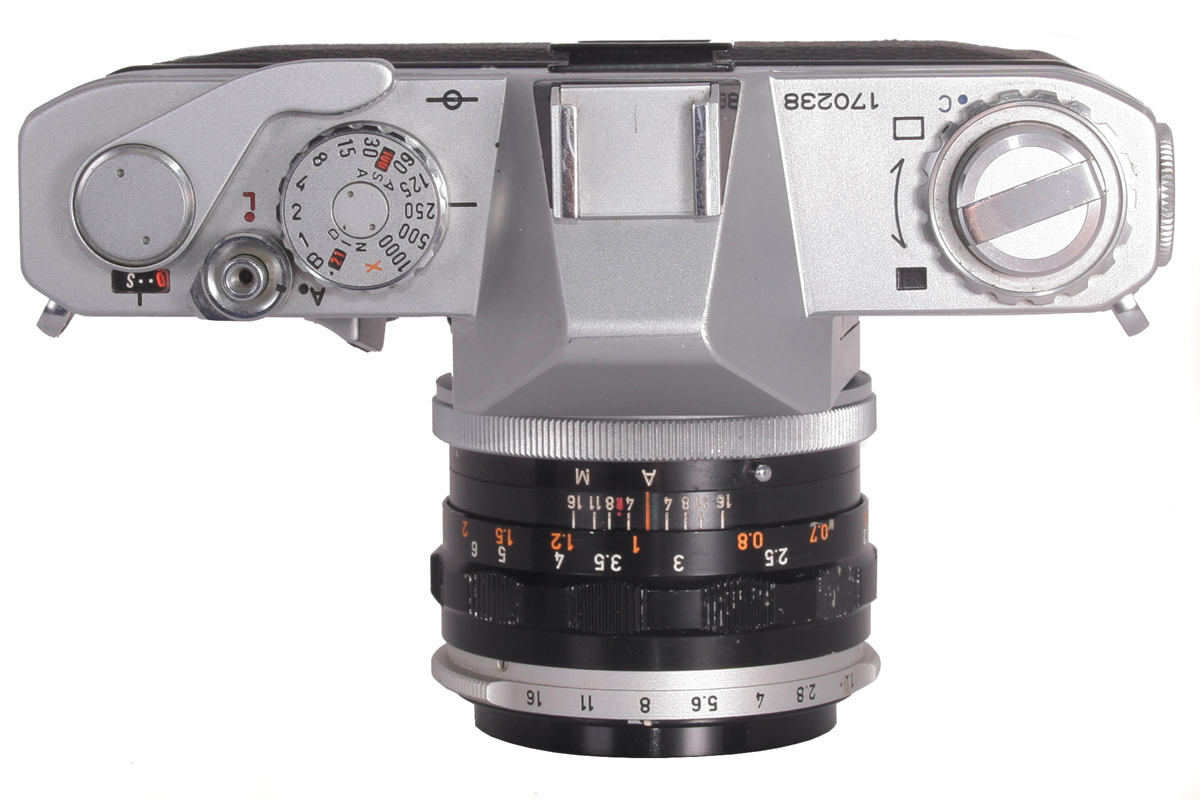
On the prism housing is an equipment shoe but flash sync is via a PC Socket on the front of the camera. Between the speed dial and the winding lever is the shutter lock. L for locked and A for unlocked.

The bottom of the camera has the tripod mount, the release for the sprocket spindle, and the locking key for the back of the camera. However, by this time, the key no longer has the ability to open a Canon Film Cassette.

The back of the camera is plain without controls or film reminders.
The Pellicle Mirror
“A pellicle mirror (diminutive of pellis, a skin or film) is an ultra-thin, ultra-lightweight semi-transparent mirror employed in the light path of an optical instrument, splitting the light beam into two separate beams, both of reduced light intensity.” (quote courtesy of Wikipedia)
The Canon Pellix was notable for the nature of the mirror it used. Instead of a mirror that swings up out of the way at the instant the shutter is opened, it had a fixed 45 degree mirror that did not move. The Pellix pellicle mirror was an ultra-thin (0.02 mm) Mylar film with a vapour
deposited semi reflecting layer placed at 45 degrees to the light beam. 30% to 40% (they varied from mirror to mirror) of the light was reflected upwards to the ground glass in the viewfinder and the remainder continued straight on to the film.
This arrangement helped reduce vibration and mechanical complexity of the swinging mirror. It also meant that when the shutter fired there was no blackout of the image in the viewfinder. And because the mirror did not swing up, there was more room for lenses that extended back into the camera further. Canon actually made a lens for exclusive use on the Pellix, by reason of its extension back into the body. This was the FLP 38mm f/2.8. However, these advantages were outweighed by some serious problems that resulted.
Firstly, less light got to the film. That was not really too bad because a 30% to 40% reduction amounted to only about a half to three quarters stop in exposure. A person shooting a Pellix manually and not using the built in light meter is well advised to compensate for this by increasing exposure by about three quarters of a stop. Of course this is not necessary for the built in light meter because it measures the light from behind the mirror and it is measuring the light that actually reaches the film.
To partially compensate for this loss, Canon sold a 50mm f/1.4 lens as the kit lens for the Pellix and made a standard lens, the FL 50mm f/1.2 for this camera. With the fast lenses available the loss of less than one f/stop was considered a reasonable trade off for the perceived advantages.
A second, more serious disadvantage, was that the swinging mirror also served to block stray light from the eyepiece which might affect the film. This was perceived to be such a problem that the camera had an eyepiece cover built in that could be employed using the ring under the rewind crank.
Thirdly and possibly most importantly, the pellicle mirror itself remained in the light stream at all times. Dirt, grease, fingerprints, scratches all were there to lower image contrast and appear on the film. The swinging mirror was tolerant of dirt because it swung up out of the way and the dirt was not visible. But on the pellicle mirror it was there for the world to see. This meant cleaning the mirror. However, the mirror was delicate and easily damaged. Every time you changed lenses the mirror was right there and open to dirt and damage.
Another more minor problem was that the shutter curtains had to be metal because there was no solid light blocking swing mirror to protect the shutter from being burnt by a focused image of the sun. Taking a picture of a sunset, for instance, would mean that while you composed the shot, that image of the sun was focused on the shutter and fabric would burn very quickly. The lens was essentially a magnifying glass.
The next 35mm SLR to employ the pellicle mirror was the Canon F-1 High Speed released in 1972. The object was ultra high speed images in rapid succession and the moving mirror would not allow for this.
Two further Canon models were produced with pellicle mirrors, the EOS RT and the EOS-1N RS, the RT being based on the EOS 600/EOS 630 and the 1N RS being based on the EOS-1N.

The Pellix was finished in black leatherette and chrome but a few were issued in black. These are rare, however, and when found in decent condition sell for a lot more than the chrome ones. They are rare.
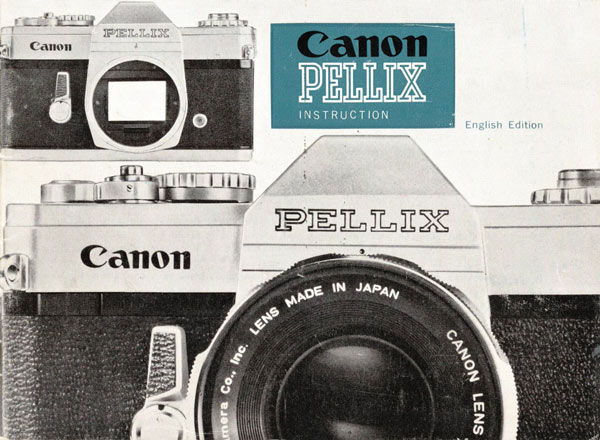
Using the Pellix is much like using any other SLR. But if you want the details of how it functions and which controls what you should read the User Manual. Click on the image on the right to open it.
A Small Maintenance Issue
There is another very interesting problem that may afflict many Pellix cameras. I have two, the Pellix and the Pellix QL and they both suffer from this. Inside the lens mount there is a metal light baffle that circles the opening. At the center bottom is an opening for the lens’s aperture
lever which is actuated by the aperture release lever of the camera behind the baffle. In the pictures below, to the right of that opening is a cutout that appears to be for the lens aperture pin on an FD lens. FD lenses appear to work on the Pellix.

Damaged Baffle
This baffle tends to get damaged because the metal between the openings is so narrow and, as a result, is not very strong. In the picture on the left below is a damaged baffle. It has been bent inwards so that it jams the aperture release arm (the silver tab just to the right of center in the opening) and this can prevent the camera from functioning. The sharp silver point in the bottom opening on the right is part of the camera body and is intended to be a support for the metal of the baffle.
By removing the screws visible in the image the baffle can be removed and using delicate pliers the metal can be flattened and the baffle replaced. Do not overtighten the screws when you replace them.
On the right is the same baffle after this simple repair. The small pointed support is now behind the baffle where it belongs supporting the metal. And the camera works as it was supposed to.

Repaired Baffle
The Pellix was in production for one year at which time it was replaced by the Pellix QL which remained in production for the next four years until May of 1970. As a result the Pellix QL is far easier to find in the collector market today.
The most obvious change was the addition of the Quick Loading (QL) mechanism which made the loading of the film faster and easier. But there were other changes as well.
In the battery compartment electrical contacts were added for the separately available light meter booster which mounted in the accessory shoe. Also involving exposure, a lock was added to the large exposure meter lever on the front of the camera. And respecting film speed, the selectable film speeds were updated to ASA 25 to 1600. There is an unmarked detent that actually represents about ASA 2000 but it is not so labeled.
And finally, the labelling on the left top plate for the eyepiece shutter was clarified to make the operation more intuitive.
Otherwise, this is the same camera in all respects. It looks and feels the same but it is a little easier to operate. Using the light meter is still awkward and the pellicle mirror still suffers from the problems listed above.
However, with these changes the camera was introduced as the Pellix QL.


You can tell this is the Pelix QL because the front of the camera says so. Also you can tell by the added lock lever under the self timer/exposure meter lever by the QL logo badge.
The top of the Pellix QL is not much different than the original Pellix. The main difference is the placing of the serial number on the top deck and new symbols for the operation of the eyepiece shutter.

This is the inside of the first Pellix. It is a standard early SLR interior. Film is loaded by catching the film leader in the slot in the take up spool and making sure it engages the sprockets on the adjacent roller.

The left side of the QL interior is the same as the original Pellix but the Quick Load mechanism dominates the right side. The film leader is simply lain over the sprockets and the back is closed. That’s quick!

This is a short Brochure on the Pellix QL put out by Canon.

Because the operation of this camera is a little different than for the first Pellix there was a separate User’s Manual. This will give you the details on using the Quick Load (QL) feature and the Light Meter Booster which is pictured on the front cover. How to use the lock on the light meter lever is also explained. But other than for these items, the use of the camera is identical to the original Pellix. I have found both a delight to use both as a simple manual camera and using the built in light meter.
Using the Pellix and Pellix QL
Both of these models are a delight to shoot. They are old cameras and so they take much more effort to take satisfying pictures but that is the charm of shooting the cameras in my collection. For me it connects me to my youth, I am thinking of the 1950’s and 1960’s, when these were cutting edge cameras.
I have already written about taking pictures with the Pellix and so I won’t go into detail here. But do check it out. I think I managed some very nice images which are shown there.
This website is the work of R. Flynn Marr who is solely responsible for its contents which are subject to his claim of copyright. User Manuals, Brochures and Advertising Materials of Canon and other manufacturers available on this site are subject to the copyright claims and are the property of Canon and other manufacturers and they are offered here for personal use only.